Dell EqualLogic PS6210XS EqualLogic Host Integration Tools for Microsoft Editi - Page 47
Create a Classification for Dell EqualLogic Storage Resources, Import the SMP Through the SCVMM GUI
 |
View all Dell EqualLogic PS6210XS manuals
Add to My Manuals
Save this manual to your list of manuals |
Page 47 highlights
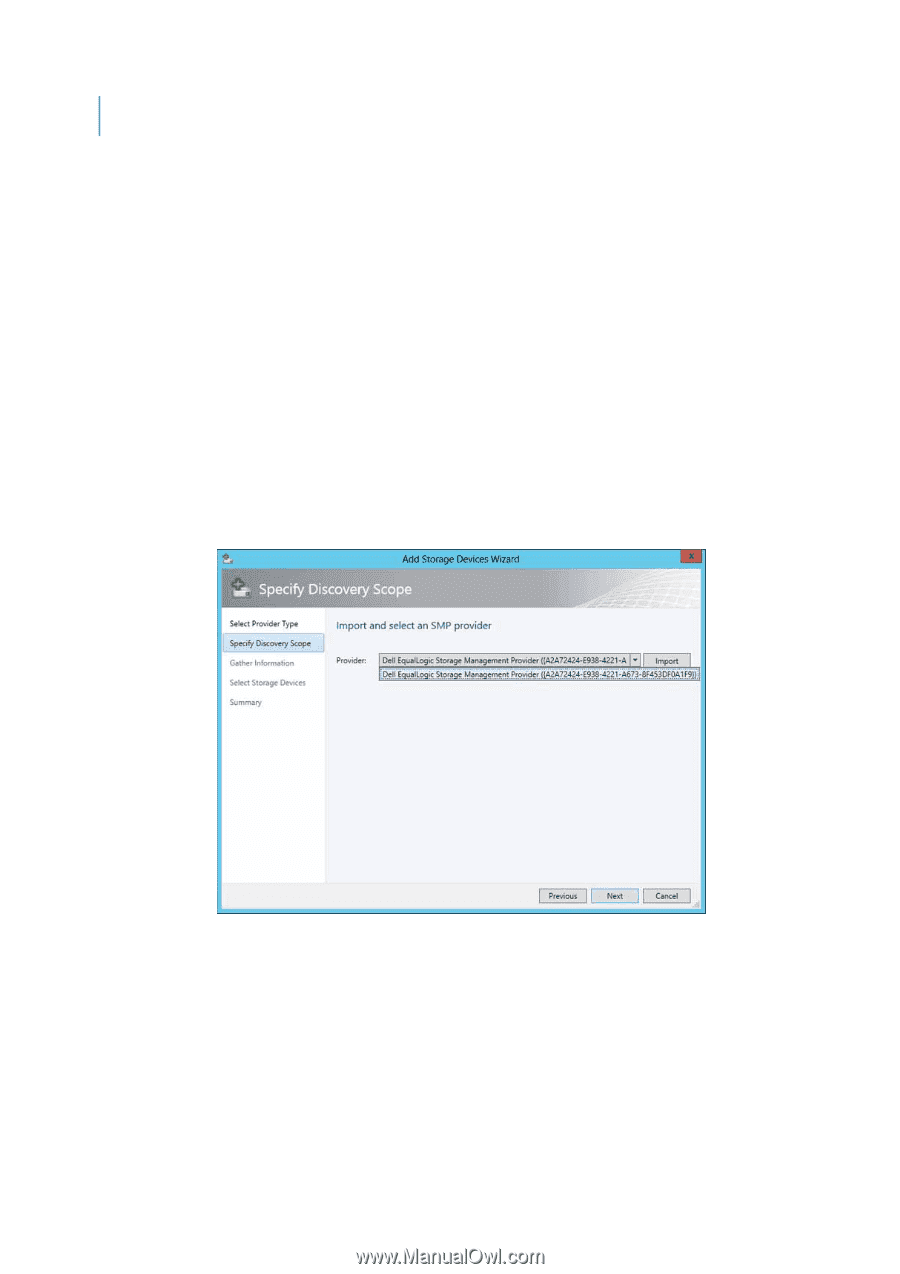
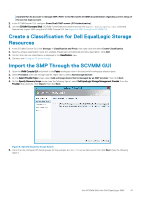
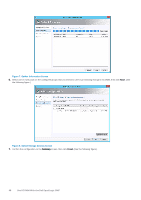
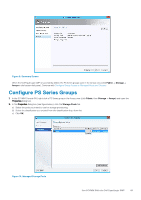
separate Run As account to manage SMP. Refer to the Microsoft SCVMM documentation regarding correct setup of the service login account. 2. In the SCVMM server GUI, configure PowerShell/SMP access (PS Authentication). 3. Use the SCVMM Command Shell (SCVMM PowerShell environment) and run the Import-SCStorageProvider command. Alternatively, import SMP using the SCVMM Console GUI. See Import the SMP through the SCVMM GUI. Create a Classification for Dell EqualLogic Storage Resources 1. In the SCVMM Console GUI, click Storage → Classification and Pools, then right-click and select Create Classification. 2. Specify a unique classification name (for example, EqualLogic) and optionally provide a description. Click Add. 3. Confirm that the new classification is displayed in the Classification view. 4. Continue with Configure PS Series Groups. Import the SMP Through the SCVMM GUI 1. Open the VMM Console GUI and switch to the Fabric workspace view in the bottom-left workspace selection pane. 2. Select Providers under the Storage subtree. Right-click to select Add Storage Devices. 3. On the Select Provider Type screen, select Add a storage device that is managed by an SMP provider, then click Next. 4. On the Specify Discovery Scope screen (see the following figure), select Dell EqualLogic Storage Management Provider from the Provider drop-down list, click Import, then click Next. Figure 6. Specify Discovery Scope Screen 5. Verify that the configured PS Series groups (in this example, WinDev74Grp) are discovered, then click Next. (See the following figure.) Use SCVMM With the Dell EqualLogic SMP 47
-
 1
1 -
2
-
3
-
4
-
5
-
6
-
7
-
8
-
9
-
10
-
11
-
12
-
13
-
14
-
15
-
16
-
17
-
18
-
19
-
20
-
21
-
22
-
23
-
24
-
25
-
26
-
27
-
28
-
29
-
30
-
31
-
32
-
33
-
34
-
35
-
36
-
37
-
38
-
39
-
40
-
41
-
 42
42 -
 43
43 -
 44
44 -
 45
45 -
 46
46 -
 47
47 -
 48
48 -
 49
49 -
 50
50 -
 51
51 -
 52
52 -
53
-
54
-
55
-
56
-
57
-
58
-
59
-
60
-
61
-
62
-
63
-
64
-
65
-
66
-
67
-
68
-
69
 |
 |