Dell Optiplex-620 User Guide - Page 163
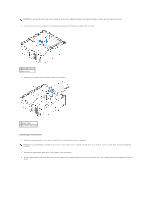
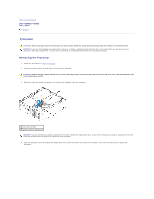
In the event the replacement or new floppy drive does not have the shoulder screws, use the screws
 |
View all Dell Optiplex-620 manuals
Add to My Manuals
Save this manual to your list of manuals |
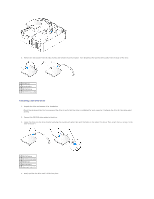
Page 163 highlights
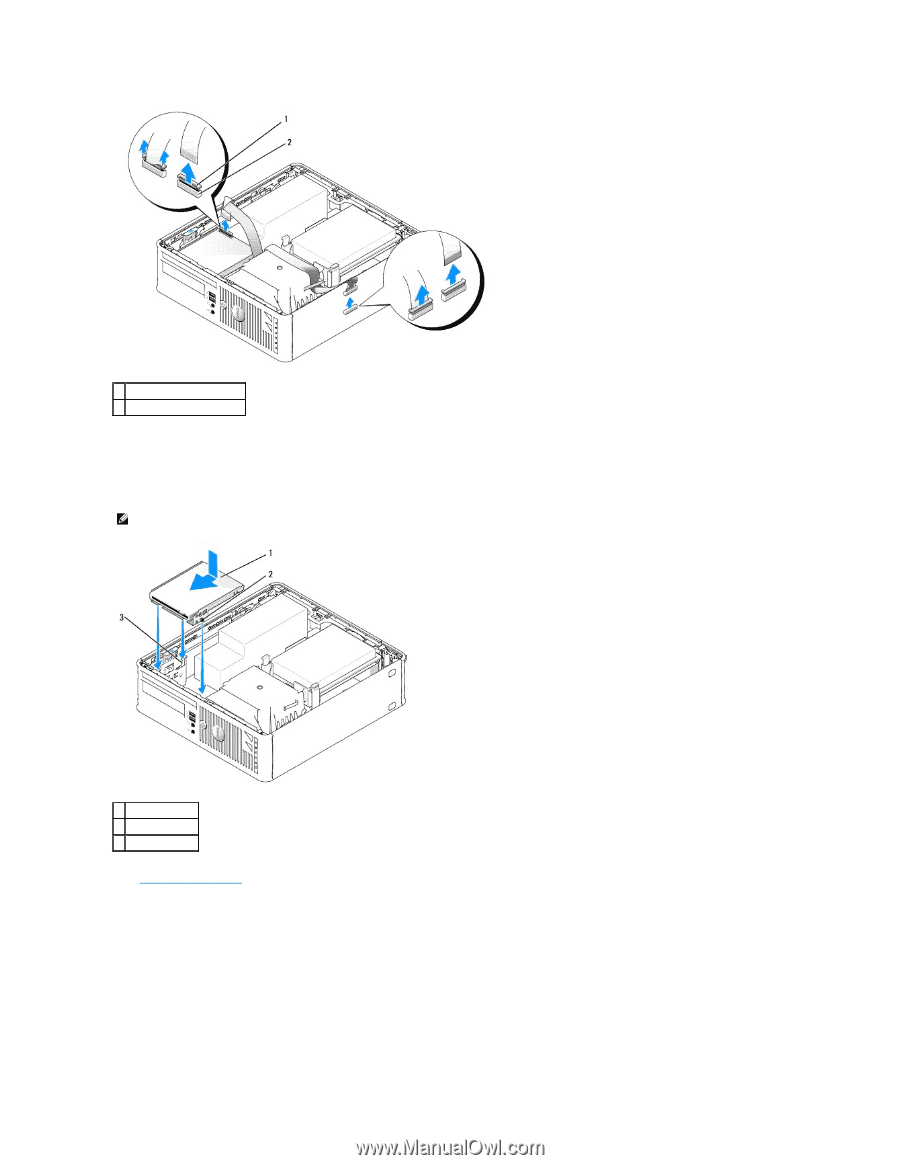
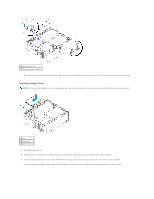
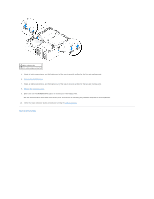
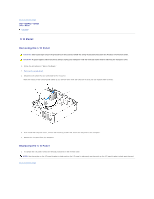
1 cable release tab 2 data-cable edge connector 7. Pull up on the drive release latch and slide the floppy drive towards the back of the computer. Then lift up to remove the drive from the computer. Installing a Floppy Drive NOTE: In the event the replacement or new floppy drive does not have the shoulder screws, use the screws located within the drive-panel insert. 1 drive 2 screws (3) 3 bracket rails (3) 1. Remove the floppy drive. 2. Align the screws on the drive with the bracket rails in the computer, and gently position the drive until it clicks into place. 3. Insert the floppy-drive cable into the cable release tab on the floppy drive and press down on the tab until it clicks to lock it in place. 4. Insert the floppy-drive cable into the cable release tab on the system board and press down on the tab until it clicks to lock it in place.
-
 1
1 -
2
-
3
-
4
-
5
-
6
-
7
-
8
-
9
-
10
-
11
-
12
-
13
-
14
-
15
-
16
-
17
-
18
-
19
-
20
-
21
-
22
-
23
-
24
-
25
-
26
-
27
-
28
-
29
-
30
-
31
-
32
-
33
-
34
-
35
-
36
-
37
-
38
-
39
-
40
-
41
-
42
-
43
-
44
-
45
-
46
-
47
-
48
-
49
-
50
-
51
-
52
-
53
-
54
-
55
-
56
-
57
-
58
-
59
-
60
-
61
-
62
-
63
-
64
-
65
-
66
-
67
-
68
-
69
-
70
-
71
-
72
-
73
-
74
-
75
-
76
-
77
-
78
-
79
-
80
-
81
-
82
-
83
-
84
-
85
-
86
-
87
-
88
-
89
-
90
-
91
-
92
-
93
-
94
-
95
-
96
-
97
-
98
-
99
-
100
-
101
-
102
-
103
-
104
-
105
-
106
-
107
-
108
-
109
-
110
-
111
-
112
-
113
-
114
-
115
-
116
-
117
-
118
-
119
-
120
-
121
-
122
-
123
-
124
-
125
-
126
-
127
-
128
-
129
-
130
-
131
-
132
-
133
-
134
-
135
-
136
-
137
-
138
-
139
-
140
-
141
-
142
-
143
-
144
-
145
-
146
-
147
-
148
-
149
-
150
-
151
-
152
-
153
-
154
-
155
-
156
-
157
-
 158
158 -
 159
159 -
 160
160 -
 161
161 -
 162
162 -
 163
163 -
 164
164 -
 165
165 -
 166
166 -
 167
167 -
 168
168 -
169
-
170
-
171
-
172
-
173
-
174
-
175
-
176
-
177
-
178
-
179
-
180
-
181
-
182
-
183
-
184
-
185
-
186
-
187
-
188
-
189
-
190
-
191
-
192
-
193
-
194
-
195
-
196
-
197
-
198
-
199
-
200
-
201
-
202
-
203
-
204
-
205
-
206
-
207
-
208
-
209
-
210
-
211
-
212
-
213
-
214
-
215
-
216
-
217
-
218
-
219
-
220
-
221
 |
 |