Dell Optiplex-620 User Guide - Page 77
Drive-Panel Inserts
 |
View all Dell Optiplex-620 manuals
Add to My Manuals
Save this manual to your list of manuals |
Page 77 highlights
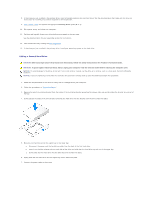
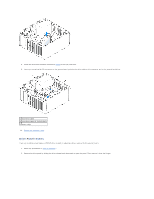
8. Attach the serial ATA connector removed in step 5 to the first hard drive. 9. Locate an unused serial ATA connector on the system board and attach a drive cable to this connector and to the second hard drive. 1 hard-drive cable 2 hard-drive cable on system board 3 power cable 10. Replace the computer cover. Drive-Panel Inserts If you are installing a new floppy or CD/DVD drive instead of replacing a drive, remove the drive-panel inserts. 1. Follow the procedures in "Before You Begin." 2. Remove the drive panel by sliding the drive release latch downward to open the panel. Then remove it from the hinges.
-
 1
1 -
2
-
3
-
4
-
5
-
6
-
7
-
8
-
9
-
10
-
11
-
12
-
13
-
14
-
15
-
16
-
17
-
18
-
19
-
20
-
21
-
22
-
23
-
24
-
25
-
26
-
27
-
28
-
29
-
30
-
31
-
32
-
33
-
34
-
35
-
36
-
37
-
38
-
39
-
40
-
41
-
42
-
43
-
44
-
45
-
46
-
47
-
48
-
49
-
50
-
51
-
52
-
53
-
54
-
55
-
56
-
57
-
58
-
59
-
60
-
61
-
62
-
63
-
64
-
65
-
66
-
67
-
68
-
69
-
70
-
71
-
 72
72 -
 73
73 -
 74
74 -
 75
75 -
 76
76 -
 77
77 -
 78
78 -
 79
79 -
 80
80 -
 81
81 -
 82
82 -
83
-
84
-
85
-
86
-
87
-
88
-
89
-
90
-
91
-
92
-
93
-
94
-
95
-
96
-
97
-
98
-
99
-
100
-
101
-
102
-
103
-
104
-
105
-
106
-
107
-
108
-
109
-
110
-
111
-
112
-
113
-
114
-
115
-
116
-
117
-
118
-
119
-
120
-
121
-
122
-
123
-
124
-
125
-
126
-
127
-
128
-
129
-
130
-
131
-
132
-
133
-
134
-
135
-
136
-
137
-
138
-
139
-
140
-
141
-
142
-
143
-
144
-
145
-
146
-
147
-
148
-
149
-
150
-
151
-
152
-
153
-
154
-
155
-
156
-
157
-
158
-
159
-
160
-
161
-
162
-
163
-
164
-
165
-
166
-
167
-
168
-
169
-
170
-
171
-
172
-
173
-
174
-
175
-
176
-
177
-
178
-
179
-
180
-
181
-
182
-
183
-
184
-
185
-
186
-
187
-
188
-
189
-
190
-
191
-
192
-
193
-
194
-
195
-
196
-
197
-
198
-
199
-
200
-
201
-
202
-
203
-
204
-
205
-
206
-
207
-
208
-
209
-
210
-
211
-
212
-
213
-
214
-
215
-
216
-
217
-
218
-
219
-
220
-
221
 |
 |
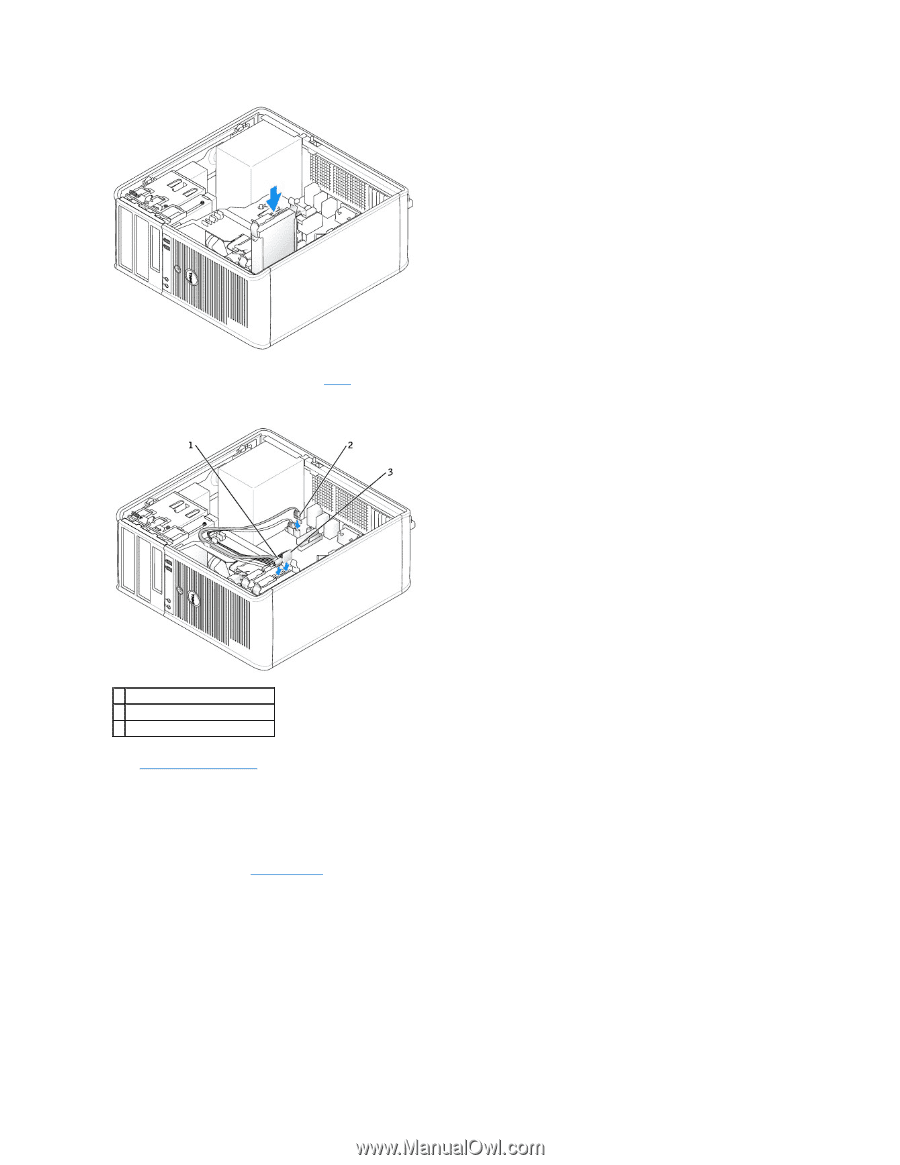
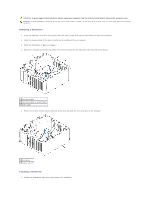
8.
Attach the serial ATA connector removed in
step 5
to the first hard drive.
9.
Locate an unused serial ATA connector on the system board and attach a drive cable to this connector and to the second hard drive.
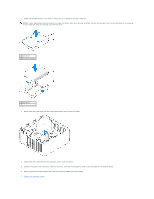
10.
Replace the computer cover
.
Drive-Panel Inserts
If you are installing a new floppy or CD/DVD drive instead of replacing a drive, remove the drive-panel inserts.
1.
Follow the procedures in "
Before You Begin
."
2.
Remove the drive panel by sliding the drive release latch downward to open the panel. Then remove it from the hinges.
1
hard-drive cable
2
hard-drive cable on system board
3
power cable