Dell PowerEdge R540 EMC Installation and Service Manual - Page 89
Drives, Removing a drive blank
 |
View all Dell PowerEdge R540 manuals
Add to My Manuals
Save this manual to your list of manuals |
Page 89 highlights
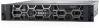
Figure 44. Installing intrusion switch 2. Slide the intrusion switch until it is firmly seated in the intrusion switch slot. 3. Connect the intrusion switch cable to the connector on the system board. Next steps 1. Installing the internal PERC riser on page 84 2. Follow the procedure listed in After working inside your system on page 67. Drives The PowerEdge R540 system supports: • Up to 12 x 3.5 inch drives or 2.5 inch drives with drive adapter, internal, hot swappable SAS, SATA, or Nearline SAS drives • Up to 8 x 3.5 inch drives or 2.5 inch drives with drive adapter, internal, hot swappable SATA SSDs Removing a drive blank The procedure for removing 2.5-inch and 3.5-inch drive blanks is identical. Prerequisites 1. Follow the safety guidelines listed in Safety instructions on page 66. 2. If installed, Removing the front bezel on page 68 CAUTION: To maintain proper system cooling, drive blanks must be installed in all empty drive slots. CAUTION: Mixing drive blanks from previous generations of PowerEdge servers is not supported. Steps Press the release button, and slide the drive blank out of the drive slot. Installing and removing system components 89
-
 1
1 -
2
-
3
-
4
-
5
-
6
-
7
-
8
-
9
-
10
-
11
-
12
-
13
-
14
-
15
-
16
-
17
-
18
-
19
-
20
-
21
-
22
-
23
-
24
-
25
-
26
-
27
-
28
-
29
-
30
-
31
-
32
-
33
-
34
-
35
-
36
-
37
-
38
-
39
-
40
-
41
-
42
-
43
-
44
-
45
-
46
-
47
-
48
-
49
-
50
-
51
-
52
-
53
-
54
-
55
-
56
-
57
-
58
-
59
-
60
-
61
-
62
-
63
-
64
-
65
-
66
-
67
-
68
-
69
-
70
-
71
-
72
-
73
-
74
-
75
-
76
-
77
-
78
-
79
-
80
-
81
-
82
-
83
-
 84
84 -
 85
85 -
 86
86 -
 87
87 -
 88
88 -
 89
89 -
 90
90 -
 91
91 -
 92
92 -
 93
93 -
 94
94 -
95
-
96
-
97
-
98
-
99
-
100
-
101
-
102
-
103
-
104
-
105
-
106
-
107
-
108
-
109
-
110
-
111
-
112
-
113
-
114
-
115
-
116
-
117
-
118
-
119
-
120
-
121
-
122
-
123
-
124
-
125
-
126
-
127
-
128
-
129
-
130
-
131
-
132
-
133
-
134
-
135
-
136
-
137
-
138
-
139
-
140
-
141
-
142
-
143
-
144
-
145
-
146
-
147
-
148
-
149
-
150
-
151
-
152
-
153
-
154
-
155
-
156
-
157
-
158
-
159
-
160
-
161
-
162
-
163
-
164
-
165
-
166
-
167
-
168
-
169
-
170
-
171
-
172
-
173
-
174
-
175
 |
 |
