Dell PowerEdge R830 Integrated Remote Access Controller 8 Version 2.70.70.70 U - Page 227
Configuring virtual media, Configuring virtual media using iDRAC web interface
 |
View all Dell PowerEdge R830 manuals
Add to My Manuals
Save this manual to your list of manuals |
Page 227 highlights
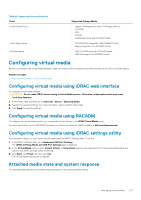
Table 40. Supported drives and devices Drive Virtual Optical Drives Virtual floppy drives USB flash drives Supported Storage Media • Legacy 1.44 floppy drive with a 1.44 floppy diskette • CD-ROM • DVD • CD-RW • Combination drive with CD-ROM media • CD-ROM/DVD image file in the ISO9660 format • Floppy image file in the ISO9660 format • USB CD-ROM drive with CD-ROM media • USB Key image in the ISO9660 format Configuring virtual media Before you configure the Virtual Media settings, make sure that you have configured your Web browser to use Java or ActiveX plug-in. Related concepts Configuring web browsers to use virtual console Configuring virtual media using iDRAC web interface To configure virtual media settings: CAUTION: Do not reset iDRAC when running a Virtual Media session. Otherwise, undesirable results may occur, including data loss. 1. In the iDRAC Web interface, go to Overview > Server > Attached Media. 2. Specify the required settings. For more information, see the iDRAC Online Help. 3. Click Apply to save the settings. Configuring virtual media using RACADM To configure the virtual media, use the set command with the objects in the iDRAC.VirtualMedia group. For more information, see the RACADM Command Line Reference Guide for iDRAC available at dell.com/idracmanuals. Configuring virtual media using iDRAC settings utility You can attach, detach, or auto-attach virtual media using the iDRAC Settings utility. To do this: 1. In the iDRAC Settings utility, go to Media and USB Port Settings. The iDRAC Settings Media and USB Port Settings page is displayed. 2. In the Virtual Media section, select Detach, Attach, or Auto attach based on the requirement. For more information about the options, see iDRAC Settings Utility Online Help. 3. Click Back, click Finish, and then click Yes. The Virtual Media settings are configured. Attached media state and system response The following table describes the system response based on the Attached Media setting. Managing virtual media 227
-
 1
1 -
2
-
3
-
4
-
5
-
6
-
7
-
8
-
9
-
10
-
11
-
12
-
13
-
14
-
15
-
16
-
17
-
18
-
19
-
20
-
21
-
22
-
23
-
24
-
25
-
26
-
27
-
28
-
29
-
30
-
31
-
32
-
33
-
34
-
35
-
36
-
37
-
38
-
39
-
40
-
41
-
42
-
43
-
44
-
45
-
46
-
47
-
48
-
49
-
50
-
51
-
52
-
53
-
54
-
55
-
56
-
57
-
58
-
59
-
60
-
61
-
62
-
63
-
64
-
65
-
66
-
67
-
68
-
69
-
70
-
71
-
72
-
73
-
74
-
75
-
76
-
77
-
78
-
79
-
80
-
81
-
82
-
83
-
84
-
85
-
86
-
87
-
88
-
89
-
90
-
91
-
92
-
93
-
94
-
95
-
96
-
97
-
98
-
99
-
100
-
101
-
102
-
103
-
104
-
105
-
106
-
107
-
108
-
109
-
110
-
111
-
112
-
113
-
114
-
115
-
116
-
117
-
118
-
119
-
120
-
121
-
122
-
123
-
124
-
125
-
126
-
127
-
128
-
129
-
130
-
131
-
132
-
133
-
134
-
135
-
136
-
137
-
138
-
139
-
140
-
141
-
142
-
143
-
144
-
145
-
146
-
147
-
148
-
149
-
150
-
151
-
152
-
153
-
154
-
155
-
156
-
157
-
158
-
159
-
160
-
161
-
162
-
163
-
164
-
165
-
166
-
167
-
168
-
169
-
170
-
171
-
172
-
173
-
174
-
175
-
176
-
177
-
178
-
179
-
180
-
181
-
182
-
183
-
184
-
185
-
186
-
187
-
188
-
189
-
190
-
191
-
192
-
193
-
194
-
195
-
196
-
197
-
198
-
199
-
200
-
201
-
202
-
203
-
204
-
205
-
206
-
207
-
208
-
209
-
210
-
211
-
212
-
213
-
214
-
215
-
216
-
217
-
218
-
219
-
220
-
221
-
 222
222 -
 223
223 -
 224
224 -
 225
225 -
 226
226 -
 227
227 -
 228
228 -
 229
229 -
 230
230 -
 231
231 -
 232
232 -
233
-
234
-
235
-
236
-
237
-
238
-
239
-
240
-
241
-
242
-
243
-
244
-
245
-
246
-
247
-
248
-
249
-
250
-
251
-
252
-
253
-
254
-
255
-
256
-
257
-
258
-
259
-
260
-
261
-
262
-
263
-
264
-
265
-
266
-
267
-
268
-
269
-
270
-
271
-
272
-
273
-
274
-
275
-
276
-
277
-
278
-
279
-
280
-
281
-
282
-
283
-
284
-
285
-
286
-
287
-
288
-
289
-
290
-
291
-
292
-
293
-
294
-
295
-
296
-
297
-
298
 |
 |
