Epson F6200 User Manual
Epson F6200 Manual
 |
View all Epson F6200 manuals
Add to My Manuals
Save this manual to your list of manuals |
Epson F6200 manual content summary:
- Epson F6200 | User Manual - Page 1
Epson® SureColor® F6200 User's Guide - Epson F6200 | User Manual - Page 2
- Epson F6200 | User Manual - Page 3
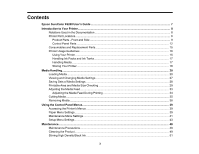
Contents Epson SureColor F6200 User's Guide ...7 Introduction to Your Printer...8 Notations Used in the Documentation 8 Printer Part Locations...8 Product Parts - Front and Side ...9 Control Panel Parts ...12 Consumables and Replacement Parts 15 Printer Usage Guidelines ...16 Using Your Printer - Epson F6200 | User Manual - Page 4
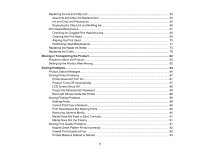
the Print Head ...70 Performing Head Maintenance...71 Replacing the Waste Ink Bottle ...75 Replacing the Cutter...78 Moving or Transporting the Product ...82 Prepare to Move the Product...82 Setting Up the Product After Moving 82 Solving Problems ...84 Product Status Messages ...84 Solving Printer - Epson F6200 | User Manual - Page 5
Printing Specifications ...96 Electrical Specifications ...96 Environmental Specifications ...97 Dimension Specifications ...97 Interface Specifications ...97 Ink Pack Specifications ...98 Paper Specifications ...98 Safety and Approvals Specifications 99 Notices ...100 Important Safety Instructions - Epson F6200 | User Manual - Page 6
- Epson F6200 | User Manual - Page 7
Epson SureColor F6200 User's Guide Welcome to the Epson SureColor F6200 User's Guide. 7 - Epson F6200 | User Manual - Page 8
printer and this manual. Notations Used in the Documentation Printer Part Locations Consumables and Replacement Parts Printer Usage Guidelines Notations Used printer. • Tips contain additional printing information. Parent topic: Introduction to Your Printer Printer Part Locations Check the printer - Epson F6200 | User Manual - Page 9
Product Parts - Front and Side 1 Printer cover 2 Maintenance box covers 3 Casters 4 Stirring stick 5 Ink tank 6 Slider (chip holder) 9 - Epson F6200 | User Manual - Page 10
8 Waste ink bottle holder 9 Waste ink bottle 10 Ink splash guard 11 Waste ink tube 12 AC inlet 13 LAN port 14 Data light 15 Status light 16 USB port 17 Control panel 18 Alert light 19 Roll rest 20 Adapter guides 21 Roll lock lever 22 Adapter holder 23 Paper slot 24 Print head 25 Roll - Epson F6200 | User Manual - Page 11
Slider (Chip Holder) Parts 1 Slider 2 Ink inlet cover 3 Chip unit Roll Paper Adapter 1 Adapter lock lever 2 Size lever Parent topic: Printer Part Locations 11 - Epson F6200 | User Manual - Page 12
Control Panel Parts 1 The power button 2 The power light 3 The load/remove paper button 4 LCD screen 5 The Menu button 6 The back button 7 The left and right arrow buttons 12 - Epson F6200 | User Manual - Page 13
arrow buttons 9 The OK button 10 The ink tab info button 11 The maintenance button 12 The pause/cancel button 13 The cut/feed media button LCD Screen Display 1 Status messages 2 Feed adjustment information, if you have entered a value during printing 3 Information display area with the - Epson F6200 | User Manual - Page 14
normal (left) to warning or error status tab (right) if necessary. The ink color is shown below (2). • HDK: High Density Black • Y: Yellow • displayed message and clear the error : Chip unit is incompatible, or the printer does not recognize it, or the slider is unlocked : Check the displayed - Epson F6200 | User Manual - Page 15
to display the Setup menu. Parent topic: Printer Part Locations Consumables and Replacement Parts You can purchase genuine Epson ink packs, paper, and accessories from an Epson authorized reseller. To find the nearest reseller, call 800-GO-EPSON (800-463-7766). Caution: Using ink from an non - Epson F6200 | User Manual - Page 16
adapter Waste ink bottle Head maintenance kit Part number S902006 C12C811391 T724000 S210042 Parent topic: Introduction to Your Printer Printer Usage Guidelines Follow the guidelines in these sections as you use your printer, consumables, and print media. Using Your Printer Handling Ink Packs and - Epson F6200 | User Manual - Page 17
59 °F (15 °C) and 77 °F (25 °C). Note: To keep the print head in the optimum operating condition, ink is used in maintenance operations such as head cleaning in addition to printing. Parent topic: Printer Usage Guidelines Handling Ink Packs and Ink Tanks Follow these guidelines as you handle the - Epson F6200 | User Manual - Page 18
the print head and prevent the nozzles from clogging. If you do not turn on the printer for a long time, the printer may malfunction. • If you will not use the printer for more than two weeks, maintenance must be performed by a service engineer before and after this period. Contact Epson support - Epson F6200 | User Manual - Page 19
Parent topic: Printer Usage Guidelines 19 - Epson F6200 | User Manual - Page 20
review and follow the media handling guidelines for the best results. Caution: Wait until just before printing to load media. This avoids creases in the media that may be caused by the pressure rollers. Creased, wavy, or curled media could cause it to jam inside the printer or contact the print head - Epson F6200 | User Manual - Page 21
3. Lift up the adapter holder lock lever. 4. Place your media on the roll rest temporarily. 21 - Epson F6200 | User Manual - Page 22
5. On the roll paper adapters, slide the size lever to the position for the size of the roll core on the media you are loading. • 3-inch core • 2-inch core 22 - Epson F6200 | User Manual - Page 23
6. Lift up the lock levers on both roll paper adapters. 7. Attach the roll paper adapters to each end of your media roll and press them in until they are fully inserted. 8. Lower the lock levers on both roll paper adapters. 23 - Epson F6200 | User Manual - Page 24
9. Slide the roll paper right until it contacts the adapter guide, then slowly roll it backward following the adapter guide. 10. Press the load/remove paper button on the product control panel. You see the Roll Paper message on the product control panel screen. Press - Epson F6200 | User Manual - Page 25
Note: Avoid touching the printable surface of the paper. Rotate the roll paper adapters as shown to feed paper. 12. Lower the adapter holder lock lever. Instructions appear on the product control panel screen. 25 - Epson F6200 | User Manual - Page 26
13. Press the OK button. Paper feeds into the printer. 14. Close the roll paper cover. 15. Select your media settings on the control panel. Parent topic: Media Handling Related references Handling Media Related tasks Viewing and Changing Media Settings 26 - Epson F6200 | User Manual - Page 27
to calculate the amount of media remaining based on the length of the roll and the amount already printed, and display the approximate results on the product control panel, set the Remaining Setup setting to On. 3. To change your media settings, select the setting you want to change and press the - Epson F6200 | User Manual - Page 28
message Ready on the product control panel indicating that it is ready to print. Parent topic: Media Handling Related tasks Saving Sets of Media Settings Saving for each type of media you use. This lets you quickly select all the necessary settings whenever you print on that media type. The media - Epson F6200 | User Manual - Page 29
character position and repeat this step as necessary to complete the setting name. When you finish, press the OK button. Note: If you need to delete the previous character, press the left arrow button. 9. Press the up or down arrow button as necessary to select each available media setting and press - Epson F6200 | User Manual - Page 30
1 Maximum media width 2 Side margins 3 Bottom margin 4 Top margin 5 Maximum media length Roll Paper Margin setting Normal Top15mm/Bottom15mm Top35mm/Bottom15mm Margins Top and bottom margins: 0.6 inch (15 mm) Side margins: 0.12 inch (3 mm) Top and bottom margins: 0.6 inch (15 mm) Side margins: 0.12 - Epson F6200 | User Manual - Page 31
Roll Paper Margin setting Top15mm/Bottom150mm Top5mm/Bottom5mm 15mm Margins Top margin: 0.6 inch (15 mm) Bottom margin: 5.9 inches (150 mm) Side margins: 0.12 inch (3 mm) Top and bottom margins: 0.2 inch (5 mm) Side margins: 0.12 inch (3 mm) All margins 0.6 inch (15 mm) Note: If you selected - Epson F6200 | User Manual - Page 32
Roll Paper Margin setting Top15mm/Bottom150mm Top5mm/Bottom5mm 15mm 360 × 720 3 pass mode Roll Paper Margin setting Normal Top15mm/Bottom15mm Top35mm/Bottom15mm Top15mm/Bottom150mm Top5mm/Bottom5mm Margins Top margin: 1.14 inches (29 mm) Bottom margin: 5.9 inches (150 mm) Side margins: 0.12 inch (3 - Epson F6200 | User Manual - Page 33
260 Parent topic: Media Handling Related references Paper Menu Settings Setup Menu Settings Adjusting the Media Feed If your printouts contain plan to print on and selected all the options you plan to use for printing. Note: You can also adjust the feed during printing without printing a test - Epson F6200 | User Manual - Page 34
adjustment pattern, select Pattern and press the OK button. Press the OK button again to print an adjustment pattern and go to the next step. • To manually enter an adjustment value, select Value and press the OK button. Press the up or down arrow buttons to select an adjustment value and press - Epson F6200 | User Manual - Page 35
the Auto Cut setting on the product control panel, your product automatically cuts the media after printing each page. • If you did not turn on the Auto Cut setting, follow the instructions here to cut the media manually. Note: The minimum length of paper that you can cut with the built-in cutter - Epson F6200 | User Manual - Page 36
printer. 2. Press the OK button. The printer slowly cuts the media. Parent topic: Media Handling Related references Setup Menu Settings Removing Media After printing or curled media could cause it to jam inside the printer or contact the print head. 1. Press the load/remove paper button. The - Epson F6200 | User Manual - Page 37
The printer automatically rewinds the paper onto the roll and displays this message: Press and load paper. Note: If you see a message telling you to turn the roll paper adapter, rewind the paper by hand using the adapter instead. 3. Open the roll paper cover. 4. Lift up the adapter holder lock lever - Epson F6200 | User Manual - Page 38
6. Lift up the lock levers on both roll paper adapters. 7. Remove the roll paper adapters from each end of your media roll. 8. Carefully rewind the media onto the roll and store it in its original packaging. Parent topic: Media Handling 38 - Epson F6200 | User Manual - Page 39
the Control Panel Menus Follow the instructions in these sections to access the printer menu system and select settings. Accessing the Printer's Menus Paper Menu Settings Maintenance Menu Settings Setup Menu Settings Accessing the Printer's Menus You can use the printer menus to adjust the settings - Epson F6200 | User Manual - Page 40
Settings - - Description Displays instructions for removing paper. Displays instructions for loading paper. Lists the names of user-defined paper types. Specifies using the software RIP settings instead of the printer settings. See the next table. Press the OK button to print a list of custom paper - Epson F6200 | User Manual - Page 41
the Media Feed Maintenance Menu Settings The Maintenance menu lets you run nozzle checks, cleaning cycles, and other maintenance operations. You can access the menu directly by pressing the maintenance button. Caution: Follow the instructions in the topic links below the table to use these menu - Epson F6200 | User Manual - Page 42
the problem, select Manual(Uni-D). Adjusts the cutter position in increments of 0.039 inch (1 mm), from -0.12 to 0.12 inch (-3 to 3 mm). Replace Cutter: positions the cutter for replacement. Positions the print head for cleaning using the head maintenance kit. Lets you reset the waste ink counter - Epson F6200 | User Manual - Page 43
Head Maintenance Replacing the Waste Ink Bottle Setup Menu Settings The Setup menu lets you configure and monitor the following aspects of your product: • Printer setup • Printer status • Network setup • Power settings • General preferences • Date and time settings Caution: Follow the instructions - Epson F6200 | User Manual - Page 44
Setting Roll Paper Setup Options Auto Cut Page Line Roll Paper Margin Roll Paper Remaining Remaining Alert Description Automatically cuts the roll paper as each page is printed. Prints a cut line between length). Enter the length at which the printer will alert you, from 4 to 50 ft (1 to 15 m). 44 - Epson F6200 | User Manual - Page 45
Wider. If ink blurs on the paper, set a time from 0.1 to 60 minutes. Automatically detects the edges of the paper. Turn off this setting only if the printer displays a paper setting error when media is loaded correctly. Changed settings take effect when paper is reloaded. Stops printing when skewed - Epson F6200 | User Manual - Page 46
5 to 240 minutes Off 1 to 24 hours Yes No Options Various languages Description Prints a sheet showing current printer settings. Description Determines whether IP addresses are obtained automatically through DHCP or manually. Select Panel to enter an IP address, subnet mask, and default gateway - Epson F6200 | User Manual - Page 47
Settings Cutting Media Checking for Clogged Print Head Nozzles Cleaning the Print Head Description Selects the unit of length used on the control panel display and when printing test patterns. Enables the alert light when an error occurs. Description Sets the printer's built-in clock. The time and - Epson F6200 | User Manual - Page 48
See the instructions in these sections to maintain your printer for optimum results. Maintenance Precautions Cleaning the Product Stirring High Density Black Ink Replacing the Ink and Chip Unit Print Head Maintenance Replacing the Waste Ink Bottle Replacing the Cutter Maintenance Precautions Follow - Epson F6200 | User Manual - Page 49
disposal company. When handing over the waste ink to the industrial waste disposal company, make sure you include the Safety Data Sheet (SDS) found on Epson's support website. Parent topic: Maintenance Related tasks Removing Media Performing Head Maintenance Cleaning the Product Clean your product - Epson F6200 | User Manual - Page 50
shown here. Wipe from the inside of the printer toward the outside to avoid spreading dirt. Caution: As you clean, do not touch the ink tubes, rollers, or platen area (b) shown here to avoid staining future prints. If necessary, clean area (a) using a cloth dampened with mild detergent and wipe dry - Epson F6200 | User Manual - Page 51
after feeding. Parent topic: Maintenance Related references Maintenance Precautions Related tasks Removing Media Cutting Media Stirring High Density Black Ink To prevent sedimentation and incorrect colors in your printed media, stir the High Density Black ink in the ink tank once a week. 1. Open - Epson F6200 | User Manual - Page 52
2. Grasp the loop at the top of the ink inlet cap and slowly remove the ink inlet cap. 52 - Epson F6200 | User Manual - Page 53
top each time. Caution: Move the stick slowly and steadily, or ink may splatter. 4. Insert the stirring stick into the ink tank and replace the ink inlet cap Caution: Press the ink inlet cap down firmly. If the slider comes into contact with the ink inlet cap when pulling it out, the cap could get - Epson F6200 | User Manual - Page 54
See these sections to replace the ink chip unit in your product. About Ink and Chip Unit Replacement Ink and Chip Unit Precautions Replacing the Chip Unit and Refilling Ink Parent topic: Maintenance Related references Consumables and Replacement Parts About Ink and Chip Unit Replacement When the - Epson F6200 | User Manual - Page 55
the usage environment and conditions. Contact Epson Support for information on replacing components. Note: This printer has a remaining ink warning system. This system does not directly detect the amount of ink remaining in the ink tank. Instead, the amount of ink remaining is estimated based on the - Epson F6200 | User Manual - Page 56
that is not covered by Epson's warranties, and under certain circumstances, may cause erratic printer behavior. • Information about non-genuine chip unit status may not be displayed, and use of non-genuine ink is recorded for possible use in service support. Warning: Should ink contact your skin or - Epson F6200 | User Manual - Page 57
2.8 in. (70 mm) from the base of the ink tank, continue to use the printer until the remaining ink level is 2.8 in. (70 mm) from the base of the ink tank so that you can use all the ink in a new ink pack to refill the ink tank. If the remaining ink level is 2.8 inches (70 mm) or less, go - Epson F6200 | User Manual - Page 58
2. Open the ink cover. 3. Insert a finger into the groove on the top of the slider and pull it straight out. Caution: Do not tilt the slider. If you drop the chip unit, it may break. 58 - Epson F6200 | User Manual - Page 59
4. Remove the chip unit from the slider. 5. Confirm that the label color on the slider matches the label on the new ink pack. Then attach the chip unit supplied with the new ink pack to the slider. 59 - Epson F6200 | User Manual - Page 60
6. Hold the slider level and insert it. Then close the ink tank cover. Caution: Do not push the slider in with too much force. Failure to observe this precaution could damage the printer. 7. Shake the new ink pack horizontally approximately 2 inches (5 cm) left and right for 5 seconds (approximately - Epson F6200 | User Manual - Page 61
8. Open the slider ink inlet cover. 9. Do the following: • For all ink colors except High Density Black ink, remove the ink inlet cap from the ink tank. 61 - Epson F6200 | User Manual - Page 62
• For High Density Black ink, remove the ink inlet cap and stirring stick, then hook the stirring stick to the ink tank. 62 - Epson F6200 | User Manual - Page 63
Rest the stirring stick on the tab at the edge of the tank as shown. 63 - Epson F6200 | User Manual - Page 64
10. Cut or tear off the ink pack spout seal. 64 - Epson F6200 | User Manual - Page 65
11. Insert the spout of the ink pack into the groove and slowly tilt it to pour the ink. Note: Be sure to completely empty the ink pack into the tank. Do not use an ink pack to refill multiple ink tanks. This can prevent the proper display of messages from the remaining ink warning system. 65 - Epson F6200 | User Manual - Page 66
12. Do the following: • For all ink colors except High Density Black ink, replace the ink inlet cap. • For the High Density Black ink, lift up the stirring stick, guide it into the ink tank, and replace the ink inlet cap as shown. Caution: Press the ink inlet cap down firmly. If the slider comes - Epson F6200 | User Manual - Page 67
references Ink and Chip Unit Precautions Consumables and Replacement Parts Print Head Maintenance Print head maintenance ensures the best print quality. Perform the following maintenance as necessary: • Nozzle Check: Check for clogged nozzles before each print job or if you have not used the printer - Epson F6200 | User Manual - Page 68
each print job. You can select how often the product performs a nozzle check in the Setup menu. • Manually run a nozzle check from the product control panel, as described here. 1. Load roll paper and select the matching paper type on the product control panel. 2. Press the maintenance button - Epson F6200 | User Manual - Page 69
Parent topic: Print Head Maintenance Related references Setup Menu Settings Maintenance Menu Settings Related tasks Loading Media Viewing and Changing Media Settings Cleaning the Print Head Cleaning the Print Head If printouts are faint or have gaps, you should clean the print head to clear the - Epson F6200 | User Manual - Page 70
: Print Head Maintenance Related references Setup Menu Settings Related tasks Checking for Clogged Print Head Nozzles Aligning the Print Head If use for quick selection. Before aligning the print head, make sure you have correctly loaded the media you plan to print on. Also check that the print head - Epson F6200 | User Manual - Page 71
. Parent topic: Print Head Maintenance Related references Maintenance Menu Settings Related tasks Loading Media Checking for Clogged Print Head Nozzles Performing Head Maintenance If ink smears onto your printed media even after cleaning the print head, you should perform head maintenance to clean - Epson F6200 | User Manual - Page 72
Head Maintenance and press the OK button. You see a message asking you to prepare the head maintenance kit. 4. Press the OK button. The product moves the print head out of the way. 5. Peel the backing off of the pads in the head maintenance kit. tab and press the OK 6. Open the printer cover - Epson F6200 | User Manual - Page 73
the ink absorbing areas (b) on the platen so the pads do not stick to them. Do not move the print head by hand; this can damage your product. 8. Press the edge of each pad against the rollers as shown. Note: Make sure there are no gaps between the pads and the rollers or head maintenance - Epson F6200 | User Manual - Page 74
. Follow the instructions on the product control panel screen to open the printer cover and carefully remove the pads when head maintenance finishes. Note: Do not reuse the pads. 13. Close the printer cover and press the OK button to clean the print head. Parent topic: Print Head Maintenance Related - Epson F6200 | User Manual - Page 75
is not printing or cleaning the print head before replacing the waste ink bottle. Caution: Replacing the waste ink bottle during printing or cleaning could cause waste ink to leak. When replacing the waste ink bottle, always wear the gloves included in the maintenance kit. Leave the waste ink in the - Epson F6200 | User Manual - Page 76
2. Lift up the waste ink bottle and remove it from the holder as shown here. 76 - Epson F6200 | User Manual - Page 77
industrial waste disposal company, make sure you include the Safety Data Sheet (SDS) found on Epson's support website. Note: If you replaced the waste ink bottle before the replacement message appeared on the control panel, press the maintenance button and select Waste Ink Counter to clear the waste - Epson F6200 | User Manual - Page 78
to replace the cutter. Make sure you have a Phillips-head screwdriver before you begin. 1. Remove any paper loaded in the product. 2. Press the left or right arrow on the product control panel to highlight the tab and press the OK button. The Maintenance menu appears. 3. Press the up or down arrow - Epson F6200 | User Manual - Page 79
5. Using a Phillips-head screwdriver, loosen the screw holding the cutter in place and carefully pull the cutter straight out. Warning: Keep the cutter out of the reach of children. The blade is sharp and can cause injury. 79 - Epson F6200 | User Manual - Page 80
securely so the cutter does not shift position. 7. Press the OK button. The cutter returns to its original position and the product is ready to print. Parent topic: Maintenance Related references Consumables and Replacement Parts Maintenance Menu Settings Related tasks Cutting Media 80 - Epson F6200 | User Manual - Page 81
Removing Media 81 - Epson F6200 | User Manual - Page 82
it. If you need to transport the product a long distance, contact Epson support. Prepare to Move the Product Setting Up the Product After Moving Prepare to installation. 2. Install the waste ink bottle. 3. Connect the power cable to an electrical outlet and turn on the printer. 4. Load media in the - Epson F6200 | User Manual - Page 83
6. Align the print head and check the print quality. Parent topic: Moving or Transporting the Product Related tasks Replacing the Waste Ink Bottle Loading Media Checking for Clogged Print Head Nozzles Cleaning the Print Head 83 - Epson F6200 | User Manual - Page 84
Check these sections for solutions to problems you may have using your product. Product Status Messages Solving Printer Problems Solving Printing Problems Solving Print Quality Problems Where to Get Help Product Status Messages You can often diagnose problems with your product by checking the - Epson F6200 | User Manual - Page 85
off the Paper Size Check setting and try printing again. Maintenance Request Replace Part Soon/Replace Part Now XXXXXXXXXX The product part indicated is nearing or at the end of its service life. Contact Epson for support and provide them with the service code shown on the LCD screen. You must - Epson F6200 | User Manual - Page 86
is indicated as follows (2: color of affected ink): Ready to print. Check the ink level in the ink tank, and replace the chip unit and refill the ink. The icon flashes when the ink tank is close to being empty. Check the and replace the chip unit, if necessary. Parent topic: Solving Problems 86 - Epson F6200 | User Manual - Page 87
references Setup Menu Settings Where to Get Help Related tasks Replacing the Waste Ink Bottle Replacing the Chip Unit and Refilling Ink Cutting Media Related topics Replacing the Ink and Chip Unit Solving Printer Problems Check these sections if you have problems operating your product. Printer Does - Epson F6200 | User Manual - Page 88
password you created during network setup, contact Epson for support. Parent topic: Solving Printer Problems Red Light Shines Inside the Printer The red light always shines inside the printer. This is normal. Parent topic: Solving Printer Problems Solving Printing Problems Check these sections if - Epson F6200 | User Manual - Page 89
Printing Problems Related references Setup Menu Settings Print Head Moves But Nothing Prints If the print head is moving and nothing prints, try these solutions: • Print a nozzle check pattern. If the pattern does not print correctly, clean the print head again. (If the printer has not been used - Epson F6200 | User Manual - Page 90
toward you and cut off any torn or creased media from the roll using scissors or a third-party cutting tool. 4. Manually rewind the media. 5. Close the printer cover and press the OK button. 6. Run a nozzle check and, if necessary, clean the print head. Parent topic: Solving Printing Problems 90 - Epson F6200 | User Manual - Page 91
Related tasks Checking for Clogged Print Head Nozzles Cleaning the Print Head Media Does Not Feed or Eject Correctly the product control panel is not too strong. Parent topic: Solving Printing Problems Related references Paper Menu Settings Paper Specifications Related tasks Loading Media Media Does - Epson F6200 | User Manual - Page 92
head. Clean the area using the maintenance kit. • If nozzles are still clogged after head cleaning at the strongest level, leave the product turned off overnight and check the nozzles again. If you still cannot clear the nozzles, contact Epson support. Parent topic: Solving Print Quality Problems - Epson F6200 | User Manual - Page 93
Platen Gap setting on the product control panel to prevent the print head from striking the media as you print. • If the edge of the media is marred, set the product. Parent topic: Solving Print Quality Problems Related references Paper Menu Settings Setup Menu Settings Paper Specifications Related - Epson F6200 | User Manual - Page 94
also need your printer serial number and proof of purchase. Visit Epson's U.S. support website or Canadian website and select your product for solutions to common problems. You can download drivers, firmware, and documentation, get FAQs and troubleshooting advice, or e-mail Epson with your questions - Epson F6200 | User Manual - Page 95
Printing Specifications Electrical Specifications Environmental Specifications Dimension Specifications Interface Specifications Ink Pack Specifications Paper Specifications Safety and Approvals Specifications Windows System Requirements To use - Epson F6200 | User Manual - Page 96
at epson.com/support (U.S.) or epson.ca/support (Canada) for the latest in compatibility and drivers for your product. Parent topic: Technical Specifications Printing Specifications Printing method Nozzle configuration Resolution Control code Media feed method Built-in memory On-demand ink jet - Epson F6200 | User Manual - Page 97
to 80% RH; 40 to 60% RH recommended Storage (before and after unpacking): 5 to 85% RH Parent topic: Technical Specifications Dimension Specifications Height Width Depth Weight (without ink) 44.4 inches (1128 mm) 63.3 inches (1608 mm) 36.0 inches (914 mm) 207.2 lb (94 kg) Parent topic: Technical - Epson F6200 | User Manual - Page 98
Pack Specifications Sublimation transfer ink color Ink life Print quality guarantee Temperature Capacity High Density Black, Cyan, Magenta, Yellow Do not use if the date on the package has expired 25 days (from the day the ink tank was refilled from the ink pack) In transit (unopened): -4 to 140 - Epson F6200 | User Manual - Page 99
Safety and Approvals Specifications United States Canada Safety: UL60950-1 EMC: FCC part 15 Subpart B class A Safety: CAN/CSA C22.2 No. 60950-1 EMC: CAN/CSA-CEI/IEC CISPR 22 Class A Parent topic: Technical Specifications 99 - Epson F6200 | User Manual - Page 100
Terms Trademarks Copyright Notice Important Safety Instructions Before using your Epson product, read and follow these safety instructions. General Product Safety Instructions Ink Pack Safety Instructions Parent topic: Notices General Product Safety Instructions • Be sure to follow all warnings - Epson F6200 | User Manual - Page 101
use aerosol products that contain flammable gases inside or around the product. Doing so may cause fire. • Except as specifically explained in your documentation, do not attempt to service the product yourself. • Unplug the product and refer servicing to qualified service instructions. ink - Epson F6200 | User Manual - Page 102
Pack Safety Instructions • Keep ink packs out of the reach of children and do not drink the ink. • Wear protective eyewear, gloves, and a mask when performing maintenance. • Should ink touch your skin or enter your eyes or mouth, immediately take the following actions: • If fluid touches your skin - Epson F6200 | User Manual - Page 103
user may be required to take adequate measures. Parent topic: Notices Software License Terms Bonjour This printer printer product. If you desire to receive the source code of the Bonjour Programs, contact Epson support but only to the extent necessary to use, reproduce and/or distribute the Original - Epson F6200 | User Manual - Page 104
otherwise make Covered Code available, directly or indirectly, to anyone other than You; and/or (b) to use Covered Code, alone or as part of a Larger Work, in any way to provide a service, including but not limited to delivery of content, through electronic communication with a client other than You - Epson F6200 | User Manual - Page 105
this License or the recipients' rights hereunder, except as permitted under Section 6. 2.2 Modified Code. You may modify Covered Code and use, reproduce, display, perform, internally distribute within Your organization, and Externally Deploy Your Modifications and Covered Code, for commercial or non - Epson F6200 | User Manual - Page 106
be incomplete or contain inaccuracies. You expressly acknowledge and agree that use of the Covered Code, or any portion thereof, is at Your sole and entire risk. THE COVERED CODE IS PROVIDED "AS IS" AND WITHOUT WARRANTY, UPGRADES OR SUPPORT OF ANY KIND AND APPLE AND APPLE'S LICENSOR(S) (COLLECTIVELY - Epson F6200 | User Manual - Page 107
, logos or trade names belonging to Apple (collectively "Apple Marks") or to any trademark, service mark, logo or trade name belonging to any Contributor. You agree not to use any Apple Marks in or as part of the name of products derived from the Original Code or to endorse or promote products - Epson F6200 | User Manual - Page 108
. Upon termination, You agree to immediately stop any further use, reproduction, modification, sublicensing and distribution of the Covered Code other right or remedy of any party. 13. Miscellaneous. 13.1 Government End Users. The Covered Code is a "commercial item" as defined in FAR 2.101. - Epson F6200 | User Manual - Page 109
must immediately discontinue any use of the Covered Code and destroy all copies of it that are in your possession or control. 13.6 Dispute Resolution. Any litigation or other dispute resolution between You and Apple relating to this License shall take place in the Northern District of California, - Epson F6200 | User Manual - Page 110
URL(s), such as to imply Info-ZIP will provide support for the altered versions. 4. Info-ZIP retains the right to use the names "Info-ZIP," "Zip," "UnZip," " Trademarks EPSON®and SureColor® are registered trademarks, and EPSON Exceed Your Vision is a registered logomark of Seiko Epson Corporation. - Epson F6200 | User Manual - Page 111
Seiko Epson Corporation's operating and maintenance instructions. Seiko Epson Corporation shall not be liable for any damages or problems arising from the use of Use of Copyrighted Materials Epson encourages each user to be responsible and respectful of the copyright laws when using any Epson - Epson F6200 | User Manual - Page 112
certain circumstances, those circumstances may not be as broad as some people assume. Contact your legal advisor for any questions regarding copyright law. Parent topic: Copyright Notice Copyright Attribution © 2015 Epson America, Inc. 7/15 CPD-43466 Parent topic: Copyright Notice 112
-
 1
1 -
 2
2 -
 3
3 -
 4
4 -
 5
5 -
 6
6 -
 7
7 -
8
-
9
-
10
-
11
-
12
-
13
-
14
-
15
-
16
-
17
-
18
-
19
-
20
-
21
-
22
-
23
-
24
-
25
-
26
-
27
-
28
-
29
-
30
-
31
-
32
-
33
-
34
-
35
-
36
-
37
-
38
-
39
-
40
-
41
-
42
-
43
-
44
-
45
-
46
-
47
-
48
-
49
-
50
-
51
-
52
-
53
-
54
-
55
-
56
-
57
-
58
-
59
-
60
-
61
-
62
-
63
-
64
-
65
-
66
-
67
-
68
-
69
-
70
-
71
-
72
-
73
-
74
-
75
-
76
-
77
-
78
-
79
-
80
-
81
-
82
-
83
-
84
-
85
-
86
-
87
-
88
-
89
-
90
-
91
-
92
-
93
-
94
-
95
-
96
-
97
-
98
-
99
-
100
-
101
-
102
-
103
-
104
-
105
-
106
-
107
-
108
-
109
-
110
-
111
-
112
 |
 |
Epson
®
SureColor
®
F6200 User's Guide