GE 60-806-95R-16Z Installation Instructions - Page 30
Phone Number 0120- r 1, 0130- r 2, 0140- r 3
 |
UPC - 046188090938
View all GE 60-806-95R-16Z manuals
Add to My Manuals
Save this manual to your list of manuals |
Page 30 highlights
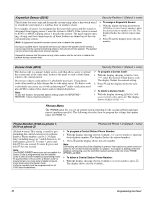
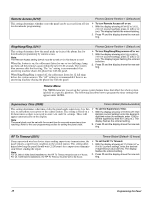
Reporting Format (0105-cs phone 1, 0115-cs phone 2) Phones-CS Phone 1-2 (Default=all CID) This setting determines whether the panel uses the SIA or CID (Contact ID) reporting format for central station communication. ¾ To select SIA or CID Reporting Format: 1. With the display showing REPORTING FORMAT SIA/CID (current setting), press 1 (for SIA) or 2 (for CID). The display flashes the entered setting. 2. Press ƒ and the display shows the new setting. The following describes how to program the phone settings that appear under PAGER PHONE 1-3. Phone Number (0120-pager 1, 0130-pager 2, 0140-pager 3) Phones-Pager Phone 1-3 (Default=none) This setting is used for programming a phone number that communicates to ¾ To program a Pager Phone Number: a pager. Phone numbers can be 1-24 digits long, and can include pauses or * 1. With the display showing PHONE NUMBER _ and # characters. (or current number), enter the desired pager To enter pauses, press C. To enter *, press and hold 7 for one second. To enter #, press and hold 9 for one second. phone number including pauses. The display flashes the entered number. Note 2. Press ƒ and the display shows the new Call-waiting services should be disabled to prevent interruptions to panel commu- number. nication to the central monitoring station (or pager). To program a dialing prefix that disables call-waiting, see the Call Wait Cancel setting under the menu PHONE ¾ To delete a Pager Phone Number: OPTIONS-GLOBAL. 1. With the display showing PHONE NUMBER _ (current number), press D. The display shows PHONE NUMBER _. High Level Rpts (0121-pager 1, 0131-pager 2, 0141-pager 3) Phones-Pager Phone 1-3 (Default=on) When this setting is on, the panel reports to the pager events that involve a high-level security risk, including the following conditions: • Fire, Police, Auxiliary, Duress, and Freeze alarms • No Activity • Receiver Failure (or jam) • System Tamper (40 incorrect keystrokes or touchpad supervisory), • Entering or exiting Sensor Test mode ¾ To turn High-Level Reports off or on: 1. With the display showing HIGH LEVEL RPTS OFF/ON (current setting), press 1 (off) or 2 (on). The display flashes the entered setting. 2. Press ƒ and the display shows the new setting. Low Level Rpts (0122-pager 1, 0132-pager 2, 0142-pager 3) Phones-Pager Phone 1-3 (Default=off) When this setting is on, the panel reports non-alarm conditions to the pager, including the following conditions: • Force Armed • Hardwire Zone Trouble (open or short) • Supervisory (wireless devices) • Low Battery (wireless devices) ¾ To turn Low-Level Reports off or on: 1. With the display showing LOW LEVEL RPTS OFF/ON (current setting), press 1 (off) or 2 (on). The display flashes the entered setting. 2. Press ƒ and the display shows LOW LEVEL RPTS OFF/ON (new setting). • Other non-alarm related conditions 25 Programming the Panel
-
 1
1 -
2
-
3
-
4
-
5
-
6
-
7
-
8
-
9
-
10
-
11
-
12
-
13
-
14
-
15
-
16
-
17
-
18
-
19
-
20
-
21
-
22
-
23
-
24
-
 25
25 -
 26
26 -
 27
27 -
 28
28 -
 29
29 -
 30
30 -
 31
31 -
 32
32 -
 33
33 -
 34
34 -
 35
35 -
36
-
37
-
38
-
39
-
40
-
41
-
42
-
43
-
44
-
45
-
46
-
47
-
48
-
49
-
50
-
51
-
52
-
53
-
54
-
55
-
56
-
57
-
58
-
59
-
60
-
61
-
62
-
63
-
64
-
65
-
66
-
67
-
68
-
69
-
70
-
71
-
72
-
73
-
74
-
75
-
76
 |
 |
