GE 60-806-95R-16Z Installation Instructions - Page 40
Receiver Failure 05011, RF Low Bat Rpt 05012, RF Supv Report 05013, Swinger Limit 05014
 |
UPC - 046188090938
View all GE 60-806-95R-16Z manuals
Add to My Manuals
Save this manual to your list of manuals |
Page 40 highlights
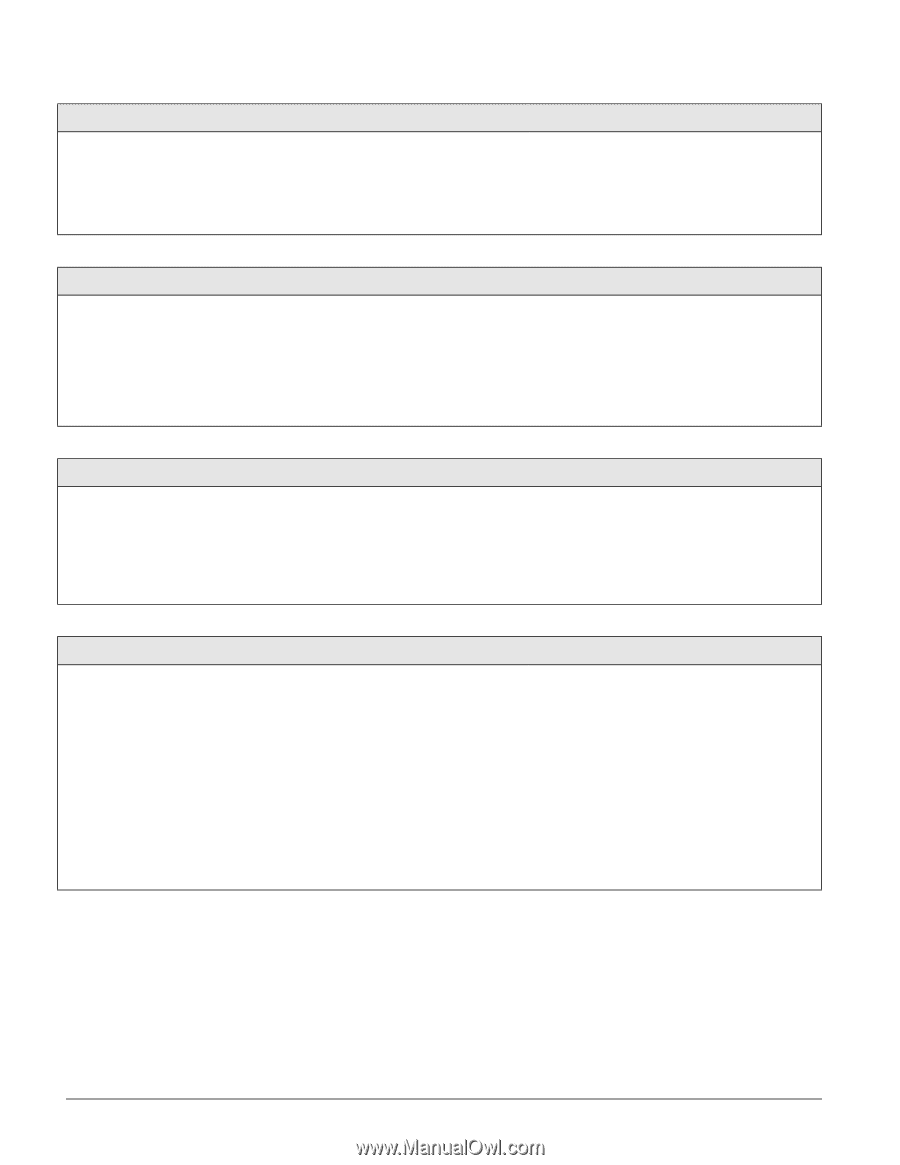
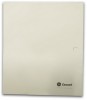
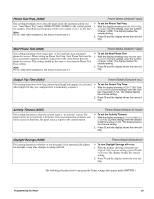
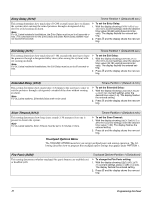
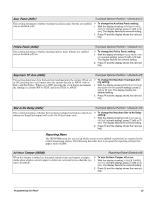
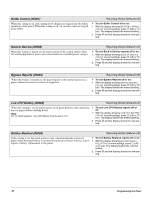
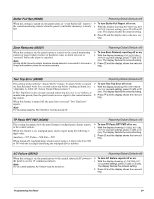
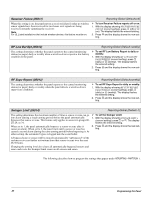
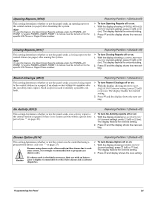
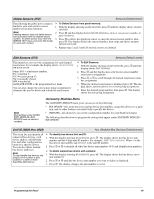
Receiver Failure (05011) Reporting-Global (Default=off) When this setting is on, the panel reports a receiver failure if either no wireless sensor signals have been received for two hours or if signals are being received constantly (jamming the receiver). Note For UL Listed installations that include wireless devices, this feature must be on. ¾ To turn Receiver Failure reports off or on: 1. With the display showing RECEIVER FAILURE OFF/ON (current setting), press 1 (off) or 2 (on). The display flashes the entered setting. 2. Press ƒ and the display shows the new setting. RF Low Bat Rpt (05012) Reporting-Global (Default=weekly) This setting determines whether the panel reports to the central monitoring station (or pager) daily or weekly when a wireless device reports a low battery condition to the panel. ¾ To set RF Low Battery Report to daily or weekly: 1. With the display showing RF LOW BAT RPT DAILY/WEEKLY (current setting), press 1 (daily) or 2 (weekly). The display flashes the entered setting. 2. Press ƒ and the display shows the new setting. RF Supv Report (05013) This setting determines whether the panel reports to the central monitoring station (or pager) daily or weekly when the panel detects a wireless device supervisory condition. Reporting-Global (Default=weekly) ¾ To set RF Supv Report to daily or weekly: 1. With the display showing RF SUPV REPORT DAILY/WEEKLY (current setting), press 1 (daily) or 2 (weekly). The display flashes the entered setting. 2. Press ƒ and the display shows the new setting. Swinger Limit (05014) Reporting-Global (Default=1) This setting determines the maximum number of times a sensor or zone can go ¾ To set the Swinger Limit: into alarm (during a single arming period) before the panel automatically 1. With the display showing SWINGER LIMIT n bypasses that sensor or zone. This feature only applies to sensors in groups 00- (current setting), press 1 or 2. The display 20, 29, or 34. flashes the entered setting. When set to 1, the panel automatically bypasses a sensor or zone after it causes an alarm. When set to 2, the panel waits until a sensor or zone has caused a second alarm (during the same arming period) before bypassing it. At either setting, the automatic bypass is logged into the event buffer. 2. Press ƒ and the display shows the new setting. A bypassed zone or sensor will be cleared (automatically "unbypassed") if the system receives no further activations from that sensor or zone over the next 48-50 hours. Changing the arming level also clears all automatically bypassed sensors and zones and resets the Swinger Limit count on all sensors and zones. The following describes how to program the settings that appear under REPORTING-PARTITION 1. 35 Programming the Panel
-
 1
1 -
2
-
3
-
4
-
5
-
6
-
7
-
8
-
9
-
10
-
11
-
12
-
13
-
14
-
15
-
16
-
17
-
18
-
19
-
20
-
21
-
22
-
23
-
24
-
25
-
26
-
27
-
28
-
29
-
30
-
31
-
32
-
33
-
34
-
 35
35 -
 36
36 -
 37
37 -
 38
38 -
 39
39 -
 40
40 -
 41
41 -
 42
42 -
 43
43 -
 44
44 -
 45
45 -
46
-
47
-
48
-
49
-
50
-
51
-
52
-
53
-
54
-
55
-
56
-
57
-
58
-
59
-
60
-
61
-
62
-
63
-
64
-
65
-
66
-
67
-
68
-
69
-
70
-
71
-
72
-
73
-
74
-
75
-
76
 |
 |