HP 1300 Service Manual - Page 132
Paper feed assembly, Removing the paper feed assembly
 |
UPC - 808736419819
View all HP 1300 manuals
Add to My Manuals
Save this manual to your list of manuals |
Page 132 highlights
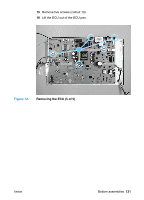
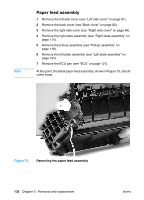
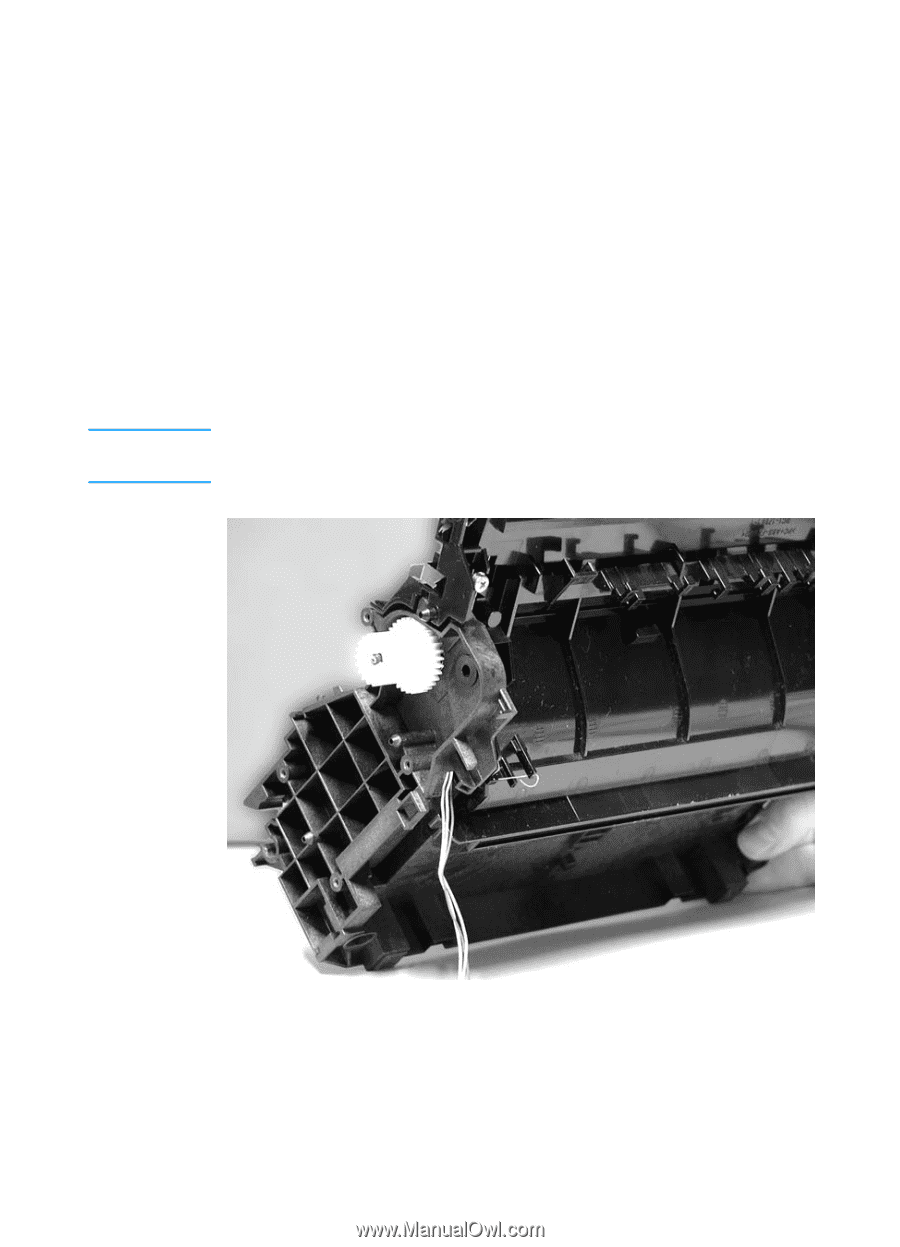
Note Paper feed assembly 1 Remove the left side cover (see "Left side cover" on page 81). 2 Remove the back cover (see "Back cover" on page 82). 3 Remove the right side cover (see "Right side cover" on page 84). 4 Remove the right plate assembly (see "Right plate assembly" on page 115). 5 Remove the pickup assembly (see "Pickup assembly" on page 118). 6 Remove the left plate assembly (see "Left plate assembly" on page 125). 7 Remove the ECU pan (see "ECU" on page 127). At this point, the black paper feed assembly, shown in Figure 73, should come loose. Figure 73. Removing the paper feed assembly 132 Chapter 5 - Removal and replacement ENWW
-
 1
1 -
2
-
3
-
4
-
5
-
6
-
7
-
8
-
9
-
10
-
11
-
12
-
13
-
14
-
15
-
16
-
17
-
18
-
19
-
20
-
21
-
22
-
23
-
24
-
25
-
26
-
27
-
28
-
29
-
30
-
31
-
32
-
33
-
34
-
35
-
36
-
37
-
38
-
39
-
40
-
41
-
42
-
43
-
44
-
45
-
46
-
47
-
48
-
49
-
50
-
51
-
52
-
53
-
54
-
55
-
56
-
57
-
58
-
59
-
60
-
61
-
62
-
63
-
64
-
65
-
66
-
67
-
68
-
69
-
70
-
71
-
72
-
73
-
74
-
75
-
76
-
77
-
78
-
79
-
80
-
81
-
82
-
83
-
84
-
85
-
86
-
87
-
88
-
89
-
90
-
91
-
92
-
93
-
94
-
95
-
96
-
97
-
98
-
99
-
100
-
101
-
102
-
103
-
104
-
105
-
106
-
107
-
108
-
109
-
110
-
111
-
112
-
113
-
114
-
115
-
116
-
117
-
118
-
119
-
120
-
121
-
122
-
123
-
124
-
125
-
126
-
 127
127 -
 128
128 -
 129
129 -
 130
130 -
 131
131 -
 132
132 -
 133
133 -
 134
134 -
 135
135 -
 136
136 -
 137
137 -
138
-
139
-
140
-
141
-
142
-
143
-
144
-
145
-
146
-
147
-
148
-
149
-
150
-
151
-
152
-
153
-
154
-
155
-
156
-
157
-
158
-
159
-
160
-
161
-
162
-
163
-
164
-
165
-
166
-
167
-
168
-
169
-
170
-
171
-
172
-
173
-
174
-
175
-
176
-
177
-
178
-
179
-
180
-
181
-
182
-
183
-
184
-
185
-
186
-
187
-
188
-
189
-
190
-
191
-
192
-
193
-
194
-
195
-
196
-
197
-
198
-
199
-
200
-
201
-
202
-
203
-
204
-
205
-
206
-
207
-
208
-
209
-
210
-
211
-
212
-
213
-
214
-
215
-
216
-
217
-
218
-
219
-
220
-
221
-
222
 |
 |
132
Chapter 5 - Removal and replacement
ENWW
Paper feed assembly
1
Remove the left side cover (see “Left side cover” on page 81).
2
Remove the back cover (see “Back cover” on page 82).
3
Remove the right side cover (see “Right side cover” on page 84).
4
Remove the right plate assembly (see “Right plate assembly” on
page 115).
5
Remove the pickup assembly (see “Pickup assembly” on
page 118).
6
Remove the left plate assembly (see “Left plate assembly” on
page 125).
7
Remove the ECU pan (see “ECU” on page 127).
Note
At this point, the black paper feed assembly, shown in Figure 73, should
come loose.
Figure 73.
Removing the paper feed assembly