HP 1300 Service Manual - Page 89
Front cover assembly, Front cover
 |
UPC - 808736419819
View all HP 1300 manuals
Add to My Manuals
Save this manual to your list of manuals |
Page 89 highlights
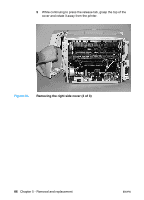
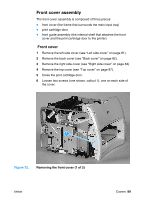
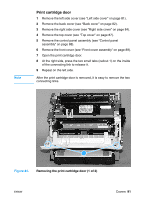
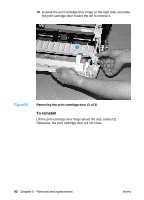
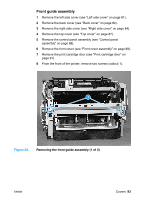
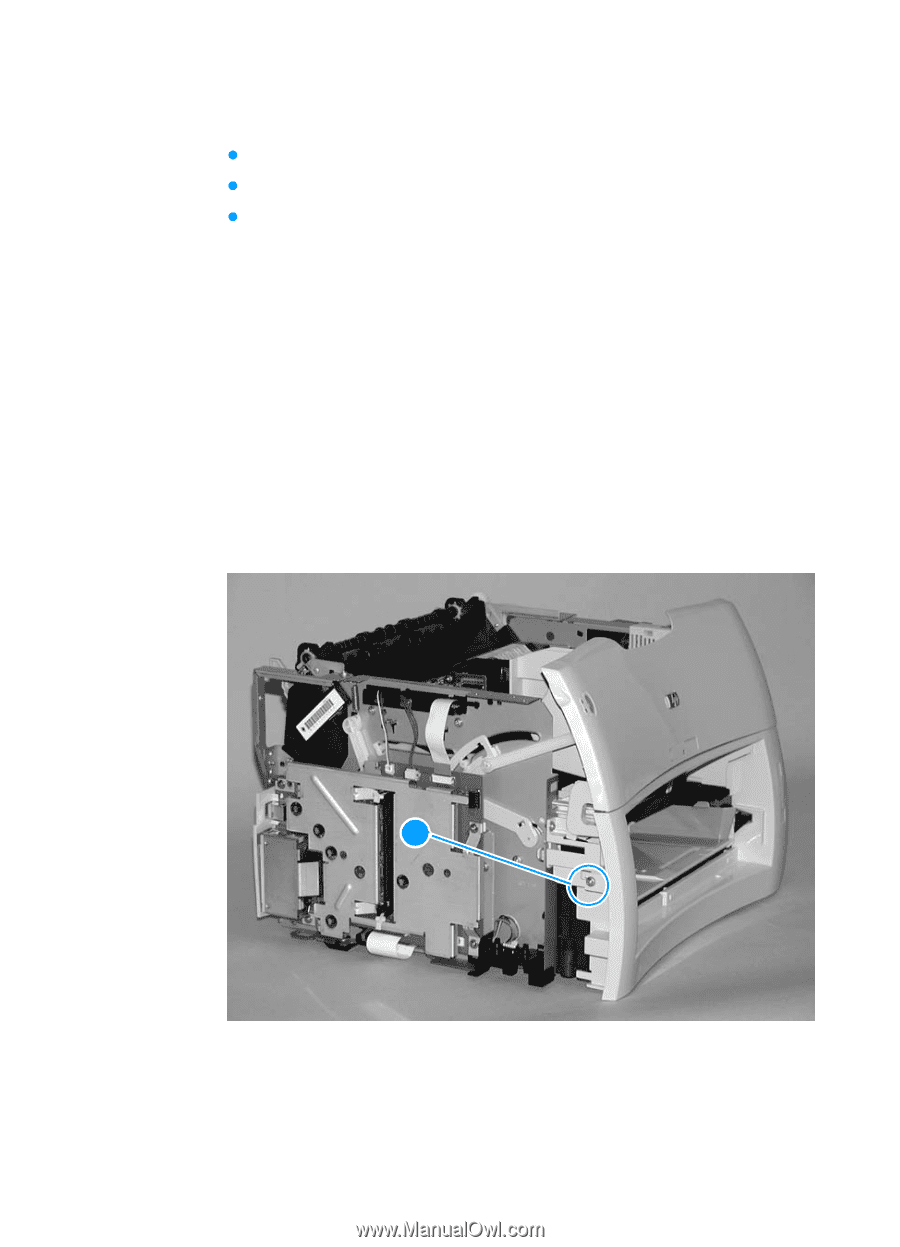
Front cover assembly The front cover assembly is composed of three pieces: z front cover (the frame that surrounds the main input tray) z print cartridge door z front guide assembly (the internal shelf that attaches the front cover and the print cartridge door to the printer) Front cover 1 Remove the left side cover (see "Left side cover" on page 81). 2 Remove the back cover (see "Back cover" on page 82). 3 Remove the right side cover (see "Right side cover" on page 84). 4 Remove the top cover (see "Top cover" on page 87). 5 Close the print cartridge door. 6 Loosen two screws (one shown, callout 1), one on each side of the cover. 1 Figure 32. Removing the front cover (1 of 2) ENWW Covers 89
-
 1
1 -
2
-
3
-
4
-
5
-
6
-
7
-
8
-
9
-
10
-
11
-
12
-
13
-
14
-
15
-
16
-
17
-
18
-
19
-
20
-
21
-
22
-
23
-
24
-
25
-
26
-
27
-
28
-
29
-
30
-
31
-
32
-
33
-
34
-
35
-
36
-
37
-
38
-
39
-
40
-
41
-
42
-
43
-
44
-
45
-
46
-
47
-
48
-
49
-
50
-
51
-
52
-
53
-
54
-
55
-
56
-
57
-
58
-
59
-
60
-
61
-
62
-
63
-
64
-
65
-
66
-
67
-
68
-
69
-
70
-
71
-
72
-
73
-
74
-
75
-
76
-
77
-
78
-
79
-
80
-
81
-
82
-
83
-
 84
84 -
 85
85 -
 86
86 -
 87
87 -
 88
88 -
 89
89 -
 90
90 -
 91
91 -
 92
92 -
 93
93 -
 94
94 -
95
-
96
-
97
-
98
-
99
-
100
-
101
-
102
-
103
-
104
-
105
-
106
-
107
-
108
-
109
-
110
-
111
-
112
-
113
-
114
-
115
-
116
-
117
-
118
-
119
-
120
-
121
-
122
-
123
-
124
-
125
-
126
-
127
-
128
-
129
-
130
-
131
-
132
-
133
-
134
-
135
-
136
-
137
-
138
-
139
-
140
-
141
-
142
-
143
-
144
-
145
-
146
-
147
-
148
-
149
-
150
-
151
-
152
-
153
-
154
-
155
-
156
-
157
-
158
-
159
-
160
-
161
-
162
-
163
-
164
-
165
-
166
-
167
-
168
-
169
-
170
-
171
-
172
-
173
-
174
-
175
-
176
-
177
-
178
-
179
-
180
-
181
-
182
-
183
-
184
-
185
-
186
-
187
-
188
-
189
-
190
-
191
-
192
-
193
-
194
-
195
-
196
-
197
-
198
-
199
-
200
-
201
-
202
-
203
-
204
-
205
-
206
-
207
-
208
-
209
-
210
-
211
-
212
-
213
-
214
-
215
-
216
-
217
-
218
-
219
-
220
-
221
-
222
 |
 |
ENWW
Covers
89
Front cover assembly
The front cover assembly is composed of three pieces:
front cover (the frame that surrounds the main input tray)
print cartridge door
front guide assembly (the internal shelf that attaches the front
cover and the print cartridge door to the printer)
Front cover
1
Remove the left side cover (see “Left side cover” on page 81).
2
Remove the back cover (see “Back cover” on page 82).
3
Remove the right side cover (see “Right side cover” on page 84).
4
Remove the top cover (see “Top cover” on page 87).
5
Close the print cartridge door.
6
Loosen two screws (one shown, callout 1), one on each side of
the cover.
Figure 32.
Removing the front cover (1 of 2)
1