HP 5500n HP Color LaserJet 5500 series printers - Software Technical Reference - Page 62
Manually Print on 2nd Side - color laserjet paper tray
 |
View all HP 5500n manuals
Add to My Manuals
Save this manual to your list of manuals |
Page 62 highlights
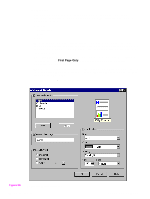
Heavy and Cardstock media can be manually printed on the second side, but there is no change to the print mode. Transparencies and labels should not be manually printed on the second side. Manually printing on the second side of a page is available when you are using the PCL 6 or PS driver (the PCL 5c driver does not support the feature). Select the Manually Print on 2nd Side check box to print on the second side of the paper for the base HP Color LaserJet model printers. Also select Manually Print on 2nd Side on the other HP LaserJet models for media sizes that are not available when using the automatic duplexing unit, such as card stock, glossy paper, labels, and thick media. To print a multiple-page document, follow these steps: Step 1 Print all even-number pages. Some applications have a selection in the file print window that specifies printing even or odd pages. Step 2 If your finished document has an odd number of pages, add a blank page to the bottom of the stack of even-number pages (behind the last even-number page). Step 3 Select MANUAL FEED as the paper source in your application (often found under page setup) or in the printer driver (click Document Defaults, click the Paper tab, and then select Manual Feed in the Source Is drop-down menu). Step 4 If you are using the PCL 6 driver, click Document Defaults, click the Finishing tab, click Details, and then select the Manually Print on 2nd Side check box. If you are using the PS driver, click Document Defaults, click the Advanced tab, select Manual Print on 2nd Side under Printer Features, and then click On. Manual Print on 2nd Side is not an option for the PCL 5c driver. Step 5 Print all odd number pages by completing the following procedure. When the printer's control panel shows the MANUALLY FEED message, insert the stack of paper (on which the even-number pages have been printed) into tray 1 in one of the following orientations: a. For portrait-orientation, long-edge binding (flips like a book), place the stack with the already-printed side facing up and the top of the pages toward the printer. b. For portrait-orientation, short-edge binding (flips like a note pad), place the stack with the already-printed side facing up and the top of the pages away from the printer. c. For landscape-orientation, long-edge binding (flips like a calendar), place the stack with the already-printed side facing up and the top of the pages to the left. d. For landscape-orientation, short-edge binding (flips like a wide book), place the stack with the already-printed side facing up and the top of the page to the right. (The top page should have page 2 facing downward.) 60 3 Driver features Software Technical Reference
-
 1
1 -
2
-
3
-
4
-
5
-
6
-
7
-
8
-
9
-
10
-
11
-
12
-
13
-
14
-
15
-
16
-
17
-
18
-
19
-
20
-
21
-
22
-
23
-
24
-
25
-
26
-
27
-
28
-
29
-
30
-
31
-
32
-
33
-
34
-
35
-
36
-
37
-
38
-
39
-
40
-
41
-
42
-
43
-
44
-
45
-
46
-
47
-
48
-
49
-
50
-
51
-
52
-
53
-
54
-
55
-
56
-
 57
57 -
 58
58 -
 59
59 -
 60
60 -
 61
61 -
 62
62 -
 63
63 -
 64
64 -
 65
65 -
 66
66 -
 67
67 -
68
-
69
-
70
-
71
-
72
-
73
-
74
-
75
-
76
-
77
-
78
-
79
-
80
-
81
-
82
-
83
-
84
-
85
-
86
-
87
-
88
-
89
-
90
-
91
-
92
-
93
-
94
-
95
-
96
-
97
-
98
-
99
-
100
-
101
-
102
-
103
-
104
-
105
-
106
-
107
-
108
-
109
-
110
-
111
-
112
-
113
-
114
-
115
-
116
-
117
-
118
-
119
-
120
-
121
-
122
-
123
-
124
-
125
-
126
-
127
-
128
-
129
-
130
-
131
-
132
-
133
-
134
-
135
-
136
-
137
-
138
-
139
-
140
-
141
-
142
-
143
-
144
-
145
-
146
-
147
-
148
-
149
-
150
-
151
-
152
-
153
-
154
-
155
-
156
-
157
-
158
-
159
-
160
-
161
-
162
-
163
-
164
-
165
-
166
-
167
-
168
-
169
-
170
-
171
-
172
-
173
-
174
-
175
-
176
-
177
-
178
-
179
-
180
-
181
-
182
-
183
-
184
-
185
-
186
-
187
-
188
-
189
-
190
-
191
-
192
-
193
-
194
-
195
-
196
-
197
-
198
-
199
-
200
 |
 |
