HP 9000 rp4410-4 Installation Guide, Sixth Edition - HP 9000 rp4410/rp4440 - Page 43
Installing Processors, Disk Drive Installation in Slot 2
 |
View all HP 9000 rp4410-4 manuals
Add to My Manuals
Save this manual to your list of manuals |
Page 43 highlights
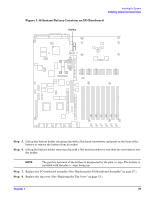
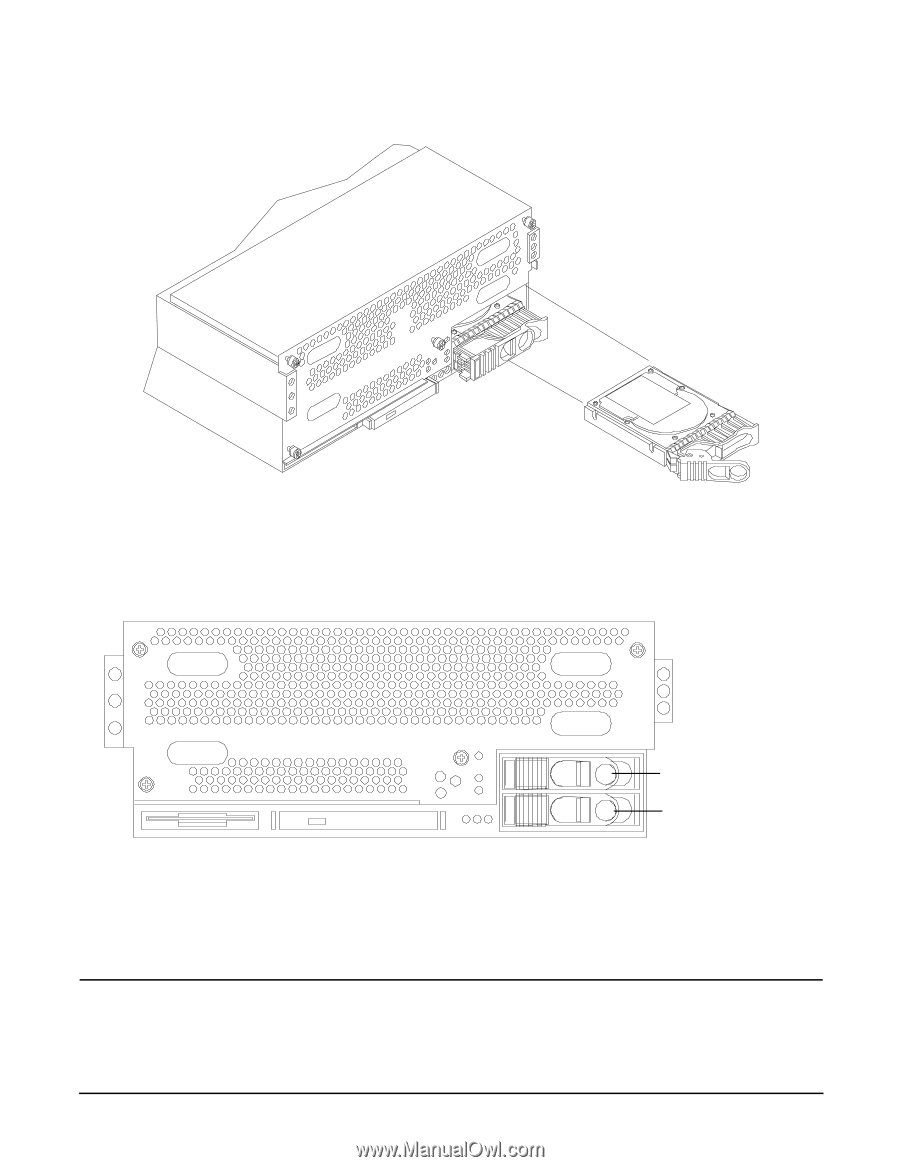
Figure 1-21 Disk Drive Installation in Slot 2 Installing the System Installing Additional Components Step 3. Close the drive ejector handle by pushing it down until it clicks. The hot-pluggable disk drive is now correctly installed. Figure 1-22 Disk Drive Installation in Slots 1 and 2 Slot 2-SCSI ID 1 Slot 1-SCSI ID 0 Installing Processors This section provides information about installing processors. WARNING Voltages are present at various locations within the server whenever an ac power source is connected. This voltage is present even when the main power switch is in the off position. Chapter 1 43
-
 1
1 -
2
-
3
-
4
-
5
-
6
-
7
-
8
-
9
-
10
-
11
-
12
-
13
-
14
-
15
-
16
-
17
-
18
-
19
-
20
-
21
-
22
-
23
-
24
-
25
-
26
-
27
-
28
-
29
-
30
-
31
-
32
-
33
-
34
-
35
-
36
-
37
-
 38
38 -
 39
39 -
 40
40 -
 41
41 -
 42
42 -
 43
43 -
 44
44 -
 45
45 -
 46
46 -
 47
47 -
 48
48 -
49
-
50
-
51
-
52
-
53
-
54
-
55
-
56
-
57
-
58
-
59
-
60
-
61
-
62
-
63
-
64
-
65
-
66
-
67
-
68
-
69
-
70
-
71
-
72
-
73
-
74
-
75
-
76
-
77
-
78
-
79
-
80
-
81
-
82
-
83
-
84
-
85
-
86
-
87
-
88
-
89
-
90
-
91
-
92
-
93
-
94
-
95
-
96
-
97
-
98
-
99
-
100
-
101
-
102
-
103
 |
 |
Installing the System
Installing Additional Components
Chapter 1
43
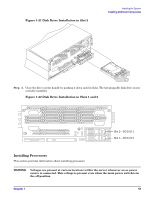
Figure 1-21 Disk Drive Installation in Slot 2
Step 3.
Close the drive ejector handle by pushing it down until it clicks. The hot-pluggable disk drive is now
correctly installed.
Figure 1-22 Disk Drive Installation in Slots 1 and 2
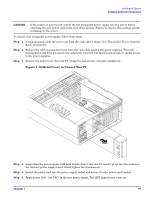
Installing Processors
This section provides information about installing processors.
WARNING
Voltages are present at various locations within the server whenever an ac power
source is connected. This voltage is present even when the main power switch is in
the off position.
Slot 2—SCSI ID 1
Slot 1—SCSI ID 0