HP Armada 4200 Armada 4100 and 4200 Families of Personal Computers Maintenance - Page 31
Clearing the Power-On and Setup Passwords, Restart the computer. During the Power-On Self Test POST
 |
View all HP Armada 4200 manuals
Add to My Manuals
Save this manual to your list of manuals |
Page 31 highlights
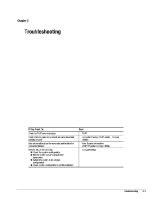
If you are running Diagnostics from a diskette, complete the following steps: a. Insert the Diagnostics diskette into the diskette drive and turn on the computer. b. At the Welcome Screen, press Enter to accept OK. c. Select Computer Checkup (TEST). d. Select Prompted Diagnostics after "Identifying System Hardware" completes. e. Select Interactive Testing and follow the displayed instructions. Refer to Chapter 3 for the description and spare part number of the loopback plugs. After completing the preliminary steps, run POST (Section 2.3) and Computer Checkup (Section 2.5). 2.2 Clearing the Power-On and Setup Passwords The power-on password prevents use of the computer until the password is entered. The setup password prevents unauthorized changes to Computer Setup. To clear the passwords, you must remove all power from the system board. If you do not know the passwords, use the following procedure to clear the password: 1. Remove all battery packs from the battery bay and DualBay, if applicable. 2. Disconnect the AC power. 2. Remove the real time clock battery. 4. Wait five minutes. 5. Reconnect the AC power. 6. Restart the computer. During the Power-On Self Test (POST), a "162 System Options not Set" message appears. (See Section 2.4 for additional POST error messages). 7. Shut down the computer, then turn off the power again. 8. Replace the real time clock battery. 9. Install the battery pack(s). 10. Proceed with the troubleshooting procedures. Troubleshooting 2-3
-
 1
1 -
2
-
3
-
4
-
5
-
6
-
7
-
8
-
9
-
10
-
11
-
12
-
13
-
14
-
15
-
16
-
17
-
18
-
19
-
20
-
21
-
22
-
23
-
24
-
25
-
 26
26 -
 27
27 -
 28
28 -
 29
29 -
 30
30 -
 31
31 -
 32
32 -
 33
33 -
 34
34 -
 35
35 -
 36
36 -
37
-
38
-
39
-
40
-
41
-
42
-
43
-
44
-
45
-
46
-
47
-
48
-
49
-
50
-
51
-
52
-
53
-
54
-
55
-
56
-
57
-
58
-
59
-
60
-
61
-
62
-
63
-
64
-
65
-
66
-
67
-
68
-
69
-
70
-
71
-
72
-
73
-
74
-
75
-
76
-
77
-
78
-
79
-
80
-
81
-
82
-
83
-
84
-
85
-
86
-
87
-
88
-
89
-
90
-
91
-
92
-
93
-
94
-
95
-
96
-
97
-
98
-
99
-
100
-
101
-
102
-
103
-
104
-
105
-
106
-
107
-
108
-
109
-
110
-
111
-
112
-
113
-
114
-
115
-
116
-
117
-
118
-
119
-
120
-
121
-
122
-
123
-
124
-
125
-
126
-
127
-
128
-
129
-
130
-
131
-
132
-
133
-
134
-
135
-
136
-
137
-
138
-
139
-
140
-
141
-
142
-
143
-
144
-
145
-
146
-
147
-
148
-
149
-
150
-
151
-
152
-
153
-
154
-
155
-
156
-
157
-
158
-
159
-
160
-
161
-
162
-
163
-
164
-
165
-
166
-
167
-
168
-
169
-
170
-
171
-
172
-
173
-
174
-
175
-
176
-
177
-
178
-
179
-
180
-
181
-
182
-
183
-
184
-
185
-
186
-
187
-
188
-
189
-
190
 |
 |