HP Color LaserJet Enterprise CP5525 HP Color LaserJet Enterprise CP5520 - User - Page 162
Delete a stored job, Set job storage options with Windows
 |
View all HP Color LaserJet Enterprise CP5525 manuals
Add to My Manuals
Save this manual to your list of manuals |
Page 162 highlights
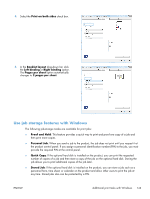
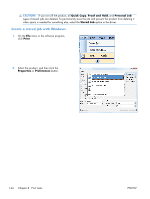
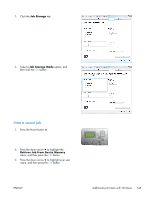
4. Press the down arrow to highlight a job name, and then press the OK button. The Print or Delete option is highlighted. NOTE: If you have stored more than one job on the product, you have the option to print or delete all of them at the same time. 5. Press the OK button to select the Print or Delete option. Delete a stored job When you send a stored job, the product overwrites any previous jobs with the same user and job name. If a job is not already stored under the same user and job name, and the product needs additional space, the product might delete other stored jobs starting with the oldest. You can change the number of jobs that can be stored from the Retrieve Job From Device Memory menu on the product control panel. You can delete a job from the control panel, from the HP Embedded Web Server, or from HP Web Jetadmin. To delete a job from the control panel, use the following procedure: 1. Press the Home button . 2. Press the down arrow to highlight the Retrieve Job From Device Memory menu, and then press the OK button. 3. Press the down arrow to highlight a job name, and then press the OK button. 4. Press the down arrow to highlight the Delete option, and then press the OK button. Set job storage options with Windows Print one copy for proof before printing all the copies 1. On the File menu in the software program, click Print. 2. Select the product, and then click the Properties or Preferences button. 3. Click the Job Storage tab. 4. In the Job Storage Mode area, click the Proof and Hold option. Temporarily store a personal job on the product and print it later NOTE: The product deletes the job after you print it. 1. On the File menu in the software program, click Print. 2. Select the product, and then click the Properties or Preferences button. 3. Click the Job Storage tab. 4. In the Job Storage Mode area, click the Personal Job option. 146 Chapter 8 Print tasks ENWW
-
 1
1 -
2
-
3
-
4
-
5
-
6
-
7
-
8
-
9
-
10
-
11
-
12
-
13
-
14
-
15
-
16
-
17
-
18
-
19
-
20
-
21
-
22
-
23
-
24
-
25
-
26
-
27
-
28
-
29
-
30
-
31
-
32
-
33
-
34
-
35
-
36
-
37
-
38
-
39
-
40
-
41
-
42
-
43
-
44
-
45
-
46
-
47
-
48
-
49
-
50
-
51
-
52
-
53
-
54
-
55
-
56
-
57
-
58
-
59
-
60
-
61
-
62
-
63
-
64
-
65
-
66
-
67
-
68
-
69
-
70
-
71
-
72
-
73
-
74
-
75
-
76
-
77
-
78
-
79
-
80
-
81
-
82
-
83
-
84
-
85
-
86
-
87
-
88
-
89
-
90
-
91
-
92
-
93
-
94
-
95
-
96
-
97
-
98
-
99
-
100
-
101
-
102
-
103
-
104
-
105
-
106
-
107
-
108
-
109
-
110
-
111
-
112
-
113
-
114
-
115
-
116
-
117
-
118
-
119
-
120
-
121
-
122
-
123
-
124
-
125
-
126
-
127
-
128
-
129
-
130
-
131
-
132
-
133
-
134
-
135
-
136
-
137
-
138
-
139
-
140
-
141
-
142
-
143
-
144
-
145
-
146
-
147
-
148
-
149
-
150
-
151
-
152
-
153
-
154
-
155
-
156
-
 157
157 -
 158
158 -
 159
159 -
 160
160 -
 161
161 -
 162
162 -
 163
163 -
 164
164 -
 165
165 -
 166
166 -
 167
167 -
168
-
169
-
170
-
171
-
172
-
173
-
174
-
175
-
176
-
177
-
178
-
179
-
180
-
181
-
182
-
183
-
184
-
185
-
186
-
187
-
188
-
189
-
190
-
191
-
192
-
193
-
194
-
195
-
196
-
197
-
198
-
199
-
200
-
201
-
202
-
203
-
204
-
205
-
206
-
207
-
208
-
209
-
210
-
211
-
212
-
213
-
214
-
215
-
216
-
217
-
218
-
219
-
220
-
221
-
222
-
223
-
224
-
225
-
226
-
227
-
228
-
229
-
230
-
231
-
232
-
233
-
234
-
235
-
236
-
237
-
238
-
239
-
240
-
241
-
242
-
243
-
244
-
245
-
246
-
247
-
248
-
249
-
250
-
251
-
252
-
253
-
254
-
255
-
256
-
257
-
258
-
259
-
260
-
261
-
262
 |
 |