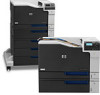
HP Color LaserJet Enterprise CP5525 HP Color LaserJet Enterprise CP5520 - User - Page 211
Print a cleaning Calibrate the product, Set the image registration, Device Maintenance
 |
View all HP Color LaserJet Enterprise CP5525 manuals
Add to My Manuals
Save this manual to your list of manuals |
Page 211 highlights
Print a cleaning page Print a cleaning page to remove dust and excess toner from the paper path if you are having any of the following problems: ● Specks of toner are on the printed pages. ● Toner is smearing on the printed pages. ● Repeated marks occur on the printed pages. Use the following procedure to print a cleaning page. 1. At the product control panel, press the Home button . 2. Open the following menus: 1. Device Maintenance 2. Calibration/Cleaning 3. Press the down arrow to highlight the Print Cleaning Page menu item, and then press the OK button. 4. Completion of the cleaning process depends on the product model: ● Non-duplex models: After the first side prints, reload the page into Tray 1 according the instructions, and then press the OK button. After the second side prints, the task is complete. Discard the printed page. ● Duplex models: After both sides print, the task is complete. Discard the printed page. Calibrate the product Calibration is a product function that optimizes print quality. If you experience any image-quality problems, calibrate the product. 1. Press the Home button . 2. Press the down arrow to highlight the Device Maintenance menu, and then press the OK button. 3. Press the down arrow to highlight the Calibration/Cleaning menu, and then press the OK button. 4. Press the down arrow to highlight the Full Calibration setting, and then press the OK button. Set the image registration If you are having problems with text aligning on the page, use the Set Registration menu to set the image registration. 1. Press the Home button . 2. Press the down arrow to highlight the Administration menu, and then press the OK button. ENWW Improve print quality 195
-
 1
1 -
2
-
3
-
4
-
5
-
6
-
7
-
8
-
9
-
10
-
11
-
12
-
13
-
14
-
15
-
16
-
17
-
18
-
19
-
20
-
21
-
22
-
23
-
24
-
25
-
26
-
27
-
28
-
29
-
30
-
31
-
32
-
33
-
34
-
35
-
36
-
37
-
38
-
39
-
40
-
41
-
42
-
43
-
44
-
45
-
46
-
47
-
48
-
49
-
50
-
51
-
52
-
53
-
54
-
55
-
56
-
57
-
58
-
59
-
60
-
61
-
62
-
63
-
64
-
65
-
66
-
67
-
68
-
69
-
70
-
71
-
72
-
73
-
74
-
75
-
76
-
77
-
78
-
79
-
80
-
81
-
82
-
83
-
84
-
85
-
86
-
87
-
88
-
89
-
90
-
91
-
92
-
93
-
94
-
95
-
96
-
97
-
98
-
99
-
100
-
101
-
102
-
103
-
104
-
105
-
106
-
107
-
108
-
109
-
110
-
111
-
112
-
113
-
114
-
115
-
116
-
117
-
118
-
119
-
120
-
121
-
122
-
123
-
124
-
125
-
126
-
127
-
128
-
129
-
130
-
131
-
132
-
133
-
134
-
135
-
136
-
137
-
138
-
139
-
140
-
141
-
142
-
143
-
144
-
145
-
146
-
147
-
148
-
149
-
150
-
151
-
152
-
153
-
154
-
155
-
156
-
157
-
158
-
159
-
160
-
161
-
162
-
163
-
164
-
165
-
166
-
167
-
168
-
169
-
170
-
171
-
172
-
173
-
174
-
175
-
176
-
177
-
178
-
179
-
180
-
181
-
182
-
183
-
184
-
185
-
186
-
187
-
188
-
189
-
190
-
191
-
192
-
193
-
194
-
195
-
196
-
197
-
198
-
199
-
200
-
201
-
202
-
203
-
204
-
205
-
 206
206 -
 207
207 -
 208
208 -
 209
209 -
 210
210 -
 211
211 -
 212
212 -
 213
213 -
 214
214 -
 215
215 -
 216
216 -
217
-
218
-
219
-
220
-
221
-
222
-
223
-
224
-
225
-
226
-
227
-
228
-
229
-
230
-
231
-
232
-
233
-
234
-
235
-
236
-
237
-
238
-
239
-
240
-
241
-
242
-
243
-
244
-
245
-
246
-
247
-
248
-
249
-
250
-
251
-
252
-
253
-
254
-
255
-
256
-
257
-
258
-
259
-
260
-
261
-
262
 |
 |