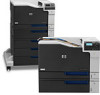
HP Color LaserJet Enterprise CP5525 HP Color LaserJet Enterprise CP5520 - User - Page 98
Close the tray., printing or the paper might jam.
 |
View all HP Color LaserJet Enterprise CP5525 manuals
Add to My Manuals
Save this manual to your list of manuals |
Page 98 highlights
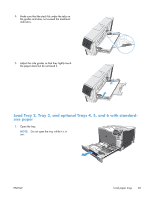
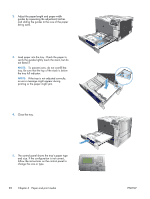
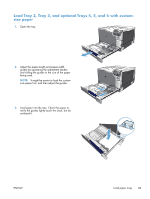
2. Adjust the paper-length and paper-width guides by squeezing the adjustment latches and sliding the guides to the size of the paper being used. 3. Load paper into the tray. Check the paper to verify the guides lightly touch the stack, but do not bend it. NOTE: To prevent jams, do not overfill the tray. Be sure that the top of the stack is below the tray full indicator. NOTE: If the tray is not adjusted correctly, an error message might appear during printing or the paper might jam. 4. Close the tray. 5. The control panel shows the tray's paper type and size. If the configuration is not correct, follow the instructions on the control panel to change the size or type. 82 Chapter 6 Paper and print media ENWW
-
 1
1 -
2
-
3
-
4
-
5
-
6
-
7
-
8
-
9
-
10
-
11
-
12
-
13
-
14
-
15
-
16
-
17
-
18
-
19
-
20
-
21
-
22
-
23
-
24
-
25
-
26
-
27
-
28
-
29
-
30
-
31
-
32
-
33
-
34
-
35
-
36
-
37
-
38
-
39
-
40
-
41
-
42
-
43
-
44
-
45
-
46
-
47
-
48
-
49
-
50
-
51
-
52
-
53
-
54
-
55
-
56
-
57
-
58
-
59
-
60
-
61
-
62
-
63
-
64
-
65
-
66
-
67
-
68
-
69
-
70
-
71
-
72
-
73
-
74
-
75
-
76
-
77
-
78
-
79
-
80
-
81
-
82
-
83
-
84
-
85
-
86
-
87
-
88
-
89
-
90
-
91
-
92
-
 93
93 -
 94
94 -
 95
95 -
 96
96 -
 97
97 -
 98
98 -
 99
99 -
 100
100 -
 101
101 -
 102
102 -
 103
103 -
104
-
105
-
106
-
107
-
108
-
109
-
110
-
111
-
112
-
113
-
114
-
115
-
116
-
117
-
118
-
119
-
120
-
121
-
122
-
123
-
124
-
125
-
126
-
127
-
128
-
129
-
130
-
131
-
132
-
133
-
134
-
135
-
136
-
137
-
138
-
139
-
140
-
141
-
142
-
143
-
144
-
145
-
146
-
147
-
148
-
149
-
150
-
151
-
152
-
153
-
154
-
155
-
156
-
157
-
158
-
159
-
160
-
161
-
162
-
163
-
164
-
165
-
166
-
167
-
168
-
169
-
170
-
171
-
172
-
173
-
174
-
175
-
176
-
177
-
178
-
179
-
180
-
181
-
182
-
183
-
184
-
185
-
186
-
187
-
188
-
189
-
190
-
191
-
192
-
193
-
194
-
195
-
196
-
197
-
198
-
199
-
200
-
201
-
202
-
203
-
204
-
205
-
206
-
207
-
208
-
209
-
210
-
211
-
212
-
213
-
214
-
215
-
216
-
217
-
218
-
219
-
220
-
221
-
222
-
223
-
224
-
225
-
226
-
227
-
228
-
229
-
230
-
231
-
232
-
233
-
234
-
235
-
236
-
237
-
238
-
239
-
240
-
241
-
242
-
243
-
244
-
245
-
246
-
247
-
248
-
249
-
250
-
251
-
252
-
253
-
254
-
255
-
256
-
257
-
258
-
259
-
260
-
261
-
262
 |
 |
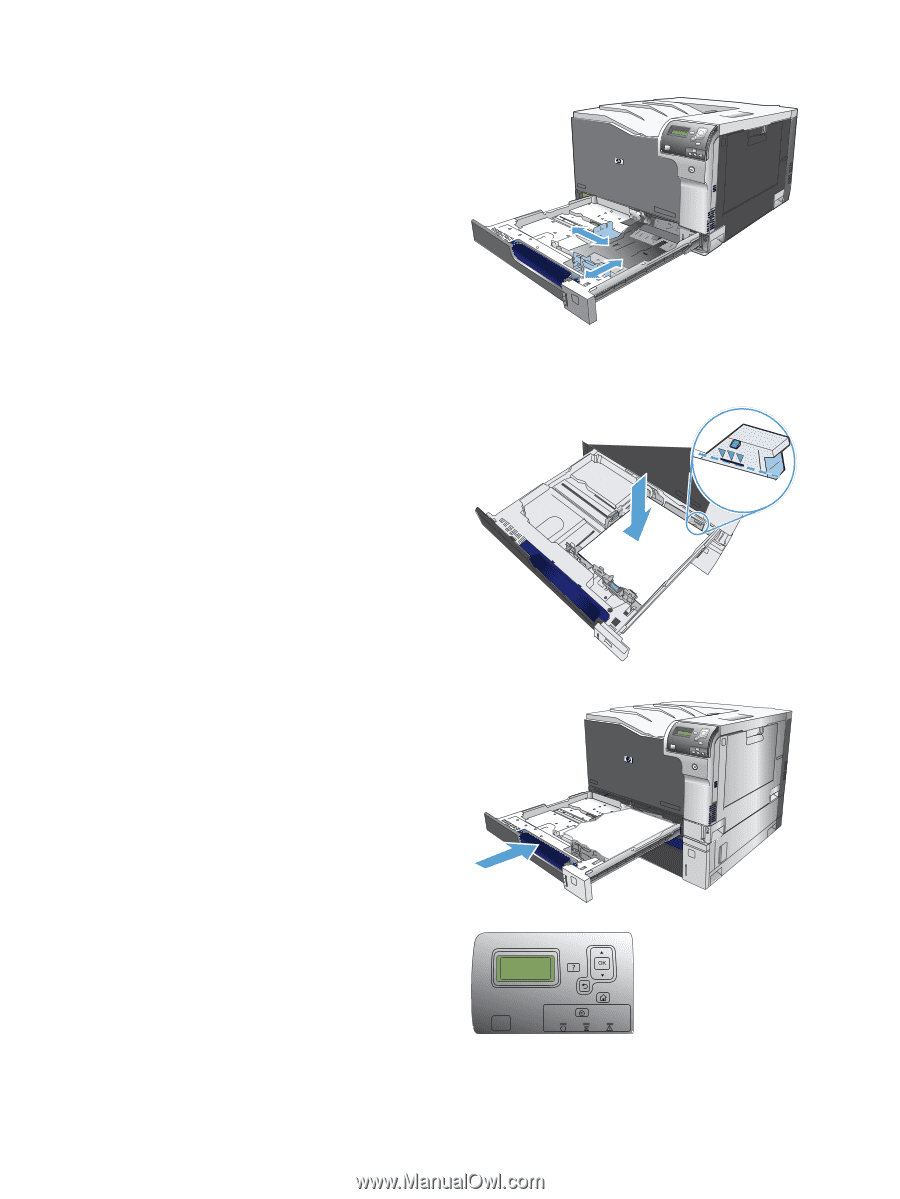
2.
Adjust the paper-length and paper-width
guides by squeezing the adjustment latches
and sliding the guides to the size of the paper
being used.
3.
Load paper into the tray. Check the paper to
verify the guides lightly touch the stack, but do
not bend it.
NOTE:
To prevent jams, do not overfill the
tray. Be sure that the top of the stack is below
the tray full indicator.
NOTE:
If the tray is not adjusted correctly,
an error message might appear during
printing or the paper might jam.
4.
Close the tray.
5.
The control panel shows the tray’s paper type
and size. If the configuration is not correct,
follow the instructions on the control panel to
change the size or type.
82
Chapter 6
Paper and print media
ENWW