HP Color LaserJet Enterprise CP5525 HP Color LaserJet Enterprise CP5520 - User - Page 212
Internal print-quality test s, Check the print cartridge, Adjust Tray <X>
 |
View all HP Color LaserJet Enterprise CP5525 manuals
Add to My Manuals
Save this manual to your list of manuals |
Page 212 highlights
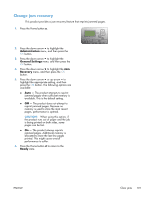
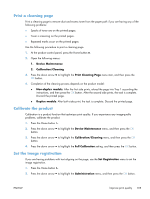
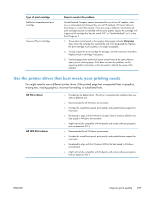
3. Press the down arrow to highlight the General Settings menu, and then press the OK button. 4. Press the down arrow to highlight the Print Quality menu, and then press the OK button. 5. Press the down arrow to highlight the Image Registration menu, and then press the OK button. 6. Press the down arrow to highlight the Adjust Tray menu for the tray that you want to adjust, and then press the OK button. 7. Press the down arrow to highlight the Print Test Page setting, and then press the OK button. 8. Follow the instructions on the test page to complete the adjustment. Internal print-quality test pages Use the built-in print-quality troubleshooting pages to help diagnose and solve print-quality problems. 1. Press the Home button . 2. Open the following menus: 1. Troubleshooting 2. Print Quality Pages 3. Press the down arrow to highlight the Print PQ Troubleshooting Pages item, and then press the OK button to print the pages. The product returns to the Ready state after printing the print-quality troubleshooting pages. Follow the instructions on the pages that print out. Check the print cartridge Check each print cartridge, and replace it if necessary, if you are having any of the following problems: ● The printing is too light or seems faded in areas. ● Printed pages have small unprinted areas. ● Printed pages have streaks or bands. NOTE: If you are using a draft or EconoMode print setting, the printing might appear light. If you determine that you need to replace a print cartridge, print the supplies status page to find the part number for the correct genuine HP print cartridge. 196 Chapter 11 Solve problems ENWW
-
 1
1 -
2
-
3
-
4
-
5
-
6
-
7
-
8
-
9
-
10
-
11
-
12
-
13
-
14
-
15
-
16
-
17
-
18
-
19
-
20
-
21
-
22
-
23
-
24
-
25
-
26
-
27
-
28
-
29
-
30
-
31
-
32
-
33
-
34
-
35
-
36
-
37
-
38
-
39
-
40
-
41
-
42
-
43
-
44
-
45
-
46
-
47
-
48
-
49
-
50
-
51
-
52
-
53
-
54
-
55
-
56
-
57
-
58
-
59
-
60
-
61
-
62
-
63
-
64
-
65
-
66
-
67
-
68
-
69
-
70
-
71
-
72
-
73
-
74
-
75
-
76
-
77
-
78
-
79
-
80
-
81
-
82
-
83
-
84
-
85
-
86
-
87
-
88
-
89
-
90
-
91
-
92
-
93
-
94
-
95
-
96
-
97
-
98
-
99
-
100
-
101
-
102
-
103
-
104
-
105
-
106
-
107
-
108
-
109
-
110
-
111
-
112
-
113
-
114
-
115
-
116
-
117
-
118
-
119
-
120
-
121
-
122
-
123
-
124
-
125
-
126
-
127
-
128
-
129
-
130
-
131
-
132
-
133
-
134
-
135
-
136
-
137
-
138
-
139
-
140
-
141
-
142
-
143
-
144
-
145
-
146
-
147
-
148
-
149
-
150
-
151
-
152
-
153
-
154
-
155
-
156
-
157
-
158
-
159
-
160
-
161
-
162
-
163
-
164
-
165
-
166
-
167
-
168
-
169
-
170
-
171
-
172
-
173
-
174
-
175
-
176
-
177
-
178
-
179
-
180
-
181
-
182
-
183
-
184
-
185
-
186
-
187
-
188
-
189
-
190
-
191
-
192
-
193
-
194
-
195
-
196
-
197
-
198
-
199
-
200
-
201
-
202
-
203
-
204
-
205
-
206
-
 207
207 -
 208
208 -
 209
209 -
 210
210 -
 211
211 -
 212
212 -
 213
213 -
 214
214 -
 215
215 -
 216
216 -
 217
217 -
218
-
219
-
220
-
221
-
222
-
223
-
224
-
225
-
226
-
227
-
228
-
229
-
230
-
231
-
232
-
233
-
234
-
235
-
236
-
237
-
238
-
239
-
240
-
241
-
242
-
243
-
244
-
245
-
246
-
247
-
248
-
249
-
250
-
251
-
252
-
253
-
254
-
255
-
256
-
257
-
258
-
259
-
260
-
261
-
262
 |
 |
