HP LaserJet Managed MFP E82540-E82560 On-Site Installation Guide - Page 34
Staging checklists
 |
View all HP LaserJet Managed MFP E82540-E82560 manuals
Add to My Manuals
Save this manual to your list of manuals |
Page 34 highlights
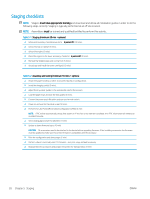
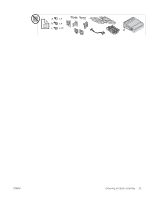
Staging checklists NOTE: Stagers must take appropriate training and download and utilize all installation guides in order to do the following steps correctly. Staging is typically performed at an off site location. NOTE: Assemblers must be trained and qualified/certified to perform this activity. Table 5-1 Staging (minimum 30 min + options) ❑ Unbox and inventory miscellaneous items - 4 person lift (10 mins). ❑ Unbox the tray or cabinet (5 mins). ❑ Unbox the engine (5 mins). ❑ Place the engine on the lower accessory, if ordered - 4 person lift (2 mins). ❑ Remove the shipping tape and scanner lock (5 mins). ❑ Unpackage and install the toner cartridge(s) (2 mins). Table 5-2 Assembly and testing (minimum 55 mins + options) ❑ Attach the paper handling or other accessories (based on configuration). ❑ Install the imaging unit(s) (5 mins). ❑ Adjust the tray paper guides to the appropriate size for the account. ❑ Load the paper trays and lock the rear guides (5 mins). ❑ Connect the power and LAN cables and turn on the main switch. ❑ Power on and wait for the initial screen (2 mins). ❑ Perform the Late Point Differentiation Configuration (LPDC) (3 min). NOTE: LPDC will be automatically set up after power on. If this fails or no internet is available, the LPDC information will need to be installed manually. ❑ Select a language and set the date/time (1 min) ❑ Update to latest firmware (up to 20 min) CAUTION: All accessories need to be attached to the device before upgrading firmware. After installing accessories the firmware must be updated to make sure the printer firmware is compatible with the accessory. ❑ Print the configuration and demo pages (2 min) ❑ Perform a basic functionality test (10 minutes) - test print, copy, and each accessory ❑ Disassemble the accessories and prepare the printer for transportation (3 min) 28 Chapter 5 Staging ENWW
-
 1
1 -
2
-
3
-
4
-
5
-
6
-
7
-
8
-
9
-
10
-
11
-
12
-
13
-
14
-
15
-
16
-
17
-
18
-
19
-
20
-
21
-
22
-
23
-
24
-
25
-
26
-
27
-
28
-
 29
29 -
 30
30 -
 31
31 -
 32
32 -
 33
33 -
 34
34 -
 35
35 -
 36
36 -
 37
37 -
 38
38 -
 39
39 -
40
-
41
-
42
-
43
-
44
-
45
-
46
-
47
-
48
-
49
-
50
-
51
-
52
-
53
-
54
-
55
-
56
-
57
-
58
-
59
-
60
-
61
-
62
-
63
-
64
-
65
-
66
-
67
-
68
-
69
-
70
-
71
-
72
-
73
-
74
-
75
-
76
-
77
-
78
-
79
-
80
-
81
-
82
-
83
-
84
-
85
-
86
-
87
-
88
-
89
-
90
-
91
-
92
-
93
-
94
-
95
-
96
-
97
-
98
-
99
-
100
-
101
-
102
-
103
-
104
-
105
-
106
 |
 |