HP ML150 HP ProLiant ML100 Series Server User Guide - Page 34
Close or install the tower bezel, as needed
 |
UPC - 884420743644
View all HP ML150 manuals
Add to My Manuals
Save this manual to your list of manuals |
Page 34 highlights
7. Connect the cable to the cache module. 8. Install the battery pack. 9. Connect the cable to the controller. 10. Route the cable. 11. Install the access panel. 12. For ML110 G6 servers, slide the server back into the rack. 13. For ML150 G6 servers, do one of the following: o Close or install the tower bezel, as needed. o Slide the server back into the rack. 14. Install the server into the rack. 15. Power up the server (on page 7). Hardware options installation 34
-
 1
1 -
2
-
3
-
4
-
5
-
6
-
7
-
8
-
9
-
10
-
11
-
12
-
13
-
14
-
15
-
16
-
17
-
18
-
19
-
20
-
21
-
22
-
23
-
24
-
25
-
26
-
27
-
28
-
 29
29 -
 30
30 -
 31
31 -
 32
32 -
 33
33 -
 34
34 -
 35
35 -
 36
36 -
 37
37 -
 38
38 -
 39
39 -
40
-
41
-
42
-
43
-
44
-
45
-
46
-
47
-
48
-
49
-
50
-
51
-
52
-
53
-
54
-
55
-
56
-
57
-
58
-
59
-
60
-
61
-
62
-
63
-
64
-
65
-
66
-
67
-
68
-
69
-
70
-
71
-
72
-
73
-
74
-
75
-
76
-
77
-
78
-
79
-
80
-
81
-
82
-
83
-
84
-
85
-
86
-
87
-
88
-
89
-
90
-
91
-
92
-
93
-
94
-
95
-
96
-
97
-
98
-
99
-
100
-
101
-
102
-
103
-
104
-
105
-
106
-
107
-
108
-
109
-
110
-
111
-
112
 |
 |
Hardware options installation 34
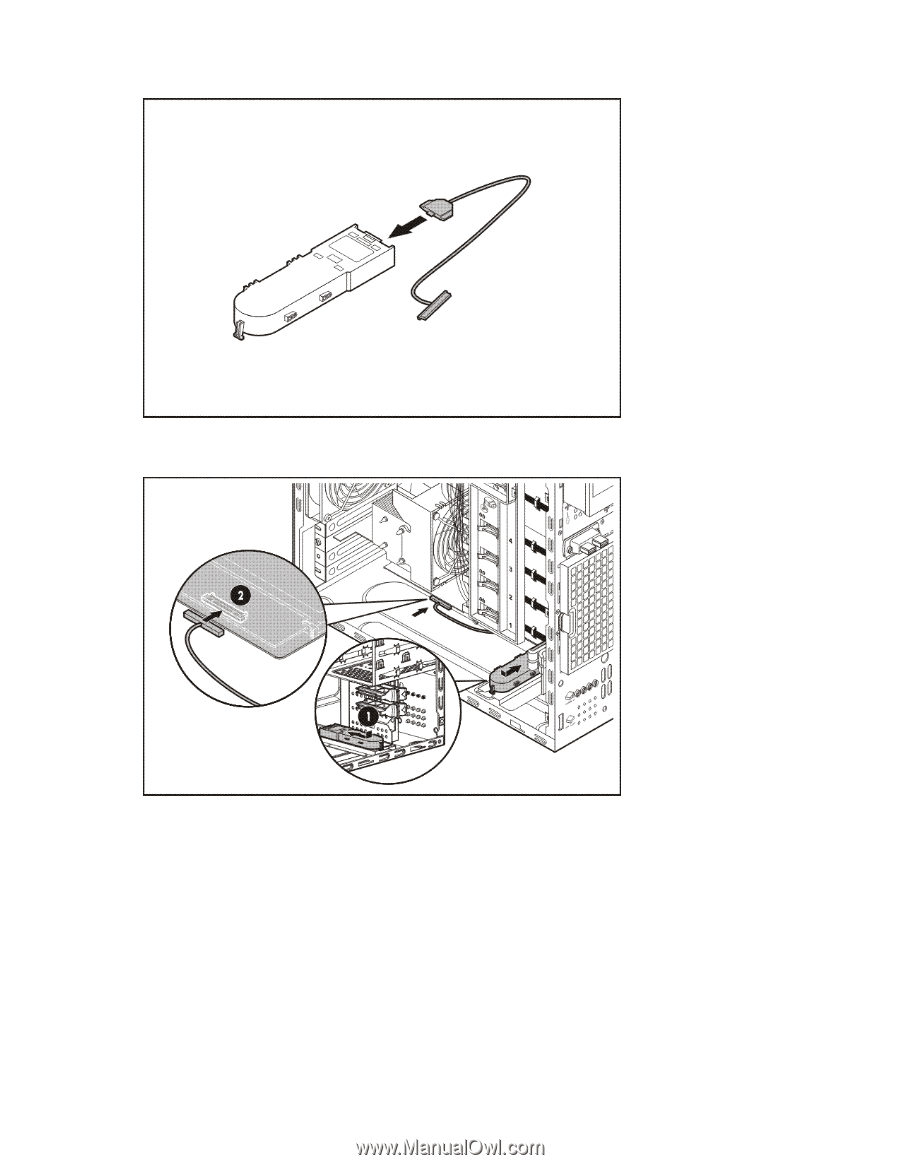
7.
Connect the cable to the cache module.
8.
Install the battery pack.
9.
Connect the cable to the controller.
10.
Route the cable.
11.
Install the access panel.
12.
For ML110 G6 servers, slide the server back into the rack.
13.
For ML150 G6 servers, do one of the following:
o
Close or install the tower bezel, as needed.
o
Slide the server back into the rack.
14.
Install the server into the rack.
15.
Power up the server (on page
7
).