HP Officejet J4000 User Guide - Page 146
The device is having problems sending and receiving faxes, Solution, Power
 |
View all HP Officejet J4000 manuals
Add to My Manuals
Save this manual to your list of manuals |
Page 146 highlights
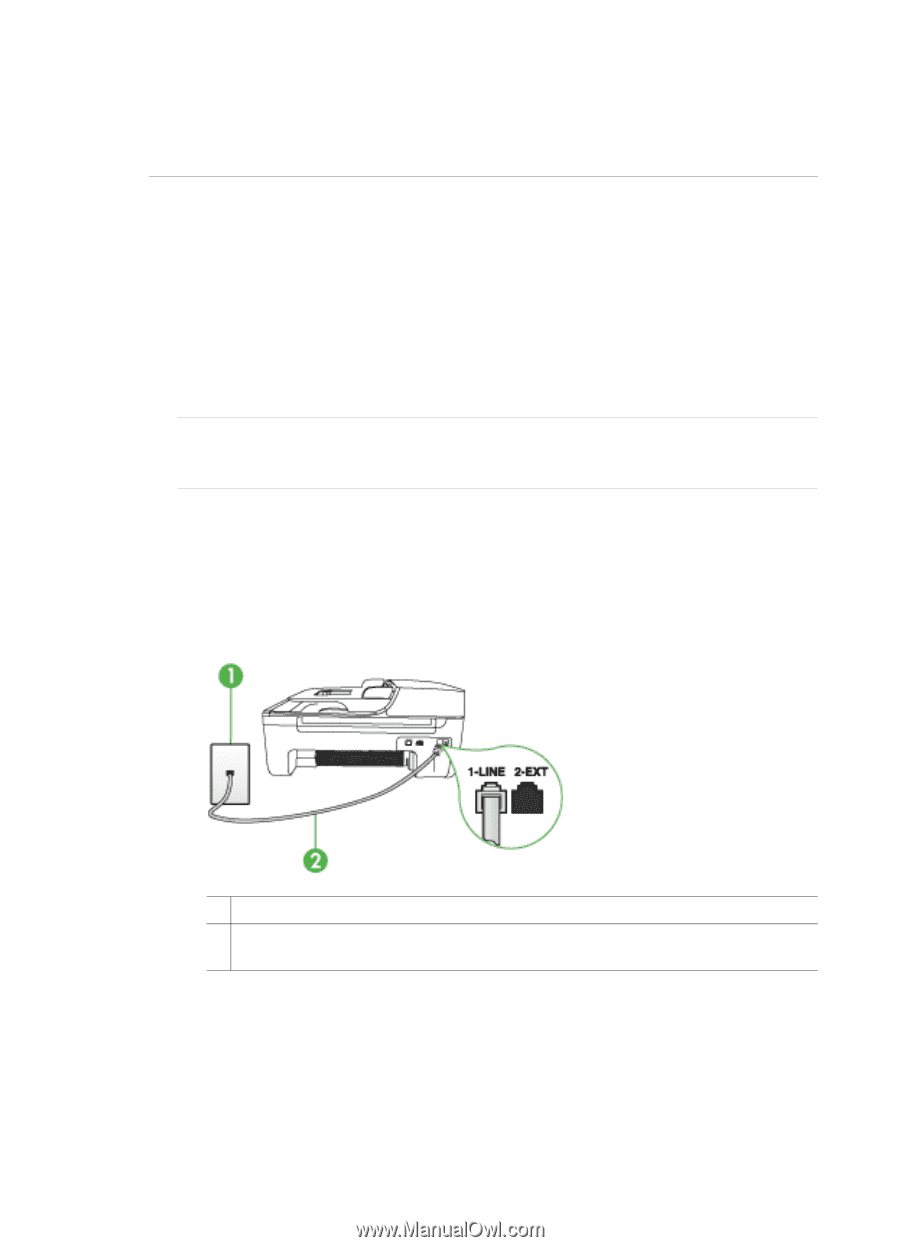
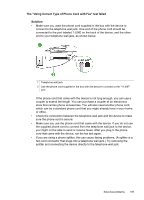
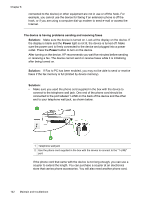
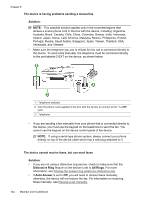
Chapter 8 connected to the device) or other equipment are not in use or off the hook. For example, you cannot use the device for faxing if an extension phone is off the hook, or if you are using a computer dial-up modem to send e-mail or access the Internet. The device is having problems sending and receiving faxes Solution: Make sure the device is turned on. Look at the display on the device. If the display is blank and the Power light is not lit, the device is turned off. Make sure the power cord is firmly connected to the device and plugged into a power outlet. Press the Power button to turn on the device. After turning on the device, HP recommends you wait five minutes before sending or receiving a fax. The device cannot send or receive faxes while it is initializing after being turned on. Solution: If Fax to PC has been enabled, you may not be able to send or receive faxes if the fax memory is full (limited by device memory). Solution: • Make sure you used the phone cord supplied in the box with the device to connect to the telephone wall jack. One end of the phone cord should be connected to the port labeled 1-LINE on the back of the device and the other end to your telephone wall jack, as shown below. 1 Telephone wall jack 2 Use the phone cord supplied in the box with the device to connect to the "1-LINE" port If the phone cord that came with the device is not long enough, you can use a coupler to extend the length. You can purchase a coupler at an electronics store that carries phone accessories. You will also need another phone cord, 142 Maintain and troubleshoot
-
 1
1 -
2
-
3
-
4
-
5
-
6
-
7
-
8
-
9
-
10
-
11
-
12
-
13
-
14
-
15
-
16
-
17
-
18
-
19
-
20
-
21
-
22
-
23
-
24
-
25
-
26
-
27
-
28
-
29
-
30
-
31
-
32
-
33
-
34
-
35
-
36
-
37
-
38
-
39
-
40
-
41
-
42
-
43
-
44
-
45
-
46
-
47
-
48
-
49
-
50
-
51
-
52
-
53
-
54
-
55
-
56
-
57
-
58
-
59
-
60
-
61
-
62
-
63
-
64
-
65
-
66
-
67
-
68
-
69
-
70
-
71
-
72
-
73
-
74
-
75
-
76
-
77
-
78
-
79
-
80
-
81
-
82
-
83
-
84
-
85
-
86
-
87
-
88
-
89
-
90
-
91
-
92
-
93
-
94
-
95
-
96
-
97
-
98
-
99
-
100
-
101
-
102
-
103
-
104
-
105
-
106
-
107
-
108
-
109
-
110
-
111
-
112
-
113
-
114
-
115
-
116
-
117
-
118
-
119
-
120
-
121
-
122
-
123
-
124
-
125
-
126
-
127
-
128
-
129
-
130
-
131
-
132
-
133
-
134
-
135
-
136
-
137
-
138
-
139
-
140
-
 141
141 -
 142
142 -
 143
143 -
 144
144 -
 145
145 -
 146
146 -
 147
147 -
 148
148 -
 149
149 -
 150
150 -
 151
151 -
152
-
153
-
154
-
155
-
156
-
157
-
158
-
159
-
160
-
161
-
162
-
163
-
164
-
165
-
166
-
167
-
168
-
169
-
170
-
171
-
172
-
173
-
174
-
175
-
176
-
177
-
178
-
179
-
180
-
181
-
182
-
183
-
184
-
185
-
186
-
187
-
188
-
189
-
190
-
191
-
192
-
193
-
194
-
195
-
196
 |
 |