HP Officejet J4000 User Guide - Page 60
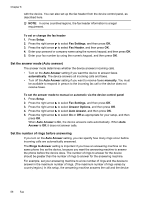
Set the answer mode (Auto answer), Set the number of rings before answering, Rings to Answer
 |
View all HP Officejet J4000 manuals
Add to My Manuals
Save this manual to your list of manuals |
Page 60 highlights
Chapter 6 with the device. You can also set up the fax header from the device control panel, as described here. NOTE: In some countries/regions, the fax header information is a legal requirement. To set or change the fax header 1. Press Setup. 2. Press the right arrow to select Fax Settings, and then press OK. 3. Press the right arrow to select Fax Header, and then press OK. 4. Enter your personal or company name using the numeric keypad, and then press OK. 5. Enter your fax number by using the numeric keypad, and then press OK. Set the answer mode (Auto answer) The answer mode determines whether the device answers incoming calls. • Turn on the Auto Answer setting if you want the device to answer faxes automatically. The device answers all incoming calls and faxes. • Turn off the Auto Answer setting if you want to receive faxes manually. You must be available to respond in person to the incoming fax call or the device does not receive faxes. To set the answer mode to manual or automatic via the device control panel 1. Press Setup. 2. Press the right arrow to select Fax Settings, and then press OK. 3. Press the right arrow to select Answer Options, and then press OK. 4. Press the right arrow to select Auto Answer, and then press OK. 5. Press the right arrow to select On or Off as appropriate for your setup, and then press OK. When Auto Answer is On, the device answers calls automatically. When Auto Answer is Off, it does not answer calls. Set the number of rings before answering If you turn on the Auto Answer setting, you can specify how many rings occur before incoming calls are automatically answered. The Rings to Answer setting is important if you have an answering machine on the same phone line as the device, because you want the answering machine to answer the phone before the device does. The number of rings to answer for the device should be greater than the number of rings to answer for the answering machine. For example, set your answering machine to a low number of rings and the device to answer in the maximum number of rings. (The maximum number of rings varies by country/region.) In this setup, the answering machine answers the call and the device 56 Fax
-
 1
1 -
2
-
3
-
4
-
5
-
6
-
7
-
8
-
9
-
10
-
11
-
12
-
13
-
14
-
15
-
16
-
17
-
18
-
19
-
20
-
21
-
22
-
23
-
24
-
25
-
26
-
27
-
28
-
29
-
30
-
31
-
32
-
33
-
34
-
35
-
36
-
37
-
38
-
39
-
40
-
41
-
42
-
43
-
44
-
45
-
46
-
47
-
48
-
49
-
50
-
51
-
52
-
53
-
54
-
 55
55 -
 56
56 -
 57
57 -
 58
58 -
 59
59 -
 60
60 -
 61
61 -
 62
62 -
 63
63 -
 64
64 -
 65
65 -
66
-
67
-
68
-
69
-
70
-
71
-
72
-
73
-
74
-
75
-
76
-
77
-
78
-
79
-
80
-
81
-
82
-
83
-
84
-
85
-
86
-
87
-
88
-
89
-
90
-
91
-
92
-
93
-
94
-
95
-
96
-
97
-
98
-
99
-
100
-
101
-
102
-
103
-
104
-
105
-
106
-
107
-
108
-
109
-
110
-
111
-
112
-
113
-
114
-
115
-
116
-
117
-
118
-
119
-
120
-
121
-
122
-
123
-
124
-
125
-
126
-
127
-
128
-
129
-
130
-
131
-
132
-
133
-
134
-
135
-
136
-
137
-
138
-
139
-
140
-
141
-
142
-
143
-
144
-
145
-
146
-
147
-
148
-
149
-
150
-
151
-
152
-
153
-
154
-
155
-
156
-
157
-
158
-
159
-
160
-
161
-
162
-
163
-
164
-
165
-
166
-
167
-
168
-
169
-
170
-
171
-
172
-
173
-
174
-
175
-
176
-
177
-
178
-
179
-
180
-
181
-
182
-
183
-
184
-
185
-
186
-
187
-
188
-
189
-
190
-
191
-
192
-
193
-
194
-
195
-
196
 |
 |