HP Officejet J4000 User Guide - Page 57
Add numbers to the junk fax list, Receive faxes to your computer, Junk Fax Blocker
 |
View all HP Officejet J4000 manuals
Add to My Manuals
Save this manual to your list of manuals |
Page 57 highlights
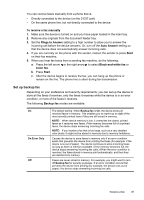
NOTE: If no phone numbers are added in the Caller ID list, it is assumed that the user has not signed up for the Caller ID service with the phone company. • Add numbers to the junk fax list • Remove numbers from the junk fax list Add numbers to the junk fax list You can block specific numbers by adding them to the junk fax list. To manually enter a number to block 1. Press Setup. 2. Press the right arrow to select Fax Settings, and then press OK. 3. Press the right arrow to select Junk Fax Blocker, and then press OK. 4. Press the right arrow to select Add, and then press OK. 5. To select a fax number to block from the caller ID list, select Select no. - or To manually enter a fax number to block, select Enter no. 6. After entering a fax number to block, press OK. Make sure you enter the fax number as it appears on the control-panel display, and not the fax number that appears on the fax header of the received fax, as these numbers can be different. 7. When the Enter Another? prompt appears, do one of the following: • If you want to add another number to the list of junk fax numbers, press Yes, and then repeat step 5 for each number you want to block. • If you are done, press No. Remove numbers from the junk fax list If you no longer want to block a fax number, you can remove a number from your junk fax list. To remove numbers from the list of junk fax numbers 1. Press Setup. 2. Press Fax Settings, and then press OK. 3. Press Junk Fax Blocker, and then press OK. 4. Press Delete, and then press OK. 5. Press the right arrow button to scroll through the numbers you have blocked. When the number you want to remove appears, press OK to select it. 6. When the Delete Another? prompt appears, do one of the following: • If you want to remove another number from the list of junk fax numbers, press Yes, and then repeat step 5 for each number you no longer want to block. • If you are done, press No. Receive faxes to your computer Use Fax to PC to automatically receive faxes and save faxes directly to your computer. With Fax to PC, you can store digital copies of your faxes easily and also Receive a fax 53
-
 1
1 -
2
-
3
-
4
-
5
-
6
-
7
-
8
-
9
-
10
-
11
-
12
-
13
-
14
-
15
-
16
-
17
-
18
-
19
-
20
-
21
-
22
-
23
-
24
-
25
-
26
-
27
-
28
-
29
-
30
-
31
-
32
-
33
-
34
-
35
-
36
-
37
-
38
-
39
-
40
-
41
-
42
-
43
-
44
-
45
-
46
-
47
-
48
-
49
-
50
-
51
-
 52
52 -
 53
53 -
 54
54 -
 55
55 -
 56
56 -
 57
57 -
 58
58 -
 59
59 -
 60
60 -
 61
61 -
 62
62 -
63
-
64
-
65
-
66
-
67
-
68
-
69
-
70
-
71
-
72
-
73
-
74
-
75
-
76
-
77
-
78
-
79
-
80
-
81
-
82
-
83
-
84
-
85
-
86
-
87
-
88
-
89
-
90
-
91
-
92
-
93
-
94
-
95
-
96
-
97
-
98
-
99
-
100
-
101
-
102
-
103
-
104
-
105
-
106
-
107
-
108
-
109
-
110
-
111
-
112
-
113
-
114
-
115
-
116
-
117
-
118
-
119
-
120
-
121
-
122
-
123
-
124
-
125
-
126
-
127
-
128
-
129
-
130
-
131
-
132
-
133
-
134
-
135
-
136
-
137
-
138
-
139
-
140
-
141
-
142
-
143
-
144
-
145
-
146
-
147
-
148
-
149
-
150
-
151
-
152
-
153
-
154
-
155
-
156
-
157
-
158
-
159
-
160
-
161
-
162
-
163
-
164
-
165
-
166
-
167
-
168
-
169
-
170
-
171
-
172
-
173
-
174
-
175
-
176
-
177
-
178
-
179
-
180
-
181
-
182
-
183
-
184
-
185
-
186
-
187
-
188
-
189
-
190
-
191
-
192
-
193
-
194
-
195
-
196
 |
 |