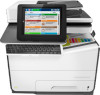
HP PageWide Managed Color MFP E58650 User Guide - Page 126
Create Quick Sets using the HP Embedded Web Server, Introduction
 |
View all HP PageWide Managed Color MFP E58650 manuals
Add to My Manuals
Save this manual to your list of manuals |
Page 126 highlights
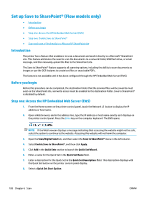
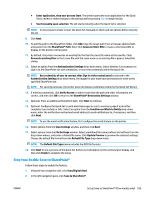
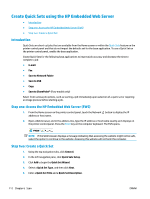
Create Quick Sets using the HP Embedded Web Server ● Introduction ● Step one: Access the HP Embedded Web Server (EWS) ● Step two: Create a Quick Set Introduction Quick Sets are short-cut jobs that are available from the Home screen or within the Quick Sets feature on the printer control panel and that do not impact the defaults set for the base application. To use a Quick Set on the printer control panel, enable the base application. Create Quick Sets for the following base applications to improve job accuracy and decrease the time to complete a job: ● E-mail ● Fax ● Save to Network Folder ● Save to USB ● Copy ● Save to SharePoint® (Flow models only) Select from various job options, such as starting a job immediately upon selection of a quick set or requiring an image preview before starting a job. Step one: Access the HP Embedded Web Server (EWS) 1. From the Home screen on the printer control panel, touch the Network button to display the IP address or host name. 2. Open a Web browser, and in the address line, type the IP address or host name exactly as it displays on the printer control panel. Press the Enter key on the computer keyboard. The EWS opens. NOTE: If the Web browser displays a message indicating that accessing the website might not be safe, select the option to continue to the website. Accessing this website will not harm the computer. Step two: Create a Quick Set 1. Using the top navigation tabs, click General. 2. In the left navigation pane, click Quick Sets Setup. 3. Click Add to begin the Quick Set Wizard. 4. Select a Quick Set Type, and then click Next. 5. Enter a Quick Set Title and a Quick Set Description. 112 Chapter 6 Scan ENWW
-
 1
1 -
2
-
3
-
4
-
5
-
6
-
7
-
8
-
9
-
10
-
11
-
12
-
13
-
14
-
15
-
16
-
17
-
18
-
19
-
20
-
21
-
22
-
23
-
24
-
25
-
26
-
27
-
28
-
29
-
30
-
31
-
32
-
33
-
34
-
35
-
36
-
37
-
38
-
39
-
40
-
41
-
42
-
43
-
44
-
45
-
46
-
47
-
48
-
49
-
50
-
51
-
52
-
53
-
54
-
55
-
56
-
57
-
58
-
59
-
60
-
61
-
62
-
63
-
64
-
65
-
66
-
67
-
68
-
69
-
70
-
71
-
72
-
73
-
74
-
75
-
76
-
77
-
78
-
79
-
80
-
81
-
82
-
83
-
84
-
85
-
86
-
87
-
88
-
89
-
90
-
91
-
92
-
93
-
94
-
95
-
96
-
97
-
98
-
99
-
100
-
101
-
102
-
103
-
104
-
105
-
106
-
107
-
108
-
109
-
110
-
111
-
112
-
113
-
114
-
115
-
116
-
117
-
118
-
119
-
120
-
 121
121 -
 122
122 -
 123
123 -
 124
124 -
 125
125 -
 126
126 -
 127
127 -
 128
128 -
 129
129 -
 130
130 -
 131
131 -
132
-
133
-
134
-
135
-
136
-
137
-
138
-
139
-
140
-
141
-
142
-
143
-
144
-
145
-
146
-
147
-
148
-
149
-
150
-
151
-
152
-
153
-
154
-
155
-
156
-
157
-
158
-
159
-
160
-
161
-
162
-
163
-
164
-
165
-
166
-
167
-
168
-
169
-
170
-
171
-
172
-
173
-
174
-
175
-
176
-
177
-
178
-
179
-
180
-
181
-
182
-
183
-
184
-
185
-
186
-
187
-
188
-
189
-
190
-
191
-
192
-
193
-
194
-
195
-
196
-
197
-
198
-
199
-
200
-
201
-
202
-
203
-
204
-
205
-
206
-
207
-
208
-
209
-
210
-
211
-
212
-
213
-
214
-
215
-
216
-
217
-
218
-
219
-
220
-
221
-
222
-
223
-
224
-
225
-
226
-
227
-
228
-
229
-
230
-
231
-
232
-
233
-
234
-
235
-
236
-
237
-
238
-
239
-
240
-
241
-
242
-
243
-
244
-
245
-
246
-
247
-
248
-
249
-
250
 |
 |
