HP Pavilion a400 HP Pavilion Desktop PCs - (English) Users Guide 5990-6416 - Page 114
installing an optical drive
 |
View all HP Pavilion a400 manuals
Add to My Manuals
Save this manual to your list of manuals |
Page 114 highlights
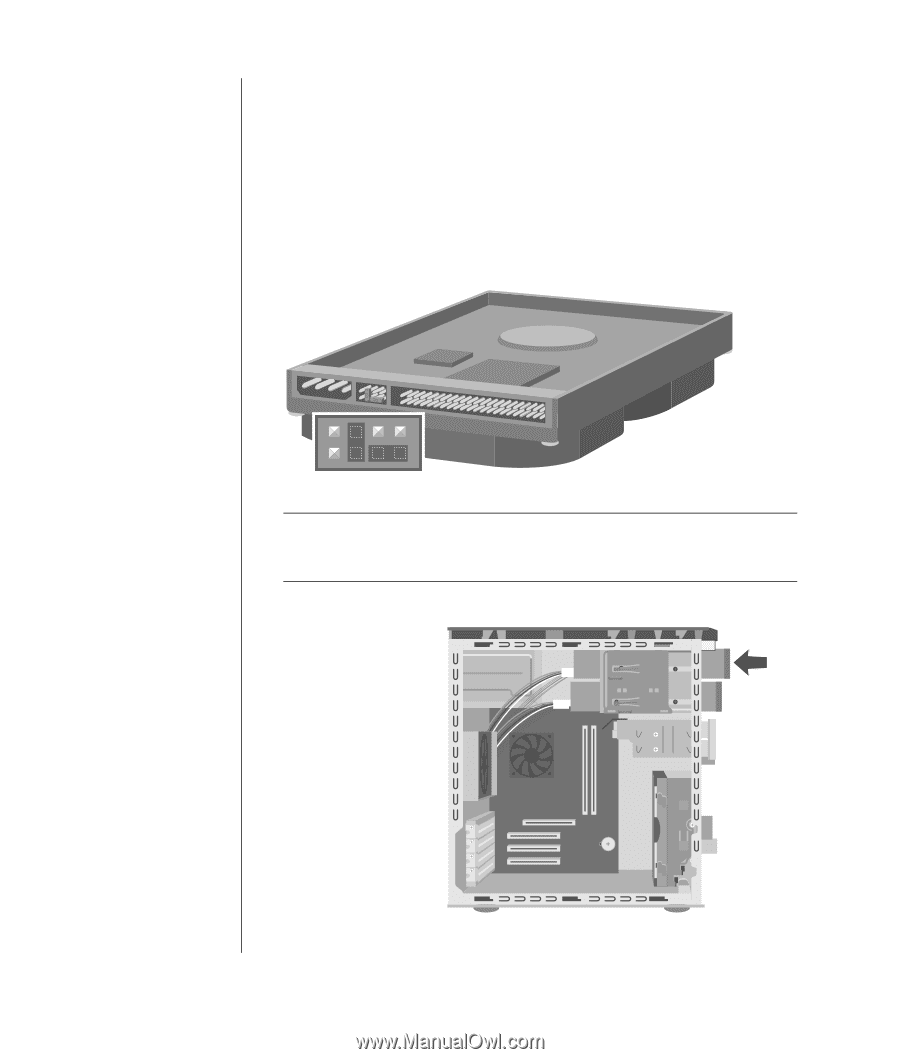
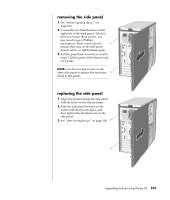
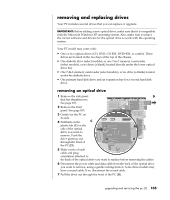
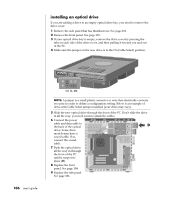
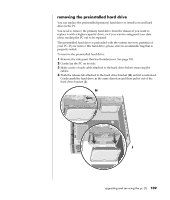
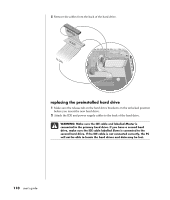
installing an optical drive If you are adding a drive to an empty optical drive bay, you need to remove the drive cover: 1 Remove the side panel that has thumbscrews. See page 101. 2 Remove the front panel. See page 103. 3 If your optical drive bay is empty, remove the drive cover by pressing the tabs on each side of the drive cover, and then pulling it toward you and out of the PC. 4 Make sure the jumper on the new drive is in the CS (Cable Select) position. 106 user's guide CS SL MA NOTE: A jumper is a small plastic connector or wire that electrically connects two pins in order to define a configuration setting. Below is an example of drive with Cable Select jumper installed (your drive may vary). 5 Slide the new optical drive through the front of the PC. Don't slide the drive in all the way; you need room to attach the cables. 6 Connect the power cable and data cable to the back of the optical D drive. Some drive models may have a sound cable. If so, connect the sound cable. 7 Push the optical drive all the way in through the front of the PC until it snaps into place (D). 8 Replace the front panel. See page 104. 9 Replace the side panel. See page 101.
-
 1
1 -
2
-
3
-
4
-
5
-
6
-
7
-
8
-
9
-
10
-
11
-
12
-
13
-
14
-
15
-
16
-
17
-
18
-
19
-
20
-
21
-
22
-
23
-
24
-
25
-
26
-
27
-
28
-
29
-
30
-
31
-
32
-
33
-
34
-
35
-
36
-
37
-
38
-
39
-
40
-
41
-
42
-
43
-
44
-
45
-
46
-
47
-
48
-
49
-
50
-
51
-
52
-
53
-
54
-
55
-
56
-
57
-
58
-
59
-
60
-
61
-
62
-
63
-
64
-
65
-
66
-
67
-
68
-
69
-
70
-
71
-
72
-
73
-
74
-
75
-
76
-
77
-
78
-
79
-
80
-
81
-
82
-
83
-
84
-
85
-
86
-
87
-
88
-
89
-
90
-
91
-
92
-
93
-
94
-
95
-
96
-
97
-
98
-
99
-
100
-
101
-
102
-
103
-
104
-
105
-
106
-
107
-
108
-
 109
109 -
 110
110 -
 111
111 -
 112
112 -
 113
113 -
 114
114 -
 115
115 -
 116
116 -
 117
117 -
 118
118 -
 119
119 -
120
-
121
-
122
-
123
-
124
-
125
-
126
-
127
-
128
-
129
-
130
-
131
-
132
-
133
-
134
-
135
-
136
-
137
-
138
-
139
-
140
-
141
-
142
-
143
-
144
-
145
-
146
-
147
-
148
-
149
-
150
-
151
-
152
-
153
-
154
-
155
-
156
 |
 |