HP Pavilion a400 HP Pavilion Desktop PCs - (English) Users Guide 5990-6416 - Page 132
removing the fan duct, removing the, drive cage
 |
View all HP Pavilion a400 manuals
Add to My Manuals
Save this manual to your list of manuals |
Page 132 highlights
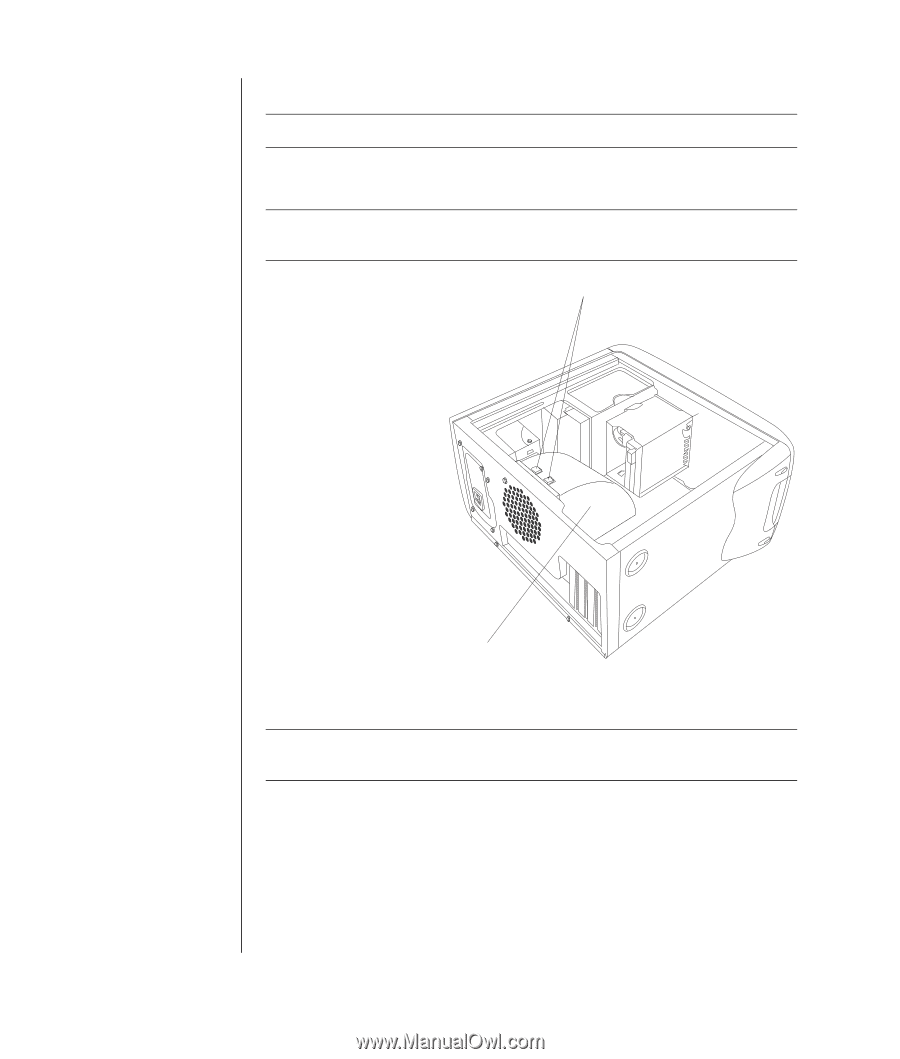
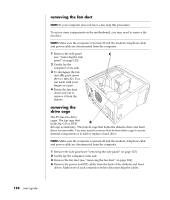
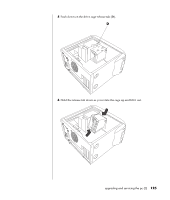
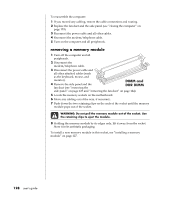
removing the fan duct NOTE: If your computer does not have a fan, skip this procedure. To access some components on the motherboard, you may need to remove the fan duct. NOTE: Make sure the computer is turned off and the modem/telephone cable and power cable are disconnected from the computer. 1 Remove the side panel C (see "removing the side panel" on page 123). 2 Gently lay the computer on its side. 3 To disengage the fan duct (B), push down the two tabs (C). You can push with your fingers or a pen. 4 Rotate the fan duct down and out to remove it from the chassis. removing the drive cage The PC has two drive cages. The top cage that holds the CD or DVD B drive(s) is stationary. The bottom cage that holds the diskette drive and hard drive is removable. You may need to remove this bottom drive cage to access internal components or to add or replace a hard drive. NOTE: Make sure the computer is turned off and the modem/telephone cable and power cable are disconnected from the computer. 1 Remove the side panel (see "removing the side panel" on page 123). 2 Gently lay the computer on its side. 3 Remove the fan duct (see "removing the fan duct" on page 124). 4 Remove the power and IDE cables from the back of the diskette and hard drives. Make note of each connection before disconnecting the cables. 124 user's guide
-
 1
1 -
2
-
3
-
4
-
5
-
6
-
7
-
8
-
9
-
10
-
11
-
12
-
13
-
14
-
15
-
16
-
17
-
18
-
19
-
20
-
21
-
22
-
23
-
24
-
25
-
26
-
27
-
28
-
29
-
30
-
31
-
32
-
33
-
34
-
35
-
36
-
37
-
38
-
39
-
40
-
41
-
42
-
43
-
44
-
45
-
46
-
47
-
48
-
49
-
50
-
51
-
52
-
53
-
54
-
55
-
56
-
57
-
58
-
59
-
60
-
61
-
62
-
63
-
64
-
65
-
66
-
67
-
68
-
69
-
70
-
71
-
72
-
73
-
74
-
75
-
76
-
77
-
78
-
79
-
80
-
81
-
82
-
83
-
84
-
85
-
86
-
87
-
88
-
89
-
90
-
91
-
92
-
93
-
94
-
95
-
96
-
97
-
98
-
99
-
100
-
101
-
102
-
103
-
104
-
105
-
106
-
107
-
108
-
109
-
110
-
111
-
112
-
113
-
114
-
115
-
116
-
117
-
118
-
119
-
120
-
121
-
122
-
123
-
124
-
125
-
126
-
 127
127 -
 128
128 -
 129
129 -
 130
130 -
 131
131 -
 132
132 -
 133
133 -
 134
134 -
 135
135 -
 136
136 -
 137
137 -
138
-
139
-
140
-
141
-
142
-
143
-
144
-
145
-
146
-
147
-
148
-
149
-
150
-
151
-
152
-
153
-
154
-
155
-
156
 |
 |