HP Pavilion a400 HP Pavilion Desktop PCs - (English) Users Guide 5990-6416 - Page 118
replacing the preinstalled hard drive
 |
View all HP Pavilion a400 manuals
Add to My Manuals
Save this manual to your list of manuals |
Page 118 highlights
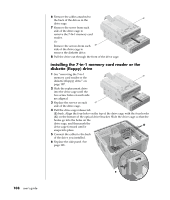
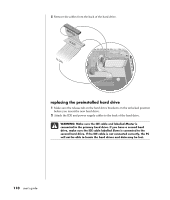
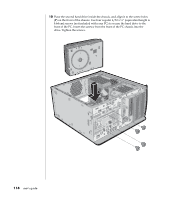
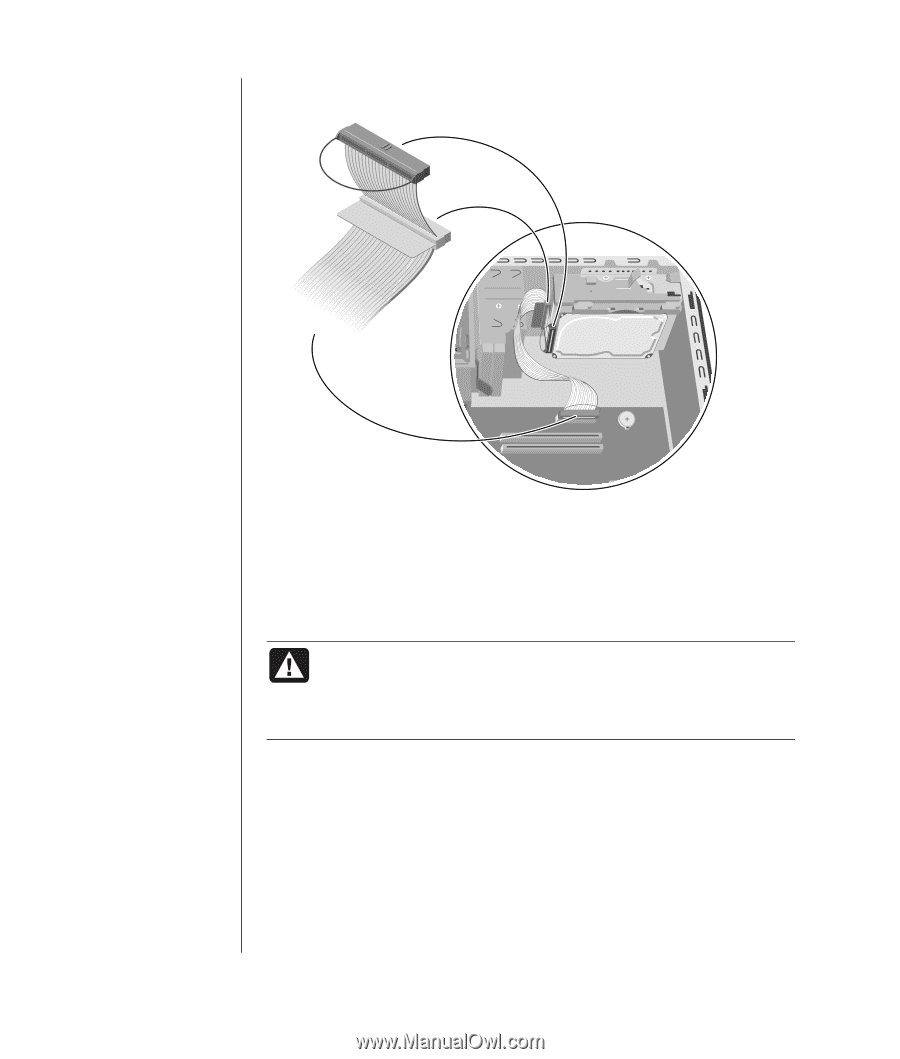
5 Remove the cables from the back of the hard drive. MASTER SLAVE To CPU replacing the preinstalled hard drive 1 Make sure the release tab on the hard drive bracket is in the unlocked position before you insert the new hard drive. 2 Attach the IDE and power supply cables to the back of the hard drive. WARNING: Make sure the IDE cable end labelled Master is connected to the primary hard drive. If you have a second hard drive, make sure the IDE cable labelled Slave is connected to the second hard drive. If the IDE cable is not connected correctly, the PC will not be able to locate the hard drives and data may be lost. 110 user's guide
-
 1
1 -
2
-
3
-
4
-
5
-
6
-
7
-
8
-
9
-
10
-
11
-
12
-
13
-
14
-
15
-
16
-
17
-
18
-
19
-
20
-
21
-
22
-
23
-
24
-
25
-
26
-
27
-
28
-
29
-
30
-
31
-
32
-
33
-
34
-
35
-
36
-
37
-
38
-
39
-
40
-
41
-
42
-
43
-
44
-
45
-
46
-
47
-
48
-
49
-
50
-
51
-
52
-
53
-
54
-
55
-
56
-
57
-
58
-
59
-
60
-
61
-
62
-
63
-
64
-
65
-
66
-
67
-
68
-
69
-
70
-
71
-
72
-
73
-
74
-
75
-
76
-
77
-
78
-
79
-
80
-
81
-
82
-
83
-
84
-
85
-
86
-
87
-
88
-
89
-
90
-
91
-
92
-
93
-
94
-
95
-
96
-
97
-
98
-
99
-
100
-
101
-
102
-
103
-
104
-
105
-
106
-
107
-
108
-
109
-
110
-
111
-
112
-
 113
113 -
 114
114 -
 115
115 -
 116
116 -
 117
117 -
 118
118 -
 119
119 -
 120
120 -
 121
121 -
 122
122 -
 123
123 -
124
-
125
-
126
-
127
-
128
-
129
-
130
-
131
-
132
-
133
-
134
-
135
-
136
-
137
-
138
-
139
-
140
-
141
-
142
-
143
-
144
-
145
-
146
-
147
-
148
-
149
-
150
-
151
-
152
-
153
-
154
-
155
-
156
 |
 |
110
user’s guide
5
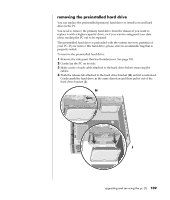
Remove the cables from the back of the hard drive.
MASTER
SLAVE
To CPU
replacing the preinstalled hard drive
1
Make sure the release tab on the hard drive bracket is in the unlocked position
before you insert the new hard drive.
2
Attach the IDE and power supply cables to the back of the hard drive.
WARNING: Make sure the IDE cable end labelled
Master
is
connected to the primary hard drive. If you have a second hard
drive, make sure the IDE cable labelled
Slave
is connected to the
second hard drive. If the IDE cable is not connected correctly, the PC
will not be able to locate the hard drives and data may be lost.