HP Pavilion a400 HP Pavilion Desktop PCs - (English) Users Guide 5990-6416 - Page 143
Pull the drive out through the front of the computer.
 |
View all HP Pavilion a400 manuals
Add to My Manuals
Save this manual to your list of manuals |
Page 143 highlights
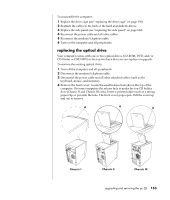
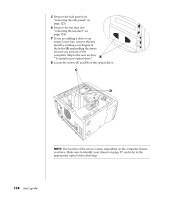
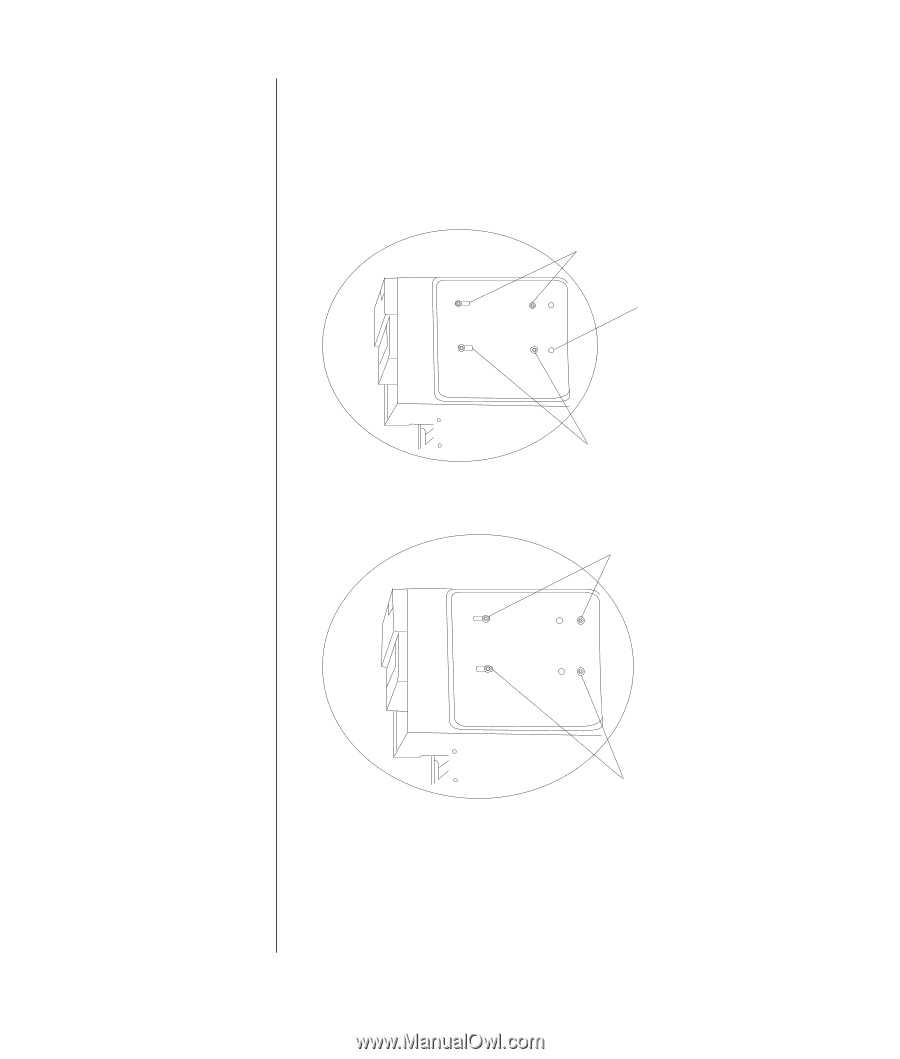
9 If you are removing the optical drive in the lower optical drive bay, remove the two screws (D) on the drive and push the drive partway out through the front of the computer. Or If you are removing the upper optical drive, remove the screws (C and D) on both optical drives and push both drives partway out through the front of the computer. (This allows better access to the cables at the back of the drive.) C G D Chassis I and Chassis II C D Chassis III 10 Remove the power and IDE cables attached to the back of the drive you want to replace. 11 Pull the drive out through the front of the computer. upgrading and servicing the pc (2) 135
-
 1
1 -
2
-
3
-
4
-
5
-
6
-
7
-
8
-
9
-
10
-
11
-
12
-
13
-
14
-
15
-
16
-
17
-
18
-
19
-
20
-
21
-
22
-
23
-
24
-
25
-
26
-
27
-
28
-
29
-
30
-
31
-
32
-
33
-
34
-
35
-
36
-
37
-
38
-
39
-
40
-
41
-
42
-
43
-
44
-
45
-
46
-
47
-
48
-
49
-
50
-
51
-
52
-
53
-
54
-
55
-
56
-
57
-
58
-
59
-
60
-
61
-
62
-
63
-
64
-
65
-
66
-
67
-
68
-
69
-
70
-
71
-
72
-
73
-
74
-
75
-
76
-
77
-
78
-
79
-
80
-
81
-
82
-
83
-
84
-
85
-
86
-
87
-
88
-
89
-
90
-
91
-
92
-
93
-
94
-
95
-
96
-
97
-
98
-
99
-
100
-
101
-
102
-
103
-
104
-
105
-
106
-
107
-
108
-
109
-
110
-
111
-
112
-
113
-
114
-
115
-
116
-
117
-
118
-
119
-
120
-
121
-
122
-
123
-
124
-
125
-
126
-
127
-
128
-
129
-
130
-
131
-
132
-
133
-
134
-
135
-
136
-
137
-
 138
138 -
 139
139 -
 140
140 -
 141
141 -
 142
142 -
 143
143 -
 144
144 -
 145
145 -
 146
146 -
 147
147 -
 148
148 -
149
-
150
-
151
-
152
-
153
-
154
-
155
-
156
 |
 |
upgrading and servicing the pc (2)
135
9
If you are removing the optical drive in the lower optical drive bay, remove
the two screws (
D
) on the drive and push the drive partway out through the
front of the computer.
Or
If you are removing the upper optical drive, remove the screws (
C
and
D
) on
both optical drives and push both drives partway out through the front of the
computer. (This allows better access to the cables at the back of the drive.)
G
C
D
Chassis I and Chassis II
C
D
Chassis III
10
Remove the power and IDE cables attached to the back of the drive you want
to replace.
11
Pull the drive out through the front of the computer.