HP Surestore E Tape Library Model 6/60 HP SureStore E Tape Library Models 2/20 - Page 172
Replacing a Card
 |
View all HP Surestore E Tape Library Model 6/60 manuals
Add to My Manuals
Save this manual to your list of manuals |
Page 172 highlights
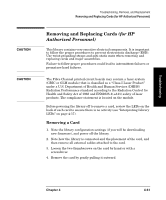
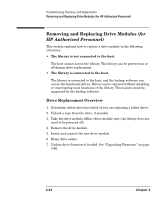
Troubleshooting, Removal, and Replacement Removing and Replacing Cards (for HP Authorized Personnel) Replacing a Card 1. Align the edges of the replacement card with the card slot. 2. Gently push the replacement card into the library until the card is flush with the library. 3. Tighten the thumbscrews (finger tight). 4. Reconnect external cables. 5. Power on the library. 6. Download new firmware (see "Upgrading Firmware" on page 4-60). 7. If installing Fibre Channel or remote management cards for the first time, configure the library from the front panel. See "Configuring the Library for Fibre Channel" on page 3-15 or "Using the Remote Management Card" on page 3-9. 4-52 Chapter 4
-
 1
1 -
2
-
3
-
4
-
5
-
6
-
7
-
8
-
9
-
10
-
11
-
12
-
13
-
14
-
15
-
16
-
17
-
18
-
19
-
20
-
21
-
22
-
23
-
24
-
25
-
26
-
27
-
28
-
29
-
30
-
31
-
32
-
33
-
34
-
35
-
36
-
37
-
38
-
39
-
40
-
41
-
42
-
43
-
44
-
45
-
46
-
47
-
48
-
49
-
50
-
51
-
52
-
53
-
54
-
55
-
56
-
57
-
58
-
59
-
60
-
61
-
62
-
63
-
64
-
65
-
66
-
67
-
68
-
69
-
70
-
71
-
72
-
73
-
74
-
75
-
76
-
77
-
78
-
79
-
80
-
81
-
82
-
83
-
84
-
85
-
86
-
87
-
88
-
89
-
90
-
91
-
92
-
93
-
94
-
95
-
96
-
97
-
98
-
99
-
100
-
101
-
102
-
103
-
104
-
105
-
106
-
107
-
108
-
109
-
110
-
111
-
112
-
113
-
114
-
115
-
116
-
117
-
118
-
119
-
120
-
121
-
122
-
123
-
124
-
125
-
126
-
127
-
128
-
129
-
130
-
131
-
132
-
133
-
134
-
135
-
136
-
137
-
138
-
139
-
140
-
141
-
142
-
143
-
144
-
145
-
146
-
147
-
148
-
149
-
150
-
151
-
152
-
153
-
154
-
155
-
156
-
157
-
158
-
159
-
160
-
161
-
162
-
163
-
164
-
165
-
166
-
 167
167 -
 168
168 -
 169
169 -
 170
170 -
 171
171 -
 172
172 -
 173
173 -
 174
174 -
 175
175 -
 176
176 -
 177
177 -
178
-
179
-
180
-
181
-
182
-
183
-
184
-
185
-
186
-
187
-
188
-
189
-
190
-
191
-
192
-
193
-
194
-
195
-
196
-
197
-
198
-
199
-
200
-
201
-
202
-
203
-
204
-
205
-
206
-
207
-
208
-
209
-
210
-
211
-
212
-
213
-
214
-
215
-
216
-
217
-
218
-
219
-
220
-
221
-
222
-
223
-
224
-
225
-
226
-
227
-
228
-
229
-
230
-
231
-
232
-
233
-
234
-
235
-
236
-
237
-
238
-
239
-
240
-
241
-
242
-
243
-
244
-
245
-
246
-
247
-
248
-
249
-
250
-
251
-
252
-
253
-
254
-
255
-
256
 |
 |

Troubleshooting, Removal, and Replacement
Removing and Replacing Cards (for HP Authorized Personnel)
Chapter 4
4-52
Replacing a Card
1.
Align the edges of the replacement card with the card slot.
2.
Gently push the replacement card into the library until the card is
flush with the library.
3.
Tighten the thumbscrews (finger tight).
4.
Reconnect external cables.
5.
Power on the library.
6.
Download new firmware (see
“
Upgrading Firmware
”
on page 4-60).
7.
If installing Fibre Channel or remote management cards for the first
time, configure the library from the front panel. See
“
Configuring the
Library for Fibre Channel
”
on page 3-15 or
“
Using the Remote
Management Card
”
on page 3-9.