HP Surestore E Tape Library Model 6/60 HP SureStore E Tape Library Models 2/20 - Page 175
Unloading a Tape from a Drive, Taking a Drive Offline
 |
View all HP Surestore E Tape Library Model 6/60 manuals
Add to My Manuals
Save this manual to your list of manuals |
Page 175 highlights
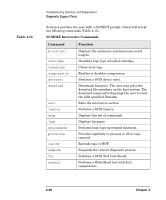
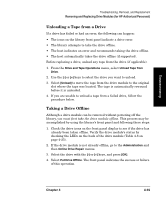
Troubleshooting Troubleshooting, Removal, and Replacement Removing and Replacing Drive Modules (for HP Authorized Personnel) Unloading a Tape from a Drive If a drive has failed or had an error, the following can happen: • The icons on the library front panel indicate a drive error. • The library attempts to take the drive offline. • The host indicates an error and recommends taking the drive offline. • The host automatically takes the drive offline (if supported). Before replacing a drive, unload any tape from the drive (if applicable). 1. From the Drive and Tape Operations menu, select Unload Tape from Drive. 2. Use the [-] or [+] keys to select the drive you want to unload. 3. Select [Unload] to move the tape from the drive module to the original slot where the tape was located. The tape is automatically rewound before it is unloaded. 4. If you are unable to unload a tape from a failed drive, follow the procedure below. Taking a Drive Offline Although a drive module can be removed without powering off the library, you must first take the drive module offline. This process may be accomplished by using the library's front panel and following these steps: 1. Check the drive icons on the front panel display to see if the drive has already been taken offline. Verify the drive module's status by checking the LEDs on the back of the drive module (Table 4-8 on page 4-25). 2. If the drive module is not already offline, go to the Administration and then Online Drive Repair menus. 3. Select the drive with the [-] or [+] keys, and press [OK]. 4. Select Put Drive Offline. The front panel indicates the success or failure of this operation. Chapter 4 4-55
-
 1
1 -
2
-
3
-
4
-
5
-
6
-
7
-
8
-
9
-
10
-
11
-
12
-
13
-
14
-
15
-
16
-
17
-
18
-
19
-
20
-
21
-
22
-
23
-
24
-
25
-
26
-
27
-
28
-
29
-
30
-
31
-
32
-
33
-
34
-
35
-
36
-
37
-
38
-
39
-
40
-
41
-
42
-
43
-
44
-
45
-
46
-
47
-
48
-
49
-
50
-
51
-
52
-
53
-
54
-
55
-
56
-
57
-
58
-
59
-
60
-
61
-
62
-
63
-
64
-
65
-
66
-
67
-
68
-
69
-
70
-
71
-
72
-
73
-
74
-
75
-
76
-
77
-
78
-
79
-
80
-
81
-
82
-
83
-
84
-
85
-
86
-
87
-
88
-
89
-
90
-
91
-
92
-
93
-
94
-
95
-
96
-
97
-
98
-
99
-
100
-
101
-
102
-
103
-
104
-
105
-
106
-
107
-
108
-
109
-
110
-
111
-
112
-
113
-
114
-
115
-
116
-
117
-
118
-
119
-
120
-
121
-
122
-
123
-
124
-
125
-
126
-
127
-
128
-
129
-
130
-
131
-
132
-
133
-
134
-
135
-
136
-
137
-
138
-
139
-
140
-
141
-
142
-
143
-
144
-
145
-
146
-
147
-
148
-
149
-
150
-
151
-
152
-
153
-
154
-
155
-
156
-
157
-
158
-
159
-
160
-
161
-
162
-
163
-
164
-
165
-
166
-
167
-
168
-
169
-
 170
170 -
 171
171 -
 172
172 -
 173
173 -
 174
174 -
 175
175 -
 176
176 -
 177
177 -
 178
178 -
 179
179 -
 180
180 -
181
-
182
-
183
-
184
-
185
-
186
-
187
-
188
-
189
-
190
-
191
-
192
-
193
-
194
-
195
-
196
-
197
-
198
-
199
-
200
-
201
-
202
-
203
-
204
-
205
-
206
-
207
-
208
-
209
-
210
-
211
-
212
-
213
-
214
-
215
-
216
-
217
-
218
-
219
-
220
-
221
-
222
-
223
-
224
-
225
-
226
-
227
-
228
-
229
-
230
-
231
-
232
-
233
-
234
-
235
-
236
-
237
-
238
-
239
-
240
-
241
-
242
-
243
-
244
-
245
-
246
-
247
-
248
-
249
-
250
-
251
-
252
-
253
-
254
-
255
-
256
 |
 |
