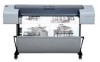
HP T610 HP Designjet T610 Series - User's Guide - Page 22
Uninstall the printer software (Windows), Connect directly to a computer (Mac OS), Wired Networking - designjet driver
 |
UPC - 883585044344
View all HP T610 manuals
Add to My Manuals
Save this manual to your list of manuals |
Page 22 highlights
Installing the software NOTE: HP Easy Printer Care and HP Color Center cannot be used with a printer connected through an HP Jetdirect print server. 4. Follow the instructions on your screen to set up the printer. The following notes help you to understand the screens and make appropriate choices. ● When asked how the printer is connected, select Wired Networking. ● The configuration program looks for printers connected to your network. When the search is complete, a list of printers appears. Identify your printer by its IP address and select it from the list. ● The configuration program analyzes the network and the printer. The program detects the network settings and suggests the settings to use when configuring the printer. It is not normally necessary to change any of these settings, but you can do so if you wish. If your computer fails to find any printers on the network, the Printer Not Found window is displayed, which helps you to try to find your printer. If you have a firewall in operation; you may have to disable it temporarily in order to find the printer. You also have the options of searching for the printer by its URL, IP address, or MAC address. Uninstall the printer software (Windows) 1. Insert the HP Start-Up Kit DVD into your DVD drive. If the DVD does not start automatically, run the START.EXE program in the root folder of the DVD. 2. Select Install, and follow the instructions on your screen to uninstall the printer software. Connect directly to a computer (Mac OS) You can connect your printer directly to a computer by using the printer's built-in USB 2.0 socket. 1. Make sure the printer is either turned off, or disconnected from the computer. 2. Insert the HP Start-Up Kit DVD into your DVD drive. 3. Open the DVD icon on your desktop. 4. Open the Mac OS X HP Designjet Installer icon. 5. Follow the instructions on your screen. You are recommended to use the Easy Install option. 6. The printer software is installed, including the printer driver, HP Printer Utility, and HP Color Center. 7. When the software has been installed, the HP Printer Setup Assistant starts automatically, to set up a connection to your printer. 8. Make sure that the printer is turned on and connected to the computer with a certified USB cable (provided with the printer). NOTE: The use of non-certified USB cables can lead to connectivity problems. Only cables certified by the USB Implementor's Forum (http://www.usb.org/) should be used with this printer. 9. In the HP Printer Setup Assistant, click Continue. 10. In the list of printers that appears, select the entry that uses the connection type USB, and click Continue. 11. The following screen displays information about your printer's installation, where the name of the printer can be modified. Make any changes you wish to make, and click Continue. 12 Chapter 2 Installing the software ENWW
-
 1
1 -
2
-
3
-
4
-
5
-
6
-
7
-
8
-
9
-
10
-
11
-
12
-
13
-
14
-
15
-
16
-
 17
17 -
 18
18 -
 19
19 -
 20
20 -
 21
21 -
 22
22 -
 23
23 -
 24
24 -
 25
25 -
 26
26 -
 27
27 -
28
-
29
-
30
-
31
-
32
-
33
-
34
-
35
-
36
-
37
-
38
-
39
-
40
-
41
-
42
-
43
-
44
-
45
-
46
-
47
-
48
-
49
-
50
-
51
-
52
-
53
-
54
-
55
-
56
-
57
-
58
-
59
-
60
-
61
-
62
-
63
-
64
-
65
-
66
-
67
-
68
-
69
-
70
-
71
-
72
-
73
-
74
-
75
-
76
-
77
-
78
-
79
-
80
-
81
-
82
-
83
-
84
-
85
-
86
-
87
-
88
-
89
-
90
-
91
-
92
-
93
-
94
-
95
-
96
-
97
-
98
-
99
-
100
-
101
-
102
-
103
-
104
-
105
-
106
-
107
-
108
-
109
-
110
-
111
-
112
-
113
-
114
-
115
-
116
-
117
-
118
-
119
-
120
-
121
-
122
-
123
-
124
-
125
-
126
-
127
-
128
-
129
-
130
-
131
-
132
-
133
-
134
-
135
-
136
-
137
-
138
-
139
-
140
-
141
-
142
-
143
-
144
-
145
-
146
-
147
-
148
-
149
-
150
-
151
-
152
-
153
-
154
-
155
-
156
-
157
-
158
-
159
-
160
-
161
-
162
-
163
-
164
-
165
-
166
-
167
-
168
-
169
-
170
-
171
-
172
-
173
-
174
-
175
-
176
-
177
-
178
-
179
-
180
-
181
 |
 |