HP Tc2120 serhp server tc2120 operations and maintenance guide - english - Page 72
Heading2 - BIOS Recovery, System Board Jumper/Dip Switch
 |
UPC - 808736945332
View all HP Tc2120 manuals
Add to My Manuals
Save this manual to your list of manuals |
Page 72 highlights
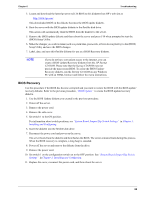
Chapter 6 Troubleshooting 3. Locate and download the latest hp server tc2120 BIOS to this diskette from HP's web site at: http://www.hp.com/ This downloaded BIOS on the diskette becomes the BIOS update diskette. 4. Boot the server with the BIOS update diskette in the flexible disk drive. This action will automatically flash the BIOS from the diskette to the server. 5. Remove the BIOS update diskette and then reboot the server and press F10 when prompted to start the (BIOS) Setup Utility. 6. Make the changes you wish to make (such as system time, passwords, or boot device priority) to the (BIOS) Setup Utility and save the BIOS changes. 7. Label, date, and save this flexible diskette for use as a BIOS Recovery diskette. NOTE If you do not have convenient access to the Internet, you can create a BIOS Update/Recovery diskette from the HP Startup CD-ROM. Please note that the Startup CD-ROM may not provide the most recent BIOS. To create the BIOS Update/ Recovery diskette, run the Startup CD-ROM on any Windows PC with an HTML browser and follow the menu instructions. BIOS Recovery Use this procedure if the BIOS has become corrupted and you want to restore the BIOS with the BIOS update/ recovery diskette. Refer to the previous procedure, "BIOS Update" to create the BIOS update/recovery diskette. 1. Use the BIOS Update diskette you created in the previous procedure. 2. Power off the server. 3. Remove the power cord. 4. Remove the side cover. 5. Set switch 1 to the ON position. For information about switch positions, see "System Board Jumper/Dip Switch Settings" in Chapter 3, Installing and Configuring. 6. Insert the diskette into the flexible disk drive. 7. Reconnect the power cord and power on the server. The server boots from the diskette and then flashes the BIOS. The screen remains blank during this process. When the BIOS recovery is complete, a long beep is sounded. 8. Power off the server and remove the diskette from the drive. 9. Remove the power cord. 10. Set switch 1 on the configuration switch set to the OFF position. See "System Board Jumper/Dip Switch Settings" in Chapter 3, Installing and Configuring. 11. Replace the cover, reconnect the power cord, and then reboot the server. 66
-
 1
1 -
2
-
3
-
4
-
5
-
6
-
7
-
8
-
9
-
10
-
11
-
12
-
13
-
14
-
15
-
16
-
17
-
18
-
19
-
20
-
21
-
22
-
23
-
24
-
25
-
26
-
27
-
28
-
29
-
30
-
31
-
32
-
33
-
34
-
35
-
36
-
37
-
38
-
39
-
40
-
41
-
42
-
43
-
44
-
45
-
46
-
47
-
48
-
49
-
50
-
51
-
52
-
53
-
54
-
55
-
56
-
57
-
58
-
59
-
60
-
61
-
62
-
63
-
64
-
65
-
66
-
 67
67 -
 68
68 -
 69
69 -
 70
70 -
 71
71 -
 72
72 -
 73
73 -
 74
74 -
 75
75 -
 76
76 -
 77
77 -
78
-
79
-
80
-
81
-
82
-
83
-
84
-
85
-
86
-
87
-
88
-
89
-
90
-
91
-
92
-
93
-
94
-
95
-
96
-
97
-
98
-
99
-
100
-
101
-
102
-
103
-
104
-
105
-
106
-
107
-
108
-
109
-
110
-
111
-
112
-
113
-
114
-
115
-
116
-
117
-
118
-
119
-
120
-
121
-
122
-
123
-
124
-
125
 |
 |
