IBM 4560SLX User Guide - Page 23
Attaching the slide members to the rack, IMPORTANT
 |
UPC - 087944855910
View all IBM 4560SLX manuals
Add to My Manuals
Save this manual to your list of manuals |
Page 23 highlights
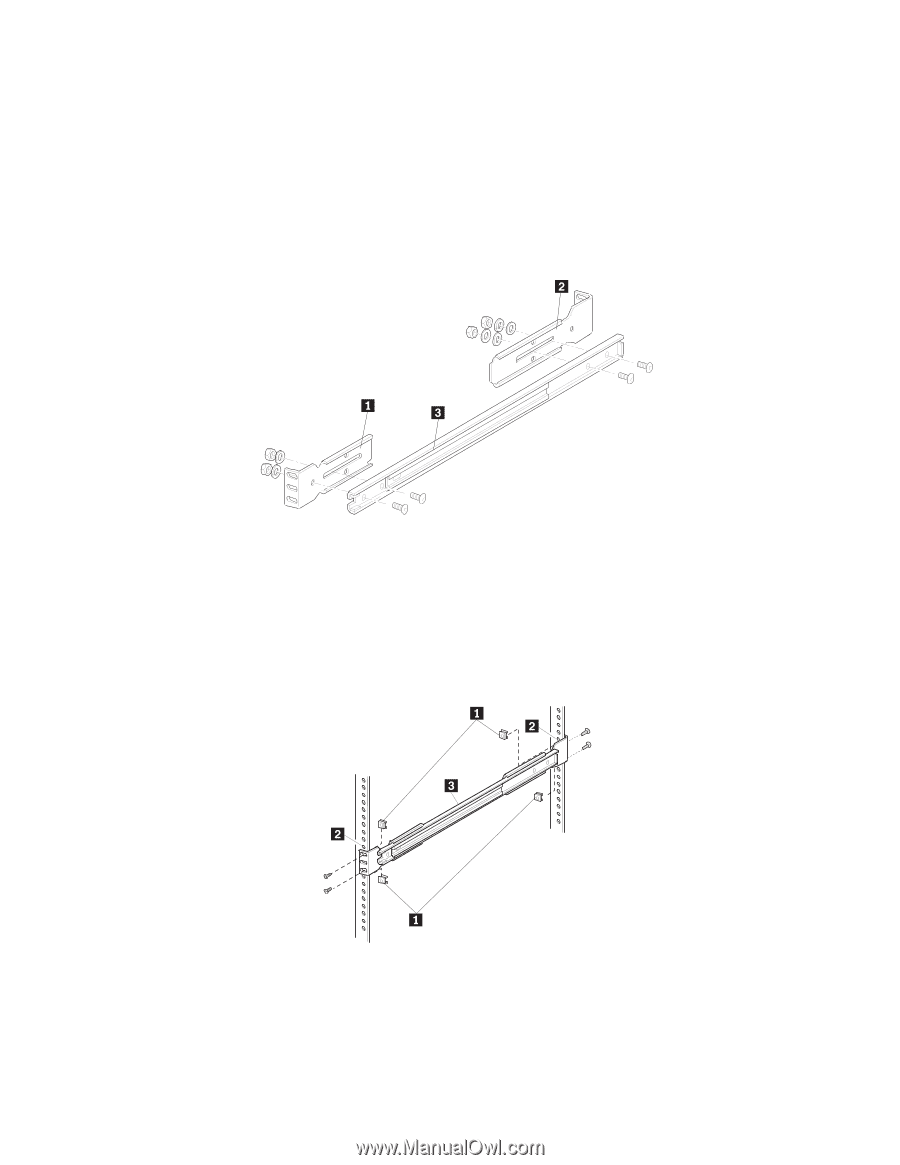
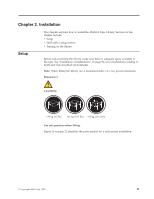
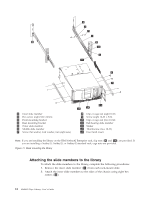
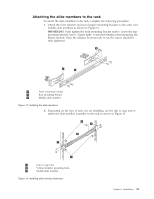
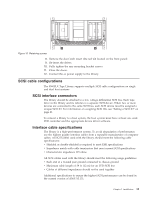
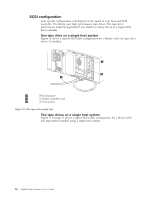
Attaching the slide members to the rack To attach the slide members to the rack, complete the following procedure: 1. Attach the front (shorter) and rear (longer) mounting brackets to the outer and middle slide members as shown in Figure 12. IMPORTANT: Fully tighten the front mounting bracket screws. Leave the rear mounting bracket screws "finger tight" to prevent binding when mounting the library module. Once the distance between rails is set, the screws should be fully tightened. 1 Front mounting bracket 2 Rear mounting bracket 3 Middle slide member Figure 12. Installing the slide members 2. Depending on the type of rack you are installing, use the clip or cage nuts to attach the slide member assembly to the rack as shown in Figure 13. 1 Clip or cage nuts 2 Vertical member mounting holes 3 Middle slide member Figure 13. Installing slide member fasteners Chapter 2. Installation 13
-
 1
1 -
2
-
3
-
4
-
5
-
6
-
7
-
8
-
9
-
10
-
11
-
12
-
13
-
14
-
15
-
16
-
17
-
 18
18 -
 19
19 -
 20
20 -
 21
21 -
 22
22 -
 23
23 -
 24
24 -
 25
25 -
 26
26 -
 27
27 -
 28
28 -
29
-
30
-
31
-
32
-
33
-
34
-
35
-
36
-
37
-
38
-
39
-
40
-
41
-
42
-
43
-
44
-
45
-
46
-
47
-
48
-
49
-
50
-
51
-
52
-
53
-
54
-
55
-
56
-
57
-
58
-
59
-
60
-
61
-
62
-
63
-
64
-
65
-
66
-
67
-
68
-
69
-
70
-
71
-
72
-
73
-
74
-
75
-
76
-
77
-
78
-
79
-
80
-
81
-
82
-
83
-
84
-
85
-
86
-
87
-
88
-
89
-
90
-
91
-
92
-
93
-
94
-
95
-
96
-
97
-
98
-
99
-
100
-
101
-
102
-
103
-
104
-
105
-
106
-
107
-
108
-
109
-
110
-
111
-
112
-
113
-
114
-
115
-
116
-
117
-
118
-
119
-
120
-
121
-
122
-
123
-
124
-
125
-
126
-
127
-
128
 |
 |