IBM 4560SLX User Guide - Page 55
Replacing a cleaning cartridge in a reserved slot, Destination Element Type
 |
UPC - 087944855910
View all IBM 4560SLX manuals
Add to My Manuals
Save this manual to your list of manuals |
Page 55 highlights
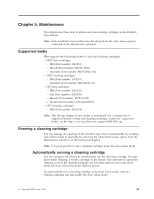
1. Reserve the cleaning cartridge slot. For more information, see "Setting up reserved tape cartridge slots" on page 23. 2. Install a cleaning cartridge in the reserved slot. 3. Select the Clean Drive menu option from the Maintenance submenu on the Menu screen. The Source window defaults to the cleaning slot (cleaning slot 0). 4. Select Cleaning. If the default entry is not the tape drive to be cleaned, select Drive in the Destination Element Type box to sequence through the available tape drive choices. You can also use the Decimal Keypad Backspace and Numeric Keys to enter the tape drive number. 5. Select Execute Clean, when the destination entry is correct. When the cleaning cycle completes, the library returns the cleaning cartridge to the cleaning cartridge slot. Replacing a cleaning cartridge in a reserved slot When the cleaning cartridge has been exhausted, a message appears on the touch screen indicating that the cleaning cartridge has expired. Examine the Status screen to make sure that the cleaning cartridge has been unloaded from the tape drive. If not, unload the cleaning cartridge using the Move Media menu option from the Status screen. A cleaning cartridge can be removed and replaced by removing the right magazine or by using the mail slot. Replacing a cleaning cartridge in the right magazine To replace a cleaning cartridge in the right magazine, complete the following procedure: 1. Select Magazine Access from the Status screen. 2. Remove the magazine from the library. 3. Remove the expired cleaning cartridge from the last slot. Mark it EXPIRED and then properly dispose of it. 4. Place a new cleaning cartridge in the last slot of the magazine. 5. Replace the right magazine. Replacing a cleaning cartridge in the mail slot To replace a cleaning cartridge in the mail slot, complete the following procedure: 1. Select the Move Media menu option from the Status screen. 2. Select Source and then select Cleaning Slot in the Source Element Type box. 3. Select Destination and then select Mail Slot in the Destination Element Type box. 4. Select Execute Move to place the cleaning cartridge in the mail slot. 5. When the move completes, press the Back button to access the library default screen. 6. Select Mail Slot Access from the Status screen. 7. Remove the expired cleaning cartridge. Mark it EXPIRED and then properly dispose of it. 8. Place a new cleaning cartridge in the mail slot. 9. Select the Move Media option from the Status screen. 10. Select Source and then select Mail Slot in the Source Element Type box. Chapter 5. Maintenance 45
-
 1
1 -
2
-
3
-
4
-
5
-
6
-
7
-
8
-
9
-
10
-
11
-
12
-
13
-
14
-
15
-
16
-
17
-
18
-
19
-
20
-
21
-
22
-
23
-
24
-
25
-
26
-
27
-
28
-
29
-
30
-
31
-
32
-
33
-
34
-
35
-
36
-
37
-
38
-
39
-
40
-
41
-
42
-
43
-
44
-
45
-
46
-
47
-
48
-
49
-
 50
50 -
 51
51 -
 52
52 -
 53
53 -
 54
54 -
 55
55 -
 56
56 -
 57
57 -
 58
58 -
 59
59 -
 60
60 -
61
-
62
-
63
-
64
-
65
-
66
-
67
-
68
-
69
-
70
-
71
-
72
-
73
-
74
-
75
-
76
-
77
-
78
-
79
-
80
-
81
-
82
-
83
-
84
-
85
-
86
-
87
-
88
-
89
-
90
-
91
-
92
-
93
-
94
-
95
-
96
-
97
-
98
-
99
-
100
-
101
-
102
-
103
-
104
-
105
-
106
-
107
-
108
-
109
-
110
-
111
-
112
-
113
-
114
-
115
-
116
-
117
-
118
-
119
-
120
-
121
-
122
-
123
-
124
-
125
-
126
-
127
-
128
 |
 |
