IBM 4560SLX User Guide - Page 92
Module configuration
 |
UPC - 087944855910
View all IBM 4560SLX manuals
Add to My Manuals
Save this manual to your list of manuals |
Page 92 highlights
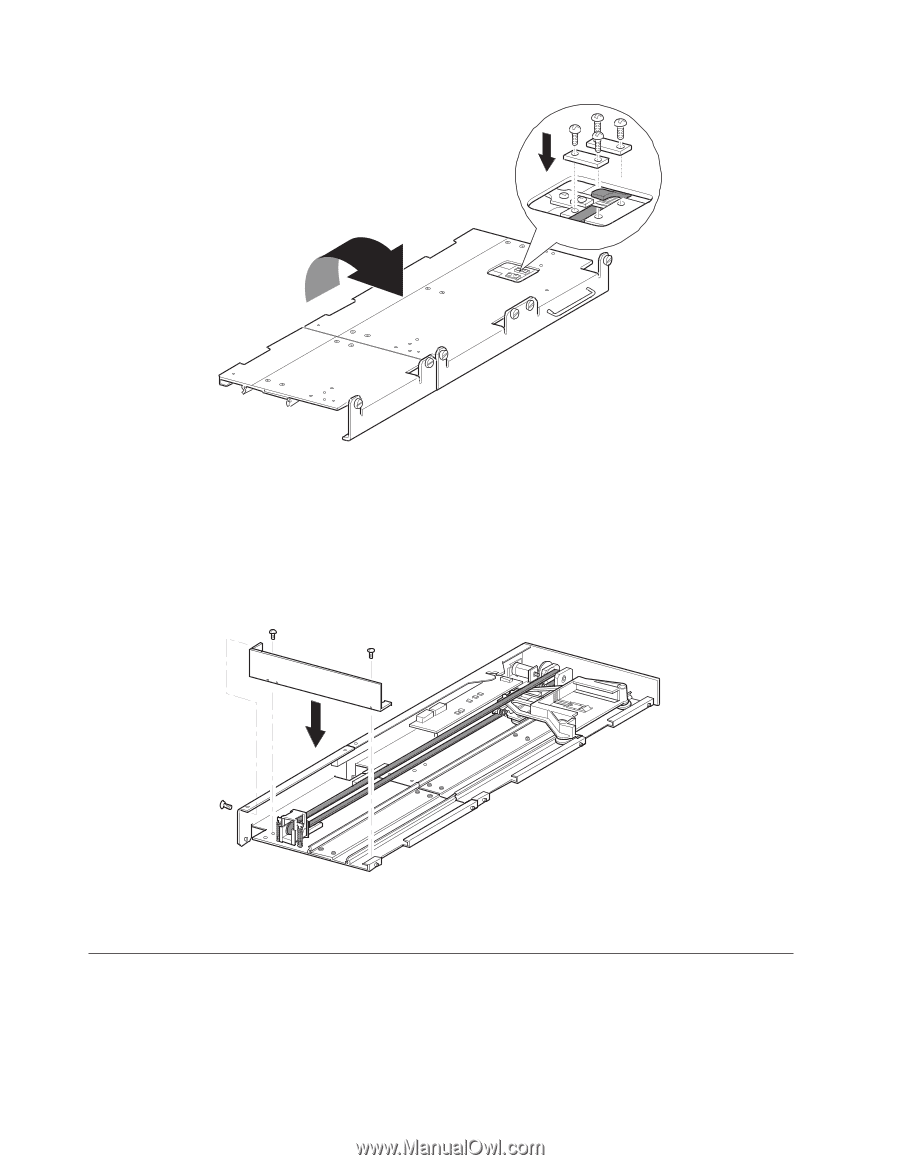
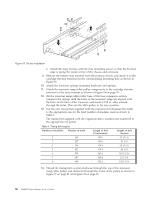
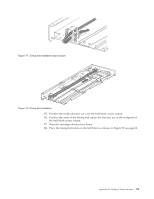
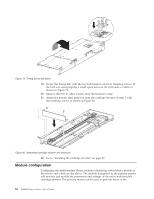
Figure 79. Timing belt to belt block 19. Secure the timing belt with the two belt brackets and four retaining screws. If the belt was sized properly a small space between the belt ends is visible as shown in Figure 79. 20. Remove the 0.05 in. allen wrench from the tensioner ramp. 21. Attach the bottom plate removed from the cartridge elevator in step 1 with the retaining screws as shown in Figure 80. Figure 80. Assembled cartridge elevator and extension 22. Go to "Installing the cartridge elevator" on page 72. Module configuration Configuring the multi-module library includes identifying which library module is the master and which are the slaves. The module designated as the primary master will monitor and modify the parameters and settings of the entire multi-module cartridge elevator. The primary master can be used to perform many of the 82 4560SLX Tape Library: User's Guide
-
 1
1 -
2
-
3
-
4
-
5
-
6
-
7
-
8
-
9
-
10
-
11
-
12
-
13
-
14
-
15
-
16
-
17
-
18
-
19
-
20
-
21
-
22
-
23
-
24
-
25
-
26
-
27
-
28
-
29
-
30
-
31
-
32
-
33
-
34
-
35
-
36
-
37
-
38
-
39
-
40
-
41
-
42
-
43
-
44
-
45
-
46
-
47
-
48
-
49
-
50
-
51
-
52
-
53
-
54
-
55
-
56
-
57
-
58
-
59
-
60
-
61
-
62
-
63
-
64
-
65
-
66
-
67
-
68
-
69
-
70
-
71
-
72
-
73
-
74
-
75
-
76
-
77
-
78
-
79
-
80
-
81
-
82
-
83
-
84
-
85
-
86
-
 87
87 -
 88
88 -
 89
89 -
 90
90 -
 91
91 -
 92
92 -
 93
93 -
 94
94 -
 95
95 -
 96
96 -
 97
97 -
98
-
99
-
100
-
101
-
102
-
103
-
104
-
105
-
106
-
107
-
108
-
109
-
110
-
111
-
112
-
113
-
114
-
115
-
116
-
117
-
118
-
119
-
120
-
121
-
122
-
123
-
124
-
125
-
126
-
127
-
128
 |
 |