IBM 4560SLX User Guide - Page 87
base of the tensioner, and insert a 0.05 in. allen wrench through the holes
 |
UPC - 087944855910
View all IBM 4560SLX manuals
Add to My Manuals
Save this manual to your list of manuals |
Page 87 highlights
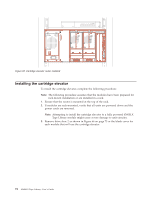
Figure 70. Cartridge elevator bottom plate 2. Slide the elevator car to the top of the primary chassis. The elevator car is now positioned over the belt block bracket access cutout next to the PCB and drive motor. Figure 71. Cartridge elevator media elevator car 3. On the tensioner ramp/idler pulley base of the primary chassis, compress the springs until the holes in the tensioner ramp are aligned with the holes in the base of the tensioner, and insert a 0.05 in. allen wrench through the holes as shown in Figure 72 on page 78. This sets the idler pulley to the zero position. Appendix B. Adding a library module 77
-
 1
1 -
2
-
3
-
4
-
5
-
6
-
7
-
8
-
9
-
10
-
11
-
12
-
13
-
14
-
15
-
16
-
17
-
18
-
19
-
20
-
21
-
22
-
23
-
24
-
25
-
26
-
27
-
28
-
29
-
30
-
31
-
32
-
33
-
34
-
35
-
36
-
37
-
38
-
39
-
40
-
41
-
42
-
43
-
44
-
45
-
46
-
47
-
48
-
49
-
50
-
51
-
52
-
53
-
54
-
55
-
56
-
57
-
58
-
59
-
60
-
61
-
62
-
63
-
64
-
65
-
66
-
67
-
68
-
69
-
70
-
71
-
72
-
73
-
74
-
75
-
76
-
77
-
78
-
79
-
80
-
81
-
 82
82 -
 83
83 -
 84
84 -
 85
85 -
 86
86 -
 87
87 -
 88
88 -
 89
89 -
 90
90 -
 91
91 -
 92
92 -
93
-
94
-
95
-
96
-
97
-
98
-
99
-
100
-
101
-
102
-
103
-
104
-
105
-
106
-
107
-
108
-
109
-
110
-
111
-
112
-
113
-
114
-
115
-
116
-
117
-
118
-
119
-
120
-
121
-
122
-
123
-
124
-
125
-
126
-
127
-
128
 |
 |
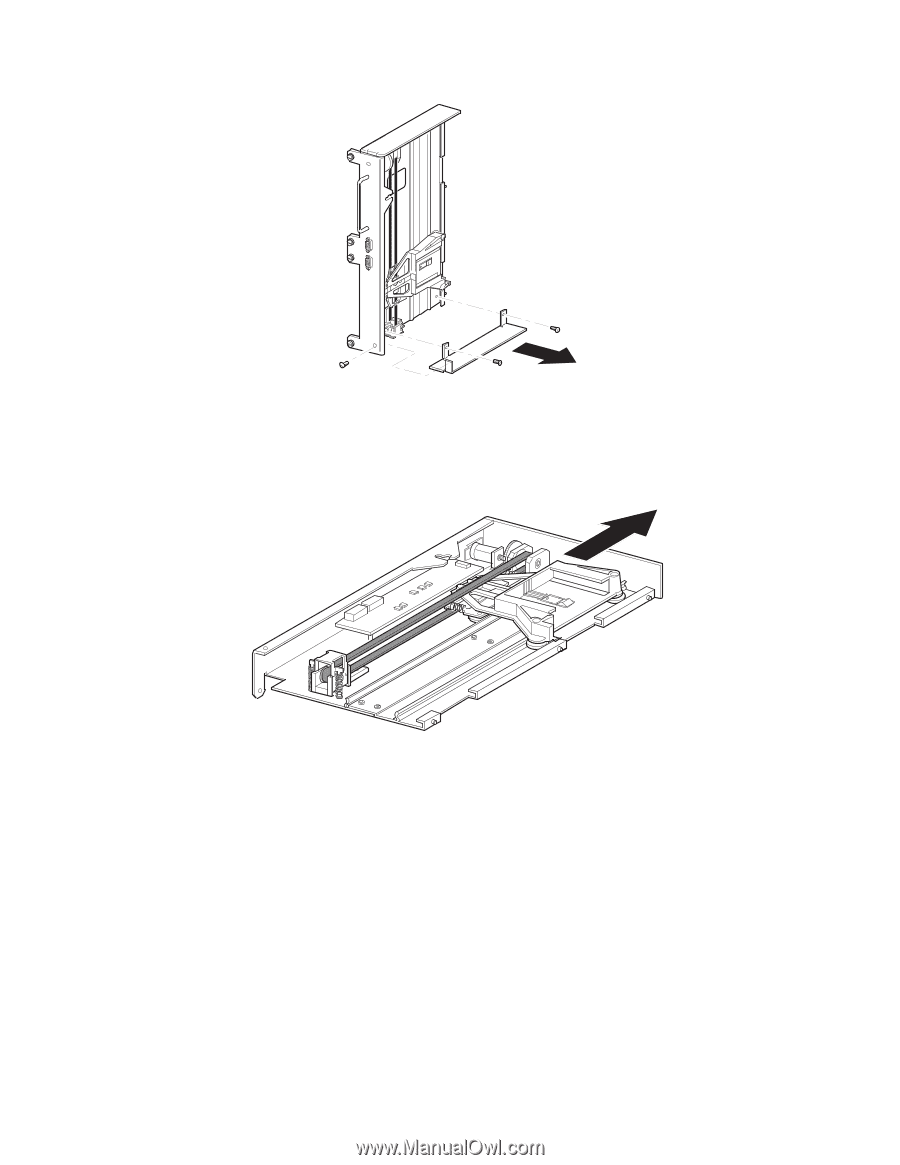
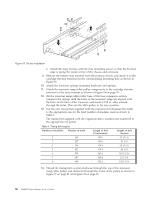
2.
Slide the elevator car to the top of the primary chassis.
The elevator car is now positioned over the belt block bracket access cutout
next to the PCB and drive motor.
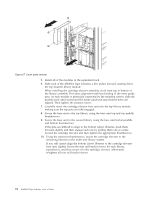
3.
On the tensioner ramp/idler pulley base of the primary chassis, compress the
springs until the holes in the tensioner ramp are aligned with the holes in the
base of the tensioner, and insert a 0.05 in. allen wrench through the holes as
shown in Figure 72 on page 78. This sets the idler pulley to the zero position.
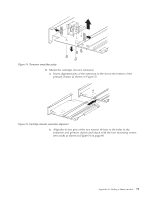
Figure 70. Cartridge elevator bottom plate
Figure 71. Cartridge elevator media elevator car
Appendix B. Adding a library module
77