IBM 4560SLX User Guide - Page 67
Setting SNMP traps, Setting e-mail addresses, Setting remote FTP server parameters, Access, Con
 |
UPC - 087944855910
View all IBM 4560SLX manuals
Add to My Manuals
Save this manual to your list of manuals |
Page 67 highlights
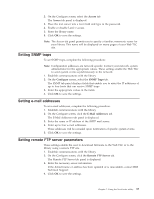
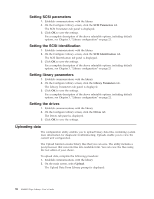
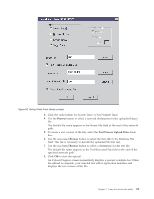
2. On the Configure screen, select the Access tab. The Access tab panel is displayed. 3. Place the text cursor into a level field and type in the password. 4. Enable or disable Level 2 access. 5. Enter the library name. 6. Click OK to save the settings. Note: The Access tab panel permits you to specify a familiar, mnemonic name for your library. This name will be displayed on many pages of your Web TLC site. Setting SNMP traps To set SNMP traps, complete the following procedure: Note: Configuration addresses are network specific. Contact your network system administrator for the appropriate values. These settings enable the Web TLC to send system events asynchronously to the network. 1. Establish communications with the library. 2. On the Configure screen, select the SNMP Traps tab. The SNMP tab panel displays fields that enable you to enter the IP addresses of up to four hosts that can receive SNMP traps. 3. Enter the appropriate values in the fields. 4. Click OK to save the settings. Setting e-mail addresses To set e-mail addresses, complete the following procedure: 1. Establish communications with the library. 2. On the Configure screen, click the E-Mail Addresses tab. The E-Mail Addresses tab panel is displayed. 3. Enter the name or IP address of the SMTP mail server. 4. Enter up to four e-mail addresses. These addresses will be e-mailed upon notification of specific system events. 5. Click OK to save the settings. Setting remote FTP server parameters These settings enable the user to download firmware to the Web TLC or to the library using a remote FTP site. 1. Establish communications with the library. 2. On the Configure screen, click the Remote FTP Server tab. The Remote FTP Server tab panel is displayed. 3. Enter the necessary server information. If the default name or address has been updated or is unavailable, contact IBM Technical Support. 4. Click OK to save the settings. Chapter 7. Using the NeoCenter utility 57
-
 1
1 -
2
-
3
-
4
-
5
-
6
-
7
-
8
-
9
-
10
-
11
-
12
-
13
-
14
-
15
-
16
-
17
-
18
-
19
-
20
-
21
-
22
-
23
-
24
-
25
-
26
-
27
-
28
-
29
-
30
-
31
-
32
-
33
-
34
-
35
-
36
-
37
-
38
-
39
-
40
-
41
-
42
-
43
-
44
-
45
-
46
-
47
-
48
-
49
-
50
-
51
-
52
-
53
-
54
-
55
-
56
-
57
-
58
-
59
-
60
-
61
-
 62
62 -
 63
63 -
 64
64 -
 65
65 -
 66
66 -
 67
67 -
 68
68 -
 69
69 -
 70
70 -
 71
71 -
 72
72 -
73
-
74
-
75
-
76
-
77
-
78
-
79
-
80
-
81
-
82
-
83
-
84
-
85
-
86
-
87
-
88
-
89
-
90
-
91
-
92
-
93
-
94
-
95
-
96
-
97
-
98
-
99
-
100
-
101
-
102
-
103
-
104
-
105
-
106
-
107
-
108
-
109
-
110
-
111
-
112
-
113
-
114
-
115
-
116
-
117
-
118
-
119
-
120
-
121
-
122
-
123
-
124
-
125
-
126
-
127
-
128
 |
 |