Intermec PM23c PM23c, PM43, and PM43c Mid-Range Printer User Manual - Page 66
Con Wireless Communications from the Main Menu, Install Authentication Certificates, Default
 |
View all Intermec PM23c manuals
Add to My Manuals
Save this manual to your list of manuals |
Page 66 highlights
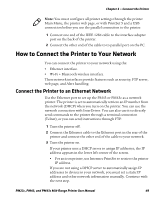
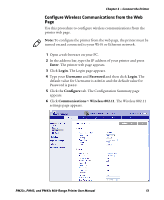
Chapter 3 - Connect the Printer 7 Change wireless settings as needed. You can also click Default Settings to restore all default Wireless 802.11 settings. 8 Click Save when you are finished. Configure Wireless Communications from the Main Menu If you have a touch panel printer, you can configure wireless communications using the Wireless 802.11 wizard. You can also configure wireless communications from the Main Menu. 1 From the Ready screen, press the Main Menu button. The Main Menu appears. 2 Select Settings > Communications > Wireless 802.11. 3 Change settings as needed for your wireless connection. 4 When you are finished, save your changes. Install Authentication Certificates If you are using Wireless 802.11 security, you may need to install authentication certificates in the printer for the highest level of security. 1 Make sure you have the printer configured for the correct date and time. 2 On your PC, open an FTP connection to the IP address of the printer. 3 Transfer your certificate to /home/user/certificates/public. 4 On your PC, open a Telnet session to the printer. 5 Change the directory to: /home/user/certificates/public. 6 Type this command:ls -la. You should see the certificate that you transferred in Step 3. 52 PM23c, PM43, and PM43c Mid-Range Printer User Manual
-
 1
1 -
2
-
3
-
4
-
5
-
6
-
7
-
8
-
9
-
10
-
11
-
12
-
13
-
14
-
15
-
16
-
17
-
18
-
19
-
20
-
21
-
22
-
23
-
24
-
25
-
26
-
27
-
28
-
29
-
30
-
31
-
32
-
33
-
34
-
35
-
36
-
37
-
38
-
39
-
40
-
41
-
42
-
43
-
44
-
45
-
46
-
47
-
48
-
49
-
50
-
51
-
52
-
53
-
54
-
55
-
56
-
57
-
58
-
59
-
60
-
 61
61 -
 62
62 -
 63
63 -
 64
64 -
 65
65 -
 66
66 -
 67
67 -
 68
68 -
 69
69 -
 70
70 -
 71
71 -
72
-
73
-
74
-
75
-
76
-
77
-
78
-
79
-
80
-
81
-
82
-
83
-
84
-
85
-
86
-
87
-
88
-
89
-
90
-
91
-
92
-
93
-
94
-
95
-
96
-
97
-
98
-
99
-
100
-
101
-
102
-
103
-
104
-
105
-
106
-
107
-
108
-
109
-
110
-
111
-
112
-
113
-
114
-
115
-
116
-
117
-
118
-
119
-
120
-
121
-
122
-
123
-
124
-
125
-
126
-
127
-
128
-
129
-
130
-
131
-
132
-
133
-
134
-
135
-
136
-
137
-
138
-
139
-
140
-
141
-
142
-
143
-
144
-
145
-
146
-
147
-
148
-
149
-
150
-
151
-
152
-
153
-
154
-
155
-
156
-
157
-
158
-
159
-
160
-
161
-
162
-
163
-
164
-
165
-
166
-
167
-
168
 |
 |
