Kyocera TASKalfa 620 Printing System (W) Operation Guide (Functions Edition) - Page 25
Selecting the Printer Settings, Frame mode can be selected, TCP/IP, Subnet Mask, Gateway, Interface
 |
View all Kyocera TASKalfa 620 manuals
Add to My Manuals
Save this manual to your list of manuals |
Page 25 highlights
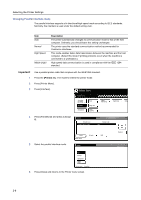
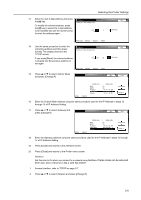
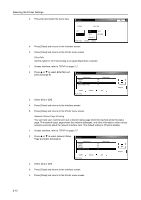
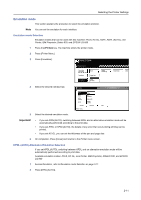
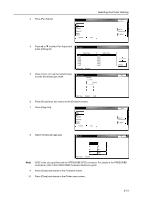
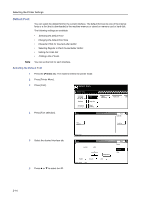
Selecting the Printer Settings 13 Enter the next 3-digit address and press the [#] key. IP Address Confirm per 3 lines pressing # key. Back To modify the entered address, press the [#] key to select the 3-digit address to be modified and use the numeric keys to enter the address again. 10 141 0 0 (with #key) Printer menu - Interface - Network - TCP/IP 14 Use the same procedure to enter the remaining address and then press IP Address Confirm per 3 lines pressing # key. Back [Close]. The display returns to the TCP/IP screen. If you press [Back], the entered address is cleared and the previous address is set again. 10 141 110 204 (with #key) Printer menu - Interface - Network - TCP/IP 15 Press or to select Subnet Mask and press [Change #]. Back Close nterface - Network Default menu DHCP BOOTP IP address Subnet Mask Gateway Setting mode On On 10. 141. 110. 204 255. 255. 248. 0 10. 181. 39. 254 Change # 16 Enter the Subnet Mask address using the same procedure used for the IP Address in steps 12 through 14 of IP Address Setting. 17 Press or to select Gateway and press [Change #]. Back Close nterface - Network Default menu DHCP BOOTP IP address Subnet Mask Gateway Setting mode On On 10. 141. 110. 204 255. 255. 248. 0 10. 181. 39. 254 Change # 18 Enter the Gateway address using the same procedure used for the IP Address in steps 12 through 14 of IP Address Setting. 19 Press [Close] and returns to the Interface screen. 20 Press [Close] and returns to the Printer menu screen. NetWare Set this item to On when you connect to a network using NetWare. Frame mode can be selected from Auto, 802.3, Ethernet II, 802.2, and 802.3SNAP. 1 Access Interface, refer to TCP/IP on page 2-7. 2 Press or to select Netware and press [Change #]. 2-9
-
 1
1 -
2
-
3
-
4
-
5
-
6
-
7
-
8
-
9
-
10
-
11
-
12
-
13
-
14
-
15
-
16
-
17
-
18
-
19
-
 20
20 -
 21
21 -
 22
22 -
 23
23 -
 24
24 -
 25
25 -
 26
26 -
 27
27 -
 28
28 -
 29
29 -
 30
30 -
31
-
32
-
33
-
34
-
35
-
36
-
37
-
38
-
39
-
40
-
41
-
42
-
43
-
44
-
45
-
46
-
47
-
48
-
49
-
50
-
51
-
52
-
53
-
54
-
55
-
56
-
57
-
58
-
59
-
60
-
61
-
62
-
63
-
64
-
65
-
66
-
67
-
68
-
69
-
70
-
71
-
72
-
73
-
74
-
75
-
76
-
77
-
78
 |
 |
