Kyocera TASKalfa 620 Printing System (W) Operation Guide (Functions Edition) - Page 54
Using Proof-and-Hold, Printing a Private Print/Stored Job
 |
View all Kyocera TASKalfa 620 manuals
Add to My Manuals
Save this manual to your list of manuals |
Page 54 highlights
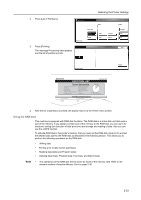
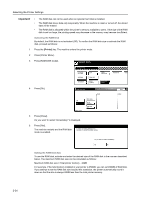
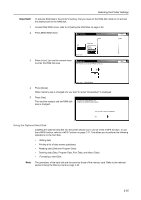
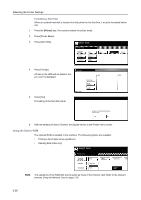
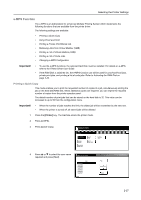
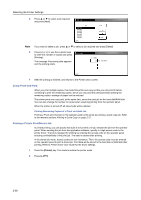
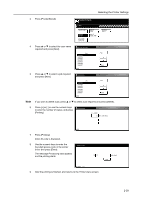
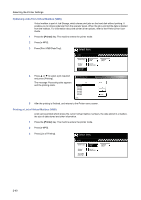
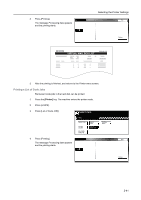
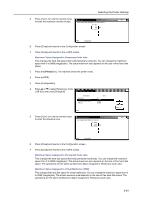
Selecting the Printer Settings 5 Press or to select a job required and press [Next]. Quick Copy J ob DataH001 DataH002 DataH003 DataH004 DataH005 DataH006 DataH007 Up Down e-MPS Note If you want to delete a job, press or to select a job required and press [Delete]. 6 Press [+] or [-] or use the numeric keys to enter the number of copies and press [Printing]. The message Processing data appears and the printing starts. Quick Copy (1 ~ 9999) 10 Set (with #key) e-MPS 7 After the printing is finished, and returns to the Printer menu screen. Using Proof-and-Hold When you print multiple copies, this mode first prints one copy so that you can proof it before continuing to print the remaining copies. Since you can proof the printouts before printing the remaining copies, wastage of paper can be reduced. The printer prints one copy and, at the same time, saves the print job on the hard disk/RAM disk. You can also change the number of copies when resuming printing from the operator panel. When the printer is turned off, all stored jobs will be deleted. Printing Remaining Copies of a Proof and Hold Job Printing a Proof-and-Hold job on the operator panel is the same as printing a quick copy job. Refer to the relevant sections Printing a Quick Copy on page 2-37. Printing a Private Print/Stored Job In private printing, you can specify that a job is not printed until you release the job from the operator panel. When sending the job from the application software, specify a 4-digit access code in the printer driver. The job is released for printing by entering the access code on the operator panel ensuring confidentiality of the print job. The data is cleared after printing. In the stored job mode, access codes are not mandatory. Then, the access code must be entered on the operator panel to print a stored job. Print data will be stored in the hard disk or RAM disk after printing. Refer to Printer Driver User Guide for the driver settings. 1 Press the [Printer] key. The machine enters the printer mode. 2 Press [e-MPS]. 2-38
-
 1
1 -
2
-
3
-
4
-
5
-
6
-
7
-
8
-
9
-
10
-
11
-
12
-
13
-
14
-
15
-
16
-
17
-
18
-
19
-
20
-
21
-
22
-
23
-
24
-
25
-
26
-
27
-
28
-
29
-
30
-
31
-
32
-
33
-
34
-
35
-
36
-
37
-
38
-
39
-
40
-
41
-
42
-
43
-
44
-
45
-
46
-
47
-
48
-
 49
49 -
 50
50 -
 51
51 -
 52
52 -
 53
53 -
 54
54 -
 55
55 -
 56
56 -
 57
57 -
 58
58 -
 59
59 -
60
-
61
-
62
-
63
-
64
-
65
-
66
-
67
-
68
-
69
-
70
-
71
-
72
-
73
-
74
-
75
-
76
-
77
-
78
 |
 |
