Kyocera TASKalfa 620 Printing System (W) Operation Guide (Functions Edition) - Page 50
Activating the RAM Disk, Setting the RAM Disk Size
 |
View all Kyocera TASKalfa 620 manuals
Add to My Manuals
Save this manual to your list of manuals |
Page 50 highlights
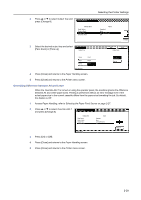
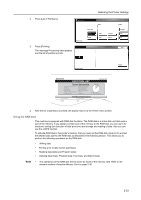
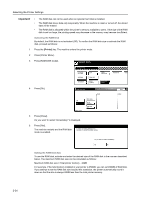
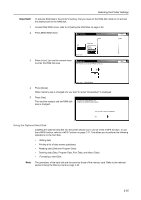
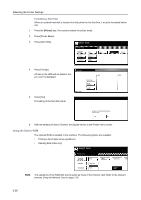
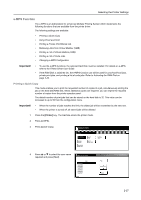
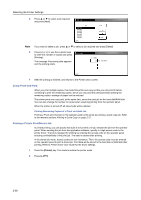
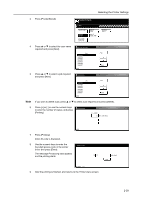
Selecting the Printer Settings Important! • The RAM disk can not be used when an optional hard disk is installed. • The RAM disk stores data only temporarily. When the machine is reset or turned off, the stored data will be erased. • The RAM disk is allocated within the printer's memory available to users. If the size of the RAM disk is set too large, the printing speed may decrease or the memory may become insufficient. Activating the RAM Disk By default, the RAM disk is not activated (Off). To confirm the RAM disk size or activate the RAM disk, proceed as follows: 1 Press the [Printer] key. The machine enters the printer mode. 2 Press [Printer Menu]. 3 Press [RAM DISK mode]. Select item. Printer menu PturisnPt aSgtaeInterface Emulation Font Page Set Print Quality PHaapnedrling Hard Disk Other RAM DISK Mode 4 Press [On]. RAM DISK Mode Read Off On Printer menu Write Data List of Partitions RAM DISK Size 5 Press [Close]. Do you want to restart immediately? is displayed. 6 Press [Yes]. The machine restarts and the RAM disk mode is enabled. To make new setting effective, it is necessary to restart the printer system. Back Delete Do you want to restart immediately? Yes No Setting the RAM Disk Size To use the RAM disk, activate and enter the desired size of the RAM disk in the manner described below. The maximum RAM disk size can be calculated as follows: Maximum RAM disk size = Total printer memory - 48MB For example, if the total memory installed in your printer is 256MB, you can set 208MB of RAM disk. If you attempt to set the RAM disk size beyond this restriction, the printer automatically round it down so that the size is always 48MB less than the total printer memory. 2-34
-
 1
1 -
2
-
3
-
4
-
5
-
6
-
7
-
8
-
9
-
10
-
11
-
12
-
13
-
14
-
15
-
16
-
17
-
18
-
19
-
20
-
21
-
22
-
23
-
24
-
25
-
26
-
27
-
28
-
29
-
30
-
31
-
32
-
33
-
34
-
35
-
36
-
37
-
38
-
39
-
40
-
41
-
42
-
43
-
44
-
 45
45 -
 46
46 -
 47
47 -
 48
48 -
 49
49 -
 50
50 -
 51
51 -
 52
52 -
 53
53 -
 54
54 -
 55
55 -
56
-
57
-
58
-
59
-
60
-
61
-
62
-
63
-
64
-
65
-
66
-
67
-
68
-
69
-
70
-
71
-
72
-
73
-
74
-
75
-
76
-
77
-
78
 |
 |
