Kyocera TASKalfa 620 Printing System (W) Operation Guide (Functions Edition) - Page 51
Using the Optional Hard Disk
 |
View all Kyocera TASKalfa 620 manuals
Add to My Manuals
Save this manual to your list of manuals |
Page 51 highlights
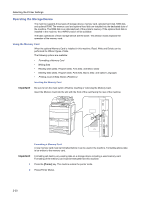
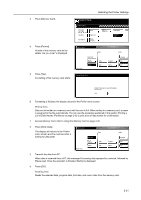
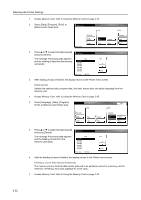
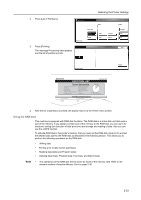
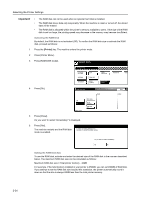
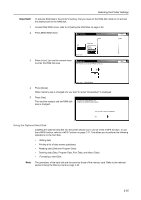
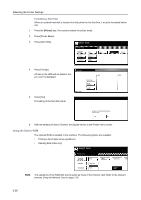
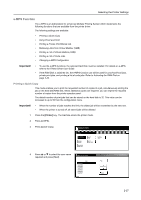
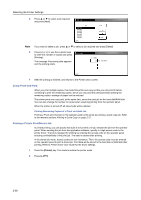
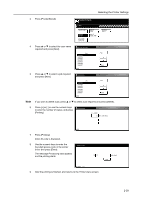
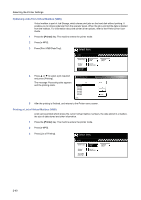
Selecting the Printer Settings Important! To activate RAM disk in the printer's memory, first you must set the RAM disk mode to On and set the desired size for the RAM disk. 1 Access RAM DISK mode, refer to Activating the RAM Disk on page 2-34. 2 Press [RAM DISK Size]. RAM DISK Mode Read Back Delete Off On Printer menu Write Data List of Partitions RAM DISK Size 3 Press [+] or [-] or use the numeric keys to enter the RAM disk size. RAM DISK Size The memory size to use as RAM disk can be set. Back 16 MB Printer menu - RAM DISK Mode 4 Press [Close]. When memory size is changed, Do you want to restart immediately? is displayed. 5 Press [Yes]. The machine restarts and the RAM disk size is changed. To make new setting effective, it is necessary to restart the printer system. Do you want to restart immediately? Yes No Using the Optional Hard Disk Installing the optional hard disk into the printer allows you to use all of the e-MPS function. To use the e-MPS function, refer to e-MPS Function on page 2-37. This allows you to perform the following operations on the hard disk. • Writing data • Printing a list of data names (partitions) • Reading data (Data and Program Data) • Deleting data (Data, Program Data, Font Data, and Macro Data) • Formatting a Hard Disk Note The operations of the hard disk are the same as those of the memory card. Refer to the relevant sections Using the Memory Card on page 2-30. 2-35
-
 1
1 -
2
-
3
-
4
-
5
-
6
-
7
-
8
-
9
-
10
-
11
-
12
-
13
-
14
-
15
-
16
-
17
-
18
-
19
-
20
-
21
-
22
-
23
-
24
-
25
-
26
-
27
-
28
-
29
-
30
-
31
-
32
-
33
-
34
-
35
-
36
-
37
-
38
-
39
-
40
-
41
-
42
-
43
-
44
-
45
-
 46
46 -
 47
47 -
 48
48 -
 49
49 -
 50
50 -
 51
51 -
 52
52 -
 53
53 -
 54
54 -
 55
55 -
 56
56 -
57
-
58
-
59
-
60
-
61
-
62
-
63
-
64
-
65
-
66
-
67
-
68
-
69
-
70
-
71
-
72
-
73
-
74
-
75
-
76
-
77
-
78
 |
 |
