Lenovo ThinkPad i Series 1124 ThinkPad 240 User's Reference that shipped with - Page 124
Using the Recovery CD with a FAT32 system
 |
View all Lenovo ThinkPad i Series 1124 manuals
Add to My Manuals
Save this manual to your list of manuals |
Page 124 highlights
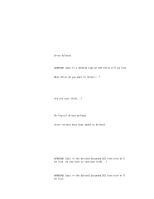
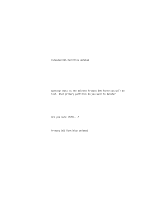
Recovering lost or damaged software 12. Restart the computer. As the computer starts, Windows will configure your device and system settings. Follow the instructions on the screen to finalize the recovery installation. Using the Recovery CD with a FAT32 system Follow these instructions to use the Recovery CD if your system is FAT32. 1. From the Windows 98 desktop, click Start, Shut down, then click Restart in MS-DOS mode. 2. The system boots to the DOS prompt. At the DOS prompt, type FDISK and then press [Enter]. You will see the message Do you wish to enable large disk support (Y/N)...? 3. Press [Y] and then press [Enter]. The "FDISK Options" screen appears. 4. Press [3] and then press [Enter]. The "Delete DOS Partition or Logical DOS Drive" screen appears. 5. Press [3] and then press [Enter]. The "Delete Logical DOS Drive(s) in the Extended DOS Partition" screen appears. You see a message WARNING! Data in a deleted Logical DOS Drive will be lost. 6. At the prompt What drive do you want to delete...?press the last drive letter listed ([F], [E], or [D], etc.) and then press [Enter]. You are prompted to enter the volume label. 7. Type the volume label and then press [Enter]. You see the message Are you sure (Y/N)...? 8. Press [Y] and then press [Enter]. Next to the drive letter, you will see the message 112 ThinkPad 240 User's Reference
-
 1
1 -
2
-
3
-
4
-
5
-
6
-
7
-
8
-
9
-
10
-
11
-
12
-
13
-
14
-
15
-
16
-
17
-
18
-
19
-
20
-
21
-
22
-
23
-
24
-
25
-
26
-
27
-
28
-
29
-
30
-
31
-
32
-
33
-
34
-
35
-
36
-
37
-
38
-
39
-
40
-
41
-
42
-
43
-
44
-
45
-
46
-
47
-
48
-
49
-
50
-
51
-
52
-
53
-
54
-
55
-
56
-
57
-
58
-
59
-
60
-
61
-
62
-
63
-
64
-
65
-
66
-
67
-
68
-
69
-
70
-
71
-
72
-
73
-
74
-
75
-
76
-
77
-
78
-
79
-
80
-
81
-
82
-
83
-
84
-
85
-
86
-
87
-
88
-
89
-
90
-
91
-
92
-
93
-
94
-
95
-
96
-
97
-
98
-
99
-
100
-
101
-
102
-
103
-
104
-
105
-
106
-
107
-
108
-
109
-
110
-
111
-
112
-
113
-
114
-
115
-
116
-
117
-
118
-
 119
119 -
 120
120 -
 121
121 -
 122
122 -
 123
123 -
 124
124 -
 125
125 -
 126
126 -
 127
127 -
 128
128 -
 129
129 -
130
-
131
-
132
-
133
-
134
-
135
-
136
-
137
-
138
-
139
-
140
-
141
-
142
-
143
-
144
-
145
-
146
-
147
-
148
-
149
-
150
-
151
-
152
-
153
-
154
-
155
-
156
-
157
-
158
-
159
-
160
-
161
-
162
-
163
-
164
-
165
-
166
-
167
-
168
-
169
-
170
 |
 |
