Lenovo ThinkPad i Series 1124 ThinkPad 240 User's Reference that shipped with - Page 73
Installing the CD-ROM device driver for Windows NT 4.0, Attention, My Computer, Adapter, Driver
 |
View all Lenovo ThinkPad i Series 1124 manuals
Add to My Manuals
Save this manual to your list of manuals |
Page 73 highlights
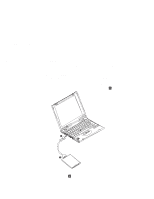
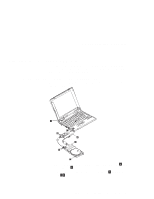
Attaching the external CD-ROM drive 6. Check that the diskette drive (for example, A:\) has been selected; click OK. 7. You may get a message stating that the driver on your system is a newer version than the one on the driver diskette. If this occurs, the setup program will ask you if you want to keep the device driver you have. Select Yes. 8. When the message "Do you want to restart your computer now?" appears, remove the driver diskette, and click Yes. Your computer will automatically restart. Note: You might be prompted to restart the computer a few times to successfully install the driver. You can now use the CD-ROM in Windows 98 or Windows 95. Installing the CD-ROM device driver for Windows NT 4.0 Attention: Do not interrupt the system during installation. Close all other applications before installing the device driver. 1. Connect the CD-ROM drive to the ThinkPad 240. Refer to "Connecting the CD-ROM to the ThinkPad 240" on page 59. 2. Connect the FDD drive to the ThinkPad 240. Refer to "Attaching the external FDD drive" on page 58. 3. Turn on the ThinkPad 240. Press the power switch of the CD-ROM drive. 4. Open My Computer in the desktop, and double-click the SCSI Adapter icon in the Control Panel. 5. Select the Driver tab; then click the Add button. 6. Click Have Disk in the "Install Driver" window. 7. Insert the driver diskette into the FDD. 8. Check that the diskette drive (for example, A:\) has been selected; click Continue. 9. You may get a message stating that the driver on your system is a newer version than the one on the driver diskette. If this occurs, the setup program will ask you if you want to keep the device driver you have. Select Yes. Chapter 2. Extending the features of your computer 61
-
 1
1 -
2
-
3
-
4
-
5
-
6
-
7
-
8
-
9
-
10
-
11
-
12
-
13
-
14
-
15
-
16
-
17
-
18
-
19
-
20
-
21
-
22
-
23
-
24
-
25
-
26
-
27
-
28
-
29
-
30
-
31
-
32
-
33
-
34
-
35
-
36
-
37
-
38
-
39
-
40
-
41
-
42
-
43
-
44
-
45
-
46
-
47
-
48
-
49
-
50
-
51
-
52
-
53
-
54
-
55
-
56
-
57
-
58
-
59
-
60
-
61
-
62
-
63
-
64
-
65
-
66
-
67
-
 68
68 -
 69
69 -
 70
70 -
 71
71 -
 72
72 -
 73
73 -
 74
74 -
 75
75 -
 76
76 -
 77
77 -
 78
78 -
79
-
80
-
81
-
82
-
83
-
84
-
85
-
86
-
87
-
88
-
89
-
90
-
91
-
92
-
93
-
94
-
95
-
96
-
97
-
98
-
99
-
100
-
101
-
102
-
103
-
104
-
105
-
106
-
107
-
108
-
109
-
110
-
111
-
112
-
113
-
114
-
115
-
116
-
117
-
118
-
119
-
120
-
121
-
122
-
123
-
124
-
125
-
126
-
127
-
128
-
129
-
130
-
131
-
132
-
133
-
134
-
135
-
136
-
137
-
138
-
139
-
140
-
141
-
142
-
143
-
144
-
145
-
146
-
147
-
148
-
149
-
150
-
151
-
152
-
153
-
154
-
155
-
156
-
157
-
158
-
159
-
160
-
161
-
162
-
163
-
164
-
165
-
166
-
167
-
168
-
169
-
170
 |
 |