Lenovo ThinkPad i Series 1124 ThinkPad 240 User's Reference that shipped with - Page 75
Attaching an external monitor, Start the ThinkPad Configuration program. See ThinkPad
 |
View all Lenovo ThinkPad i Series 1124 manuals
Add to My Manuals
Save this manual to your list of manuals |
Page 75 highlights
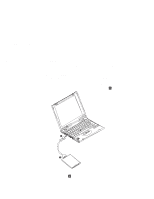
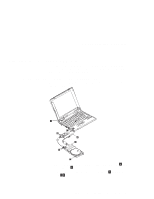
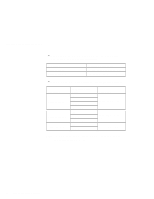
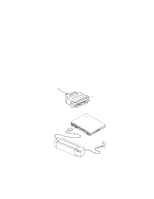
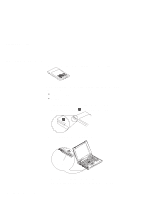
Attaching an external monitor Attaching an external monitor This section provides information about using the computer LCD and an external monitor. It also provides things to consider when using DOS applications. The LCD of your computer uses thin-film transistor (TFT) technology. The LCD displays output with SVGA (800x600 resolution) video mode and 16M colors. If you are attaching an external monitor that supports a resolution higher than VGA mode, you can achieve a maximum of 1024x768 video resolution. To attach an external monitor, do the following: 1. Connect the external monitor to the external-monitor connector at the rear of the computer; then connect the monitor to an electrical outlet. 2. Turn on the monitor. 3. Start the ThinkPad Configuration program. (See "ThinkPad configuration" on page 29.) 4. Change the display output location by clicking on the LCD+External Display button. button or the External Display Notes: 1. If you select the LCD+External Display button, do not attach an external monitor that supports only VGA mode (640x480 resolution). Otherwise, the external monitor is scrambled and output is not displayed, or the screen might be damaged. Use External Display instead. 2. You can change the display output location by pressing Fn+F7. 3. Set your monitor type and display device driver as follows: If you are attaching an SVGA monitor, see "Display modes" on page 65 for information on the supported color depth or resolution. Chapter 2. Extending the features of your computer 63
-
 1
1 -
2
-
3
-
4
-
5
-
6
-
7
-
8
-
9
-
10
-
11
-
12
-
13
-
14
-
15
-
16
-
17
-
18
-
19
-
20
-
21
-
22
-
23
-
24
-
25
-
26
-
27
-
28
-
29
-
30
-
31
-
32
-
33
-
34
-
35
-
36
-
37
-
38
-
39
-
40
-
41
-
42
-
43
-
44
-
45
-
46
-
47
-
48
-
49
-
50
-
51
-
52
-
53
-
54
-
55
-
56
-
57
-
58
-
59
-
60
-
61
-
62
-
63
-
64
-
65
-
66
-
67
-
68
-
69
-
 70
70 -
 71
71 -
 72
72 -
 73
73 -
 74
74 -
 75
75 -
 76
76 -
 77
77 -
 78
78 -
 79
79 -
 80
80 -
81
-
82
-
83
-
84
-
85
-
86
-
87
-
88
-
89
-
90
-
91
-
92
-
93
-
94
-
95
-
96
-
97
-
98
-
99
-
100
-
101
-
102
-
103
-
104
-
105
-
106
-
107
-
108
-
109
-
110
-
111
-
112
-
113
-
114
-
115
-
116
-
117
-
118
-
119
-
120
-
121
-
122
-
123
-
124
-
125
-
126
-
127
-
128
-
129
-
130
-
131
-
132
-
133
-
134
-
135
-
136
-
137
-
138
-
139
-
140
-
141
-
142
-
143
-
144
-
145
-
146
-
147
-
148
-
149
-
150
-
151
-
152
-
153
-
154
-
155
-
156
-
157
-
158
-
159
-
160
-
161
-
162
-
163
-
164
-
165
-
166
-
167
-
168
-
169
-
170
 |
 |
