Lexmark 44J0000 User's Guide - Page 75
Printer menus, Using the printer menu settings
 |
UPC - 734646207737
View all Lexmark 44J0000 manuals
Add to My Manuals
Save this manual to your list of manuals |
Page 75 highlights
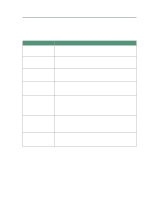
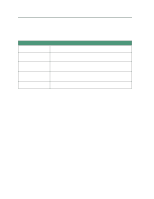
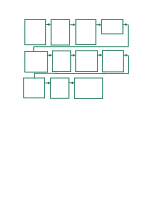
24 Printer menus Your printer has eleven menu categories with printer settings grouped together under each menu. For example, settings for printer status are under the Supplies Menu; settings for paper handling are grouped under the Paper Menu. The menu map shows the printer settings for each menu. Click on any setting for a description of what it is and when to use it. Using the printer menu settings Linking paper trays saves you time refilling them, monitoring supplies reminds you when to have replacements on hand, and selecting a specific print quality setting helps reduce printing costs-these are a few examples of using printer settings to control how you want to print. Media handling If you use the same media size and media type in tray 1 and tray 2, you can link the two trays by selecting the same Paper Size and Paper Type in the Paper Menu. When one tray is empty, the printer automatically switches to the other tray. Printer status Use the settings in the SUPPLIES MENU to monitor your supplies. Reduce printing costs Conserving supplies lowers printing costs: • Change the print quality setting from Normal (the default) to Ink Saver Color menu Menu Item Printer Setting Print Quality Ink Saver* Normal Best • Select N-UP PRINTING printing from your printer driver to save paper by printing multiple pages on one page or • Select MANUAL DUPLEX from your printer driver to print jobs on both sides of the page. 66
-
 1
1 -
2
-
3
-
4
-
5
-
6
-
7
-
8
-
9
-
10
-
11
-
12
-
13
-
14
-
15
-
16
-
17
-
18
-
19
-
20
-
21
-
22
-
23
-
24
-
25
-
26
-
27
-
28
-
29
-
30
-
31
-
32
-
33
-
34
-
35
-
36
-
37
-
38
-
39
-
40
-
41
-
42
-
43
-
44
-
45
-
46
-
47
-
48
-
49
-
50
-
51
-
52
-
53
-
54
-
55
-
56
-
57
-
58
-
59
-
60
-
61
-
62
-
63
-
64
-
65
-
66
-
67
-
68
-
69
-
 70
70 -
 71
71 -
 72
72 -
 73
73 -
 74
74 -
 75
75 -
 76
76 -
 77
77 -
 78
78 -
 79
79 -
 80
80 -
81
-
82
-
83
-
84
-
85
-
86
-
87
-
88
-
89
-
90
-
91
-
92
-
93
-
94
-
95
-
96
-
97
-
98
-
99
-
100
-
101
-
102
-
103
-
104
-
105
-
106
-
107
-
108
-
109
-
110
-
111
-
112
-
113
-
114
-
115
-
116
 |
 |