Lexmark C912 User's Reference - Page 192
Removing an optional drawer
 |
View all Lexmark C912 manuals
Add to My Manuals
Save this manual to your list of manuals |
Page 192 highlights
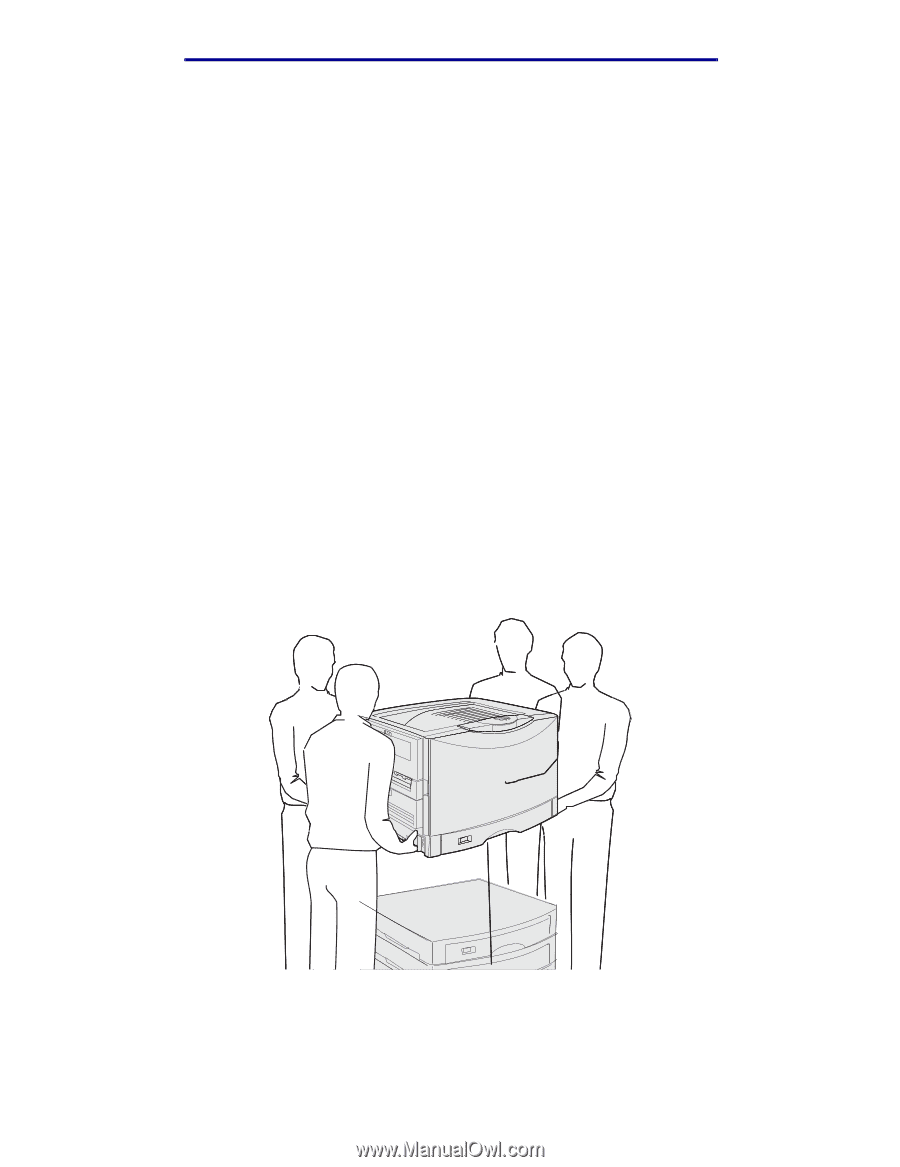
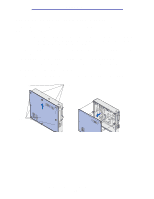
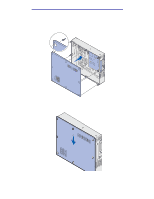
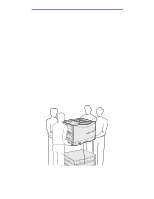
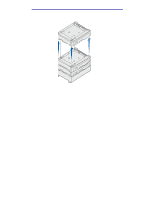
Maintenance 4 Tighten the eight screws. 5 Connect the printer cables and power cord, and turn the printer on. Note: To prevent an electrical overload, plug your printer into a well-grounded outlet on a non-ground fault interrupter (GFI) circuit. Removing an optional drawer 1 Turn the printer off. 2 Unplug the power cord. Note: To prevent an electrical overload, plug your printer into a well-grounded outlet on a non-ground fault interrupter (GFI) circuit. 3 Disconnect the parallel or Ethernet cable from the printer. If you have any other devices connected to the printer, turn them off and unplug any cables going to the printer. CAUTION: This printer weighs 80.5 kg (177 Ib) and requires four people to lift. Anytime you move or lift the printer make sure you have enough people to help. Use the handholds located on the sides to lift. 4 Lift the printer and move it away from the optional drawer. CAUTION: An optional drawer weighs 18.5 kg (40.8 Ib.). Have someone help when lifting. Removing an optional drawer 187
-
 1
1 -
2
-
3
-
4
-
5
-
6
-
7
-
8
-
9
-
10
-
11
-
12
-
13
-
14
-
15
-
16
-
17
-
18
-
19
-
20
-
21
-
22
-
23
-
24
-
25
-
26
-
27
-
28
-
29
-
30
-
31
-
32
-
33
-
34
-
35
-
36
-
37
-
38
-
39
-
40
-
41
-
42
-
43
-
44
-
45
-
46
-
47
-
48
-
49
-
50
-
51
-
52
-
53
-
54
-
55
-
56
-
57
-
58
-
59
-
60
-
61
-
62
-
63
-
64
-
65
-
66
-
67
-
68
-
69
-
70
-
71
-
72
-
73
-
74
-
75
-
76
-
77
-
78
-
79
-
80
-
81
-
82
-
83
-
84
-
85
-
86
-
87
-
88
-
89
-
90
-
91
-
92
-
93
-
94
-
95
-
96
-
97
-
98
-
99
-
100
-
101
-
102
-
103
-
104
-
105
-
106
-
107
-
108
-
109
-
110
-
111
-
112
-
113
-
114
-
115
-
116
-
117
-
118
-
119
-
120
-
121
-
122
-
123
-
124
-
125
-
126
-
127
-
128
-
129
-
130
-
131
-
132
-
133
-
134
-
135
-
136
-
137
-
138
-
139
-
140
-
141
-
142
-
143
-
144
-
145
-
146
-
147
-
148
-
149
-
150
-
151
-
152
-
153
-
154
-
155
-
156
-
157
-
158
-
159
-
160
-
161
-
162
-
163
-
164
-
165
-
166
-
167
-
168
-
169
-
170
-
171
-
172
-
173
-
174
-
175
-
176
-
177
-
178
-
179
-
180
-
181
-
182
-
183
-
184
-
185
-
186
-
 187
187 -
 188
188 -
 189
189 -
 190
190 -
 191
191 -
 192
192 -
 193
193 -
 194
194 -
 195
195 -
 196
196 -
 197
197 -
198
-
199
-
200
-
201
-
202
-
203
-
204
-
205
-
206
-
207
 |
 |