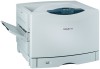
Lexmark C912 User's Reference - Page 33
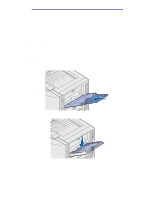
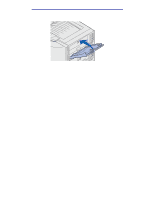
Printing with custom size specialty media, Step 1: Using the multipurpose feeder
 |
View all Lexmark C912 manuals
Add to My Manuals
Save this manual to your list of manuals |
Page 33 highlights
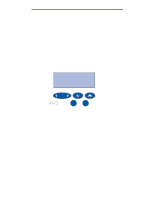
Printing Printing with custom size specialty media Your printer supports a wide range of paper sizes and types, some of which exceed the dimensions of your printer's standard trays. As a result, when printing with media of a special size you must first make the appropriate adjustments to both your printer and your printer's driver. Step 1: Using the multipurpose feeder Because some sizes of media do not fit in your printer's normal paper trays, you must use the multipurpose feeder to load the media into your printer. For detailed instructions on loading custom size media, see Loading the multipurpose feeder. Step 2: Configuring the operator panel for custom size media The Universal paper size is the standard setting for custom size media on your printer, using 12x18 in. as the default dimensions. If you have changed the default settings on your printer or you want to use media of a different size, you must set the Universal paper size to the dimensions that you want to use and make sure that the appropriate unit of measure is selected. To set the Universal paper size: 1 Press Return until you see the main menu. 2 Press Menu until you see Paper Menu, and then press Select. 3 Press Menu until you see Universal Setup, and then press Select. 4 Press Menu until you see Portrait Width, and then press Select. • For the default settings, if the value displayed is 12 in., press Return, or press Menu to increase or decrease the value to the desired size. Press Select. 5 Press Menu until you see Portrait Height, and then press Select. • For the default settings, if the value displayed is 18 in., press Return, or press Menu to increase or decrease the value to the desired size. Press Select. To set the Unit of Measure: 1 From Universal Setup, press Menu until you see Units of Measure, then press Select. 2 Press Menu until the appropriate unit of measure is displayed. If the unit of measure you want is already saved with an asterisk beside it, press Return to return to Universal Setup. Otherwise, press Select to change the unit of measure. Printing with custom size specialty media 28
-
 1
1 -
2
-
3
-
4
-
5
-
6
-
7
-
8
-
9
-
10
-
11
-
12
-
13
-
14
-
15
-
16
-
17
-
18
-
19
-
20
-
21
-
22
-
23
-
24
-
25
-
26
-
27
-
 28
28 -
 29
29 -
 30
30 -
 31
31 -
 32
32 -
 33
33 -
 34
34 -
 35
35 -
 36
36 -
 37
37 -
 38
38 -
39
-
40
-
41
-
42
-
43
-
44
-
45
-
46
-
47
-
48
-
49
-
50
-
51
-
52
-
53
-
54
-
55
-
56
-
57
-
58
-
59
-
60
-
61
-
62
-
63
-
64
-
65
-
66
-
67
-
68
-
69
-
70
-
71
-
72
-
73
-
74
-
75
-
76
-
77
-
78
-
79
-
80
-
81
-
82
-
83
-
84
-
85
-
86
-
87
-
88
-
89
-
90
-
91
-
92
-
93
-
94
-
95
-
96
-
97
-
98
-
99
-
100
-
101
-
102
-
103
-
104
-
105
-
106
-
107
-
108
-
109
-
110
-
111
-
112
-
113
-
114
-
115
-
116
-
117
-
118
-
119
-
120
-
121
-
122
-
123
-
124
-
125
-
126
-
127
-
128
-
129
-
130
-
131
-
132
-
133
-
134
-
135
-
136
-
137
-
138
-
139
-
140
-
141
-
142
-
143
-
144
-
145
-
146
-
147
-
148
-
149
-
150
-
151
-
152
-
153
-
154
-
155
-
156
-
157
-
158
-
159
-
160
-
161
-
162
-
163
-
164
-
165
-
166
-
167
-
168
-
169
-
170
-
171
-
172
-
173
-
174
-
175
-
176
-
177
-
178
-
179
-
180
-
181
-
182
-
183
-
184
-
185
-
186
-
187
-
188
-
189
-
190
-
191
-
192
-
193
-
194
-
195
-
196
-
197
-
198
-
199
-
200
-
201
-
202
-
203
-
204
-
205
-
206
-
207
 |
 |