Logitech G510s Gaming Software Guide - Page 98
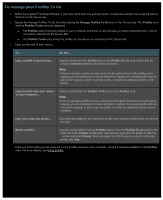
To change your pointer settings, Separate DPI X and Y axis - keys aren t sensitive
 |
View all Logitech G510s manuals
Add to My Manuals
Save this manual to your list of manuals |
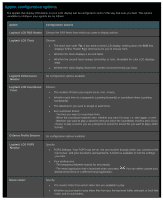
Page 98 highlights
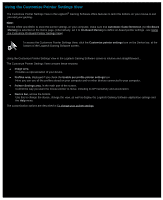
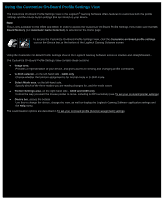
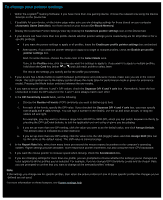
To change your pointer settings 1. Within the Logitech® Gaming Software, if you have more than one gaming device, choose the relevant one using the Device Selector on the Device bar. 2. If available for your device, on the Home page make sure you are changing settings for those stored on your computer (Automatic Game Detection), not those stored on your mouse (On-Board Memory). 3. Display the Customize Pointer Settings View (by clicking the Customize pointer settings icon on the Device bar). 4. If your device can have more than one profile, decide whether pointer settings you're customizing are for all profiles or for a specific profile(s): If you want the pointer settings to apply to all profiles, leave the Enable per profile pointer settings box unchecked. Alternatively, if you want the pointer settings to apply to a single or multiple profiles, check the Enable per profile pointer settings box. Next, for some devices, choose the mode color in the Select Mode area. Then, in the Profiles area, click the one you want the settings to apply to. If you want it to apply to multiple profiles, hold down the Cmd key (either or ) and click each profile to select them. The rest of the settings you specify are for the profile you selected. 5. If your device has a Mode button to switch between performance and endurance modes, make sure you are in the correct mode - the LED symbol next to the battery symbol shows the mode (blue for performance mode or green for endurance mode). Pressing the Mode button switches between the two modes. 6. If you want to set up different X and Y DPI values, check the Separate DPI X and Y axis box. Alternatively, leave the box unchecked to make the DPI values for the X and Y axes always match each other. 7. In the DPI Sensitivity Levels fields, set the following: i. Choose the Number of levels of DPI sensitivity you want to define (up to five). ii. For each of the levels, specify the DPI value. If you checked the Separate DPI X and Y axis box, you must specify both X-axis and Y-axis settings. You can type a number in the field(s), use the up and down arrows, or drag the sliders left and right. For example, you may want to choose a range from 400 DPI to 3600 DPI, which you can switch between on-the-fly by pressing the DPI Up/Down buttons, to suit the application you are using or game you are playing. iii. If you set up more than one DPI setting, click the value you want to be the default value, and click Assign Default. The default value is indicated by a blue diamond. iv. If you set up more than one DPI setting, click the value to be the shift (toggle) value, and click Assign Shift (this can be the same as the default value). The shift value is colored orange. 8. In the Report Rate field, select how many times per second the mouse reports its position to the computer's operating system. Higher settings provide smoother, more responsive pointer movement, but also consume more CPU bandwidth. 9. If you want the mouse pointer to increase speed when moving, check the Acceleration box. 10. If you are changing settings for more than one profile, you are prompted to choose whether the settings you've changed are to be applied to all the profiles you've selected. For example, if you've changed DPI Sensitivity Levels and the Report Rate, you are prompted to confirm that you want to change all the selected profiles' settings. Note: If the settings you change are for specific profiles, then when the active profile isn't one of those specific profiles the changes you've defined are not used. For more information on these features, see Pointer settings help.
-
 1
1 -
2
-
3
-
4
-
5
-
6
-
7
-
8
-
9
-
10
-
11
-
12
-
13
-
14
-
15
-
16
-
17
-
18
-
19
-
20
-
21
-
22
-
23
-
24
-
25
-
26
-
27
-
28
-
29
-
30
-
31
-
32
-
33
-
34
-
35
-
36
-
37
-
38
-
39
-
40
-
41
-
42
-
43
-
44
-
45
-
46
-
47
-
48
-
49
-
50
-
51
-
52
-
53
-
54
-
55
-
56
-
57
-
58
-
59
-
60
-
61
-
62
-
63
-
64
-
65
-
66
-
67
-
68
-
69
-
70
-
71
-
72
-
73
-
74
-
75
-
76
-
77
-
78
-
79
-
80
-
81
-
82
-
83
-
84
-
85
-
86
-
87
-
88
-
89
-
90
-
91
-
92
-
 93
93 -
 94
94 -
 95
95 -
 96
96 -
 97
97 -
 98
98 -
 99
99 -
 100
100 -
 101
101 -
 102
102 -
 103
103 -
104
-
105
-
106
-
107
-
108
-
109
 |
 |
