Netgear AC2200 User Manual - Page 114
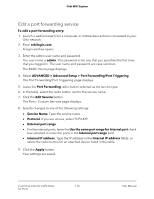
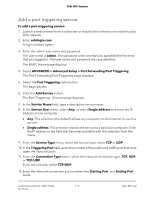
Edit a port forwarding service, ADVANCED > Advanced Setup > Port Forwarding/Port Triggering
 |
View all Netgear AC2200 manuals
Add to My Manuals
Save this manual to your list of manuals |
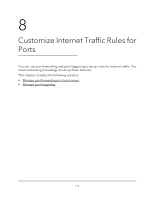
Page 114 highlights
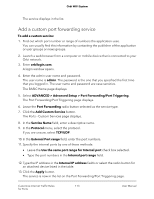
Orbi WiFi System Edit a port forwarding service To edit a port forwarding entry: 1. Launch a web browser from a computer or mobile device that is connected to your Orbi network. 2. Enter orbilogin.com. A login window opens. 3. Enter the admin user name and password. The user name is admin. The password is the one that you specified the first time that you logged in. The user name and password are case-sensitive. The BASIC Home page displays. 4. Select ADVANCED > Advanced Setup > Port Forwarding/Port Triggering. The Port Forwarding/Port Triggering page displays. 5. Leave the Port Forwarding radio button selected as the service type. 6. In the table, select the radio button next to the service name. 7. Click the Edit Service button. The Ports - Custom Services page displays. 8. Specify changes to any of the following settings: • Service Name. Type the service name. • Protocol. If you are unsure, select TCP/UDP. • External port range. • For the internal ports, leave the Use the same port range for Internal port check box selected or enter the ports in the Internal port range field. • Internal IP address. Type the IP address in the Internal IP address fields, or select the radio button for an attached device listed in the table. 9. Click the Apply button. Your settings are saved. Customize Internet Traffic Rules 114 for Ports User Manual
-
 1
1 -
2
-
3
-
4
-
5
-
6
-
7
-
8
-
9
-
10
-
11
-
12
-
13
-
14
-
15
-
16
-
17
-
18
-
19
-
20
-
21
-
22
-
23
-
24
-
25
-
26
-
27
-
28
-
29
-
30
-
31
-
32
-
33
-
34
-
35
-
36
-
37
-
38
-
39
-
40
-
41
-
42
-
43
-
44
-
45
-
46
-
47
-
48
-
49
-
50
-
51
-
52
-
53
-
54
-
55
-
56
-
57
-
58
-
59
-
60
-
61
-
62
-
63
-
64
-
65
-
66
-
67
-
68
-
69
-
70
-
71
-
72
-
73
-
74
-
75
-
76
-
77
-
78
-
79
-
80
-
81
-
82
-
83
-
84
-
85
-
86
-
87
-
88
-
89
-
90
-
91
-
92
-
93
-
94
-
95
-
96
-
97
-
98
-
99
-
100
-
101
-
102
-
103
-
104
-
105
-
106
-
107
-
108
-
 109
109 -
 110
110 -
 111
111 -
 112
112 -
 113
113 -
 114
114 -
 115
115 -
 116
116 -
 117
117 -
 118
118 -
 119
119 -
120
-
121
-
122
-
123
-
124
-
125
-
126
-
127
-
128
-
129
-
130
-
131
-
132
-
133
-
134
-
135
-
136
-
137
-
138
-
139
-
140
-
141
-
142
-
143
-
144
-
145
-
146
-
147
-
148
-
149
-
150
-
151
-
152
-
153
-
154
-
155
-
156
-
157
-
158
-
159
-
160
-
161
-
162
-
163
-
164
 |
 |
