Nikon COOLPIX 5700 User Manual - Page 34
Basic Picture Taking, Step 1-Ready the Camera
 |
UPC - 018208255047
View all Nikon COOLPIX 5700 manuals
Add to My Manuals
Save this manual to your list of manuals |
Page 34 highlights
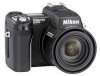
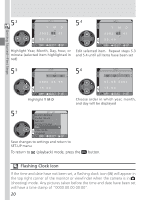
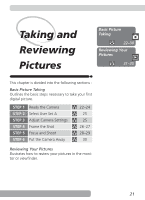
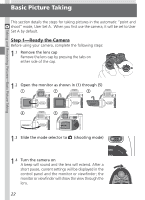
Taking and Reviewing Pictures-Basic Picture Taking Basic Picture Taking This section details the steps for taking pictures in the automatic "point and shoot" mode, User Set A. When you first use the camera, it will be set to User Set A by default. Step 1-Ready the Camera Before using your camera, complete the following steps: 1.1 Remove the lens cap Remove the lens cap by pressing the tabs on either side of the cap. 1.2 Open the monitor as shown in (1) through (5) 1.3 Slide the mode selector to (shooting mode) 1.4 Turn the camera on A beep will sound and the lens will extend. After a short pause, current settings will be displayed in the control panel and the monitor or viewfinder; the monitor or viewfinder will show the view through the lens. 22
-
 1
1 -
2
-
3
-
4
-
5
-
6
-
7
-
8
-
9
-
10
-
11
-
12
-
13
-
14
-
15
-
16
-
17
-
18
-
19
-
20
-
21
-
22
-
23
-
24
-
25
-
26
-
27
-
28
-
 29
29 -
 30
30 -
 31
31 -
 32
32 -
 33
33 -
 34
34 -
 35
35 -
 36
36 -
 37
37 -
 38
38 -
 39
39 -
40
-
41
-
42
-
43
-
44
-
45
-
46
-
47
-
48
-
49
-
50
-
51
-
52
-
53
-
54
-
55
-
56
-
57
-
58
-
59
-
60
-
61
-
62
-
63
-
64
-
65
-
66
-
67
-
68
-
69
-
70
-
71
-
72
-
73
-
74
-
75
-
76
-
77
-
78
-
79
-
80
-
81
-
82
-
83
-
84
-
85
-
86
-
87
-
88
-
89
-
90
-
91
-
92
-
93
-
94
-
95
-
96
-
97
-
98
-
99
-
100
-
101
-
102
-
103
-
104
-
105
-
106
-
107
-
108
-
109
-
110
-
111
-
112
-
113
-
114
-
115
-
116
-
117
-
118
-
119
-
120
-
121
-
122
-
123
-
124
-
125
-
126
-
127
-
128
-
129
-
130
-
131
-
132
-
133
-
134
-
135
-
136
-
137
-
138
-
139
-
140
-
141
-
142
-
143
-
144
-
145
-
146
-
147
-
148
-
149
-
150
-
151
-
152
-
153
-
154
-
155
-
156
-
157
-
158
-
159
-
160
-
161
-
162
-
163
-
164
-
165
-
166
-
167
-
168
-
169
-
170
-
171
-
172
-
173
-
174
-
175
-
176
-
177
-
178
-
179
-
180
-
181
-
182
-
183
-
184
-
185
-
186
-
187
-
188
-
189
-
190
-
191
-
192
 |
 |
